After a small break (wife having a child) its time to make some moves with little blue. I have been accumulating parts in the mean time, so we have ready to go, new front swivel kits, all new seals and gaskets, new wheel bearings, and axle bearings. As per the rear axle (Part2) I will be doing new brakes also, likely the only original brake parts with be the backing plates and adjusters, so new cylinders, shoes, return springs, drums etc.
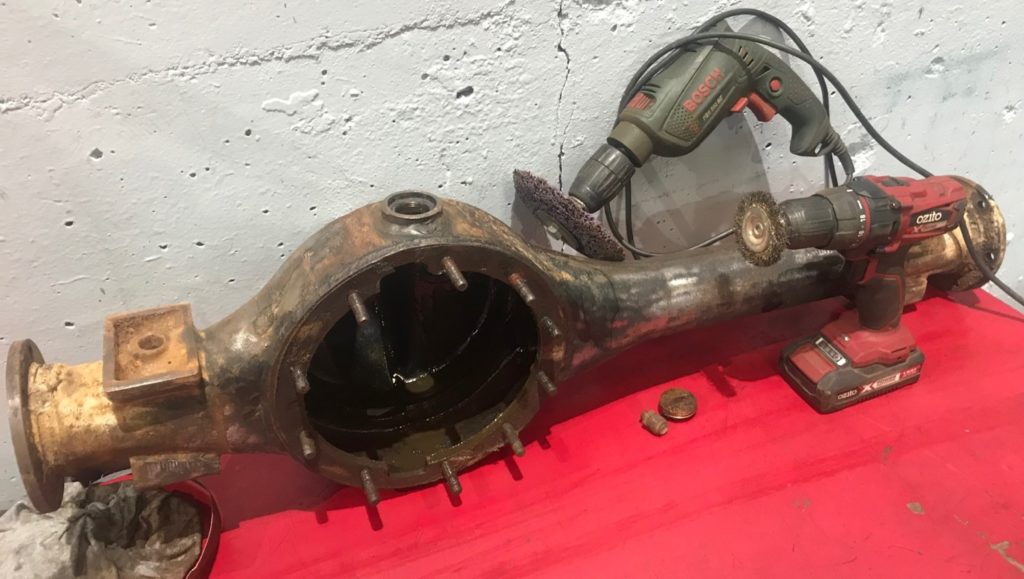
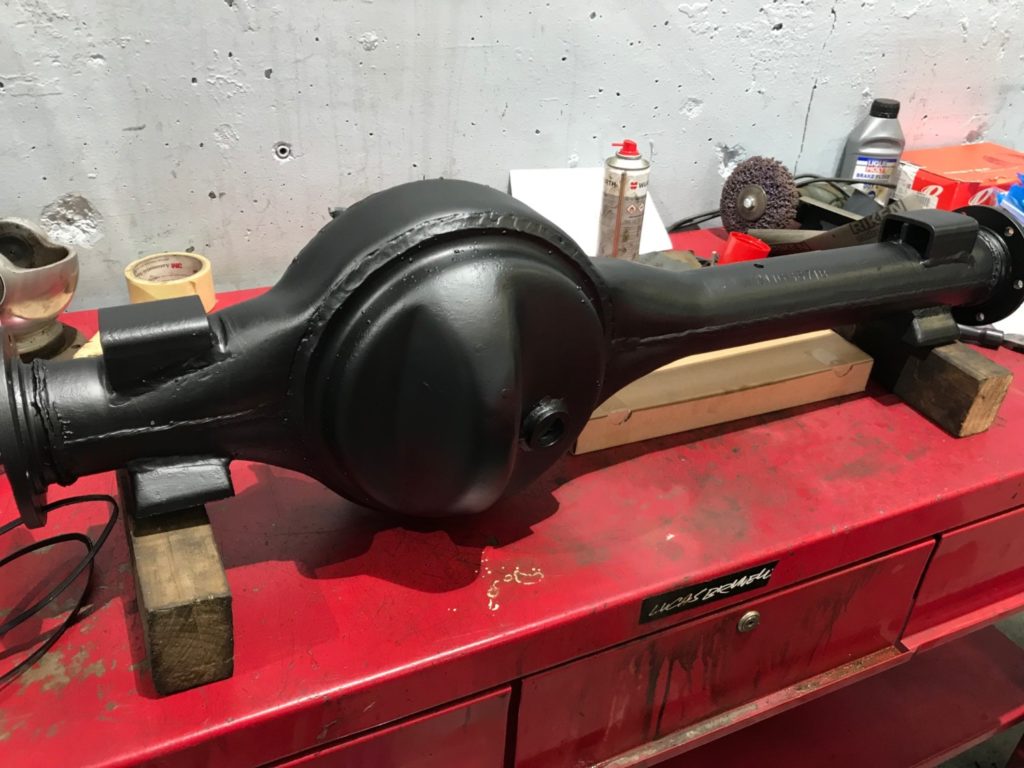
4/5/19 was day one of getting back into it, the axle was front axle assembly was already largely stripped, so now it clean up and time for some fresh paint. Ideally a lot of these components could have been sand blasted (or similar) etc which we don’t have on site, and this is an exercise of resurrecting this old truck on a limited budget. That said it was time to get dirty with a wire brush, wire wheels in a drill…. The end result I am very happy with.
Want to see Part 1 & 2… CLICK HERE
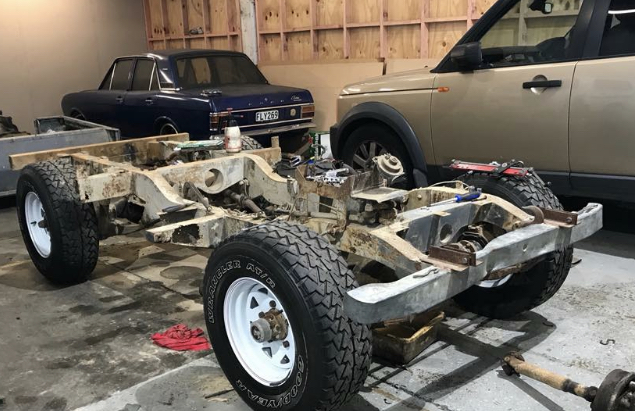
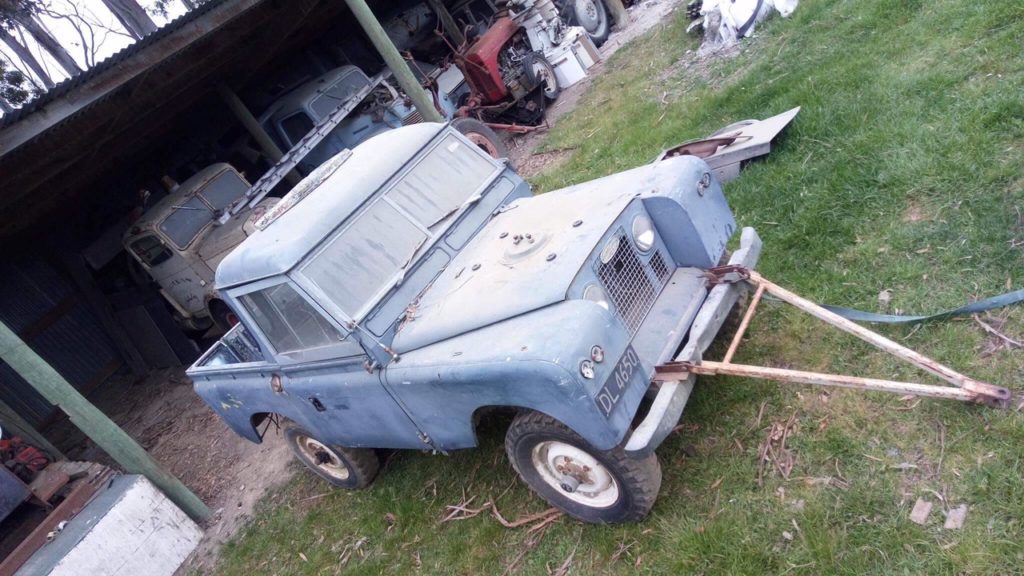
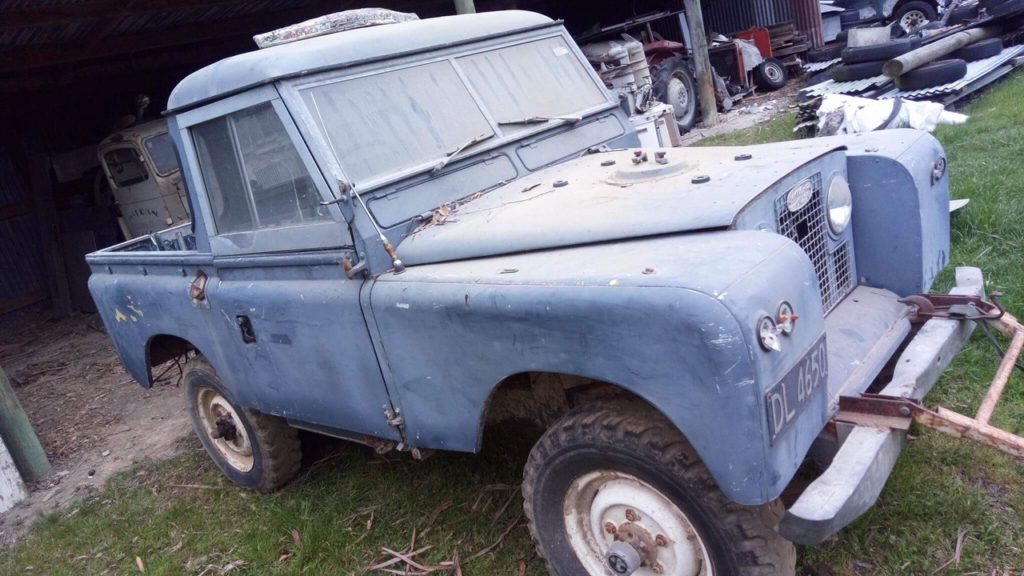
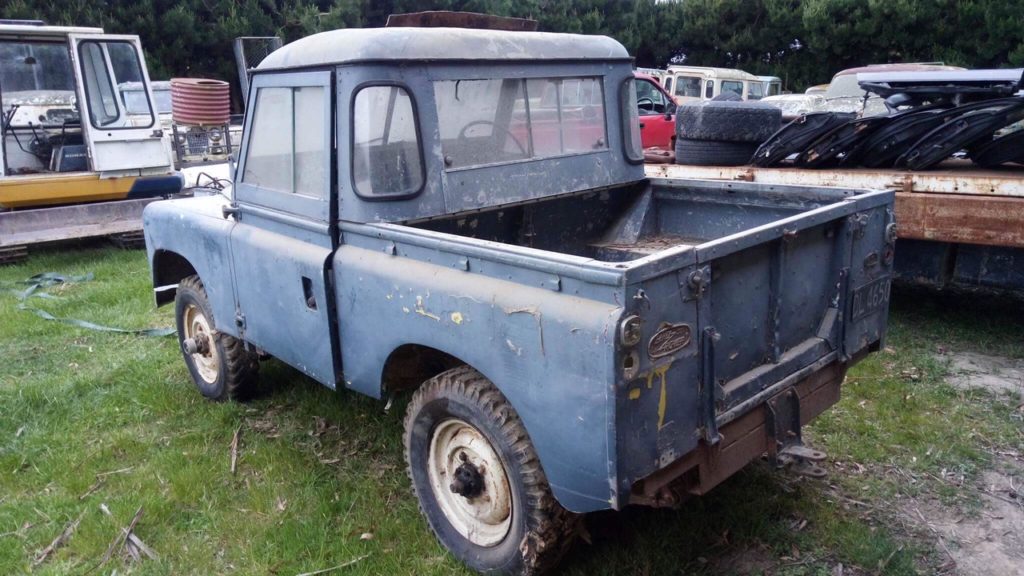
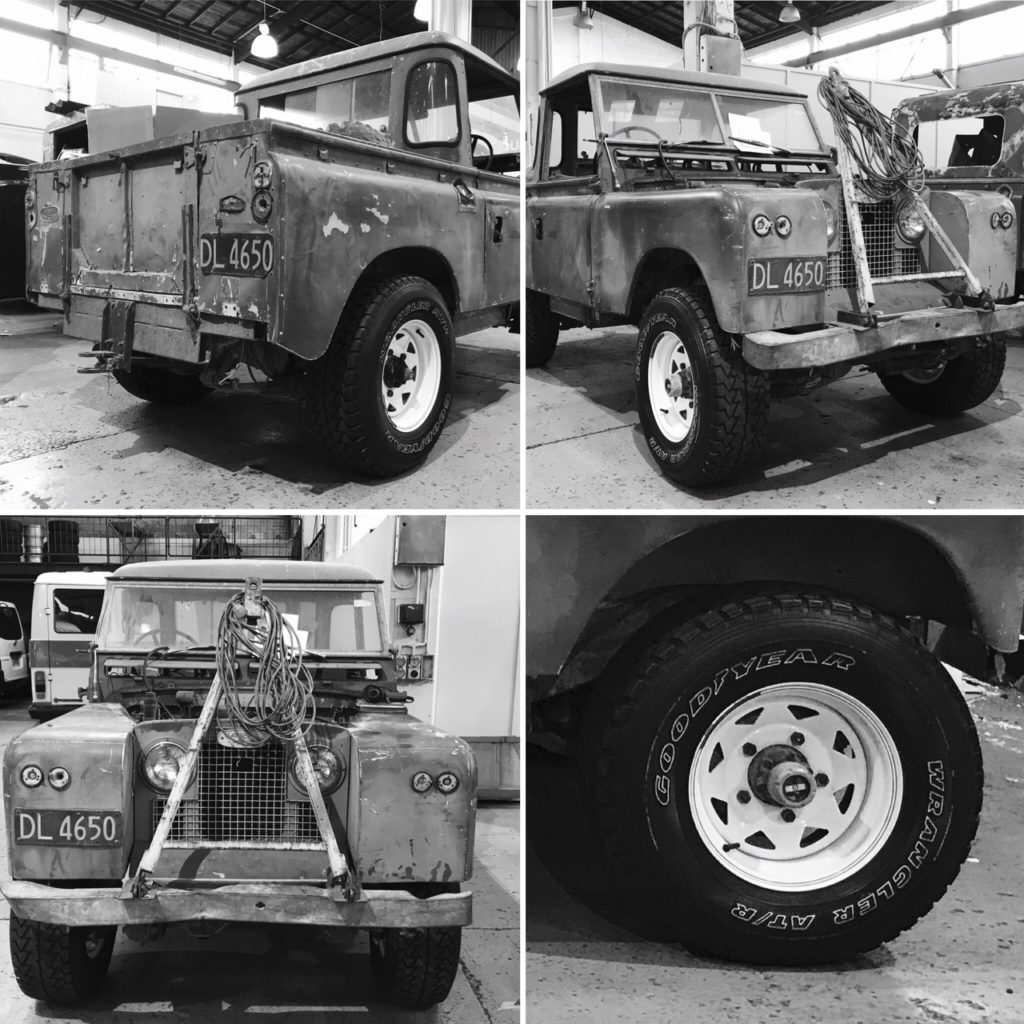
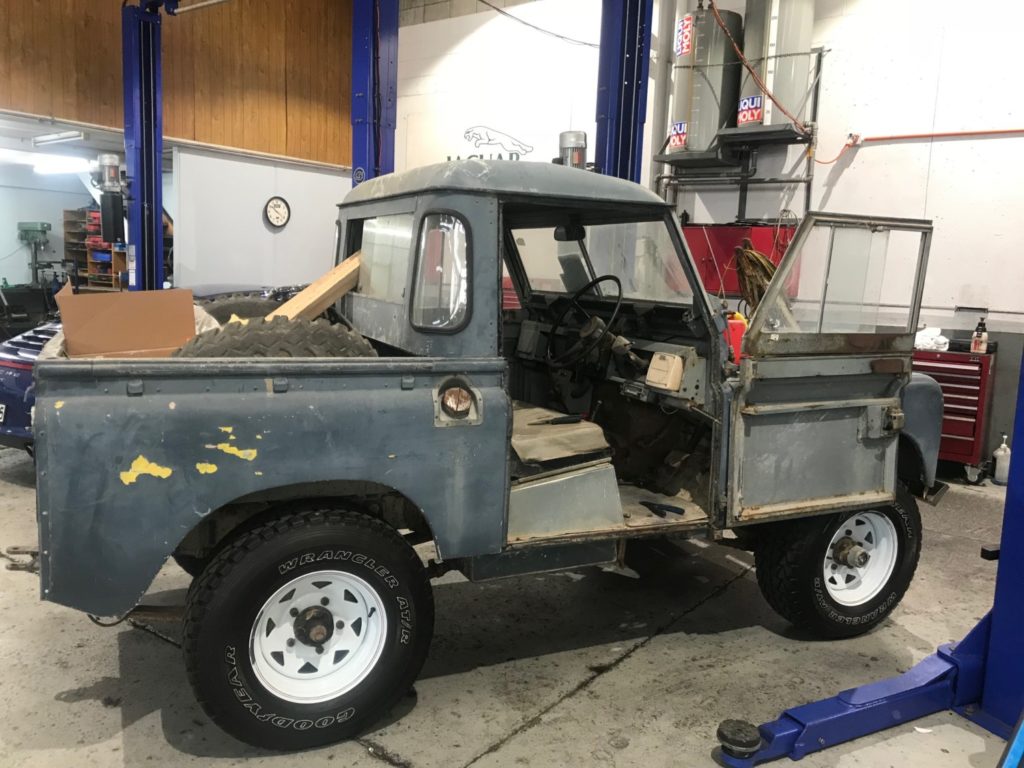
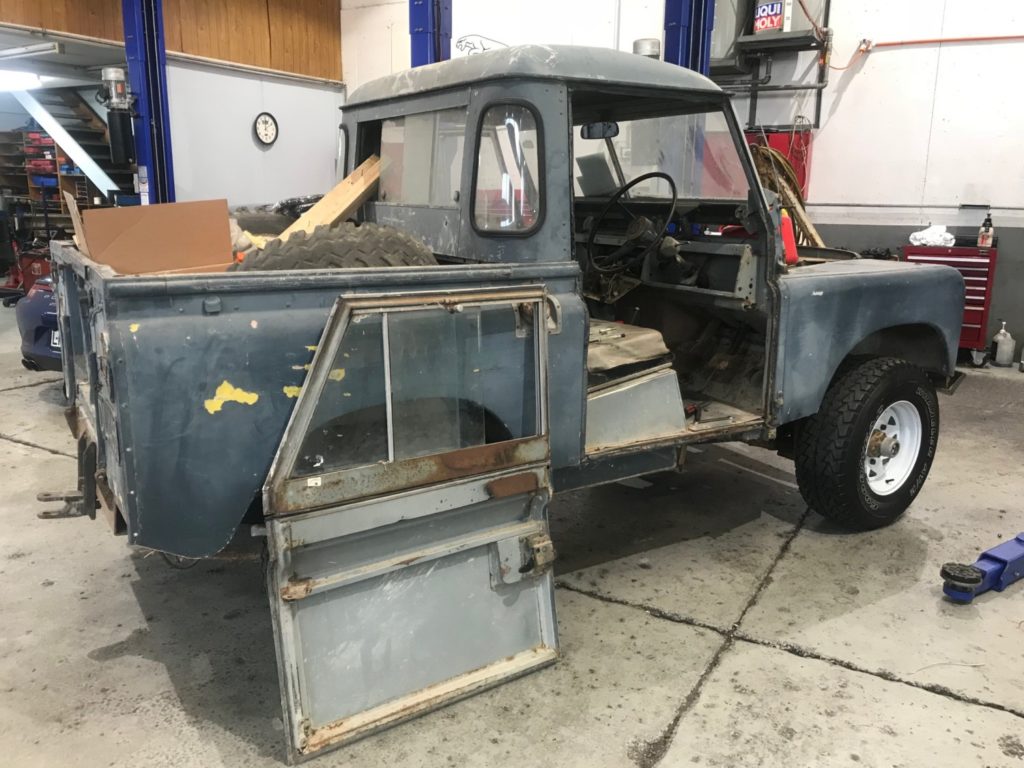
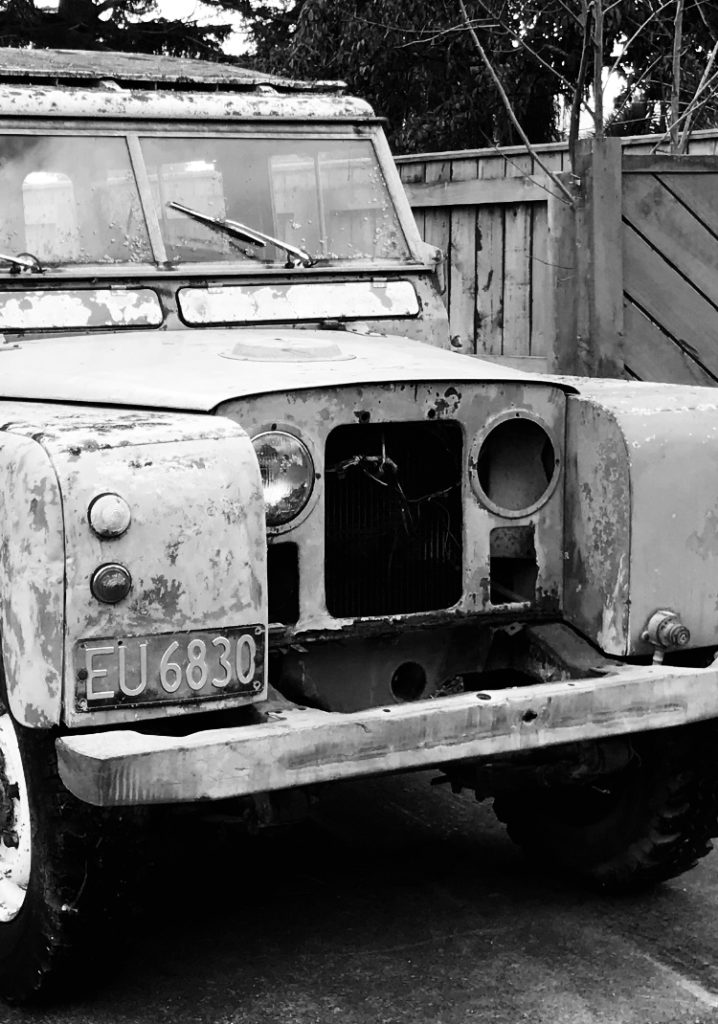
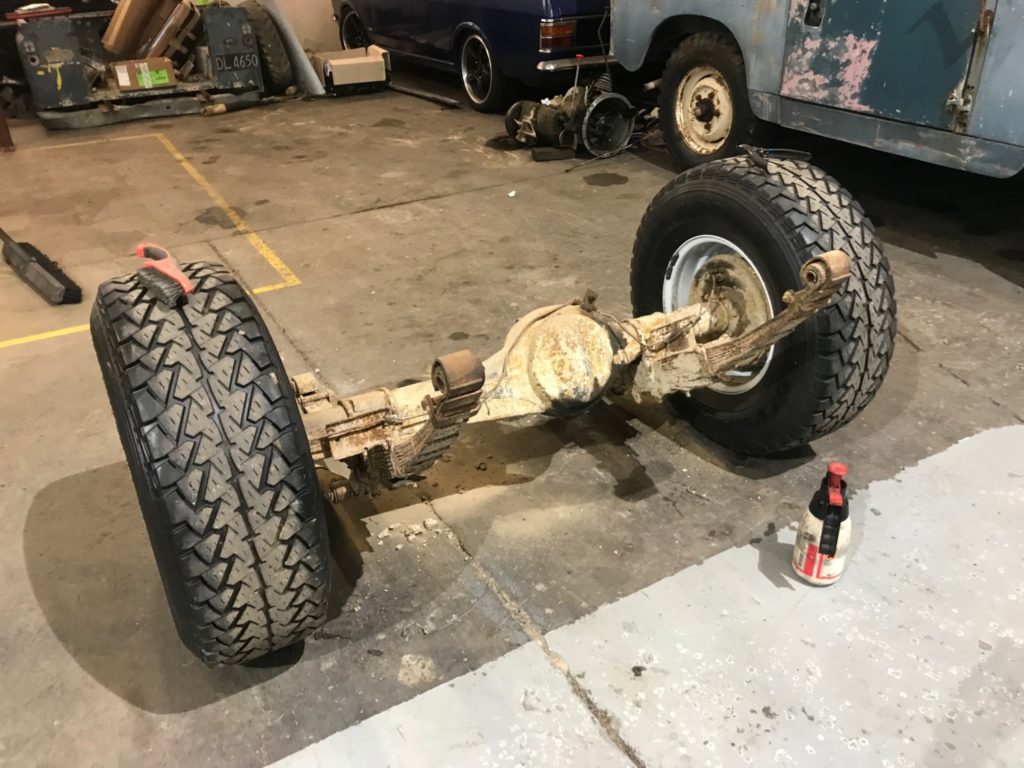
First pic is what we started with, total mess, collapsed wheel bearings, play and slop in everything, 27 years of farm use without a wash…)
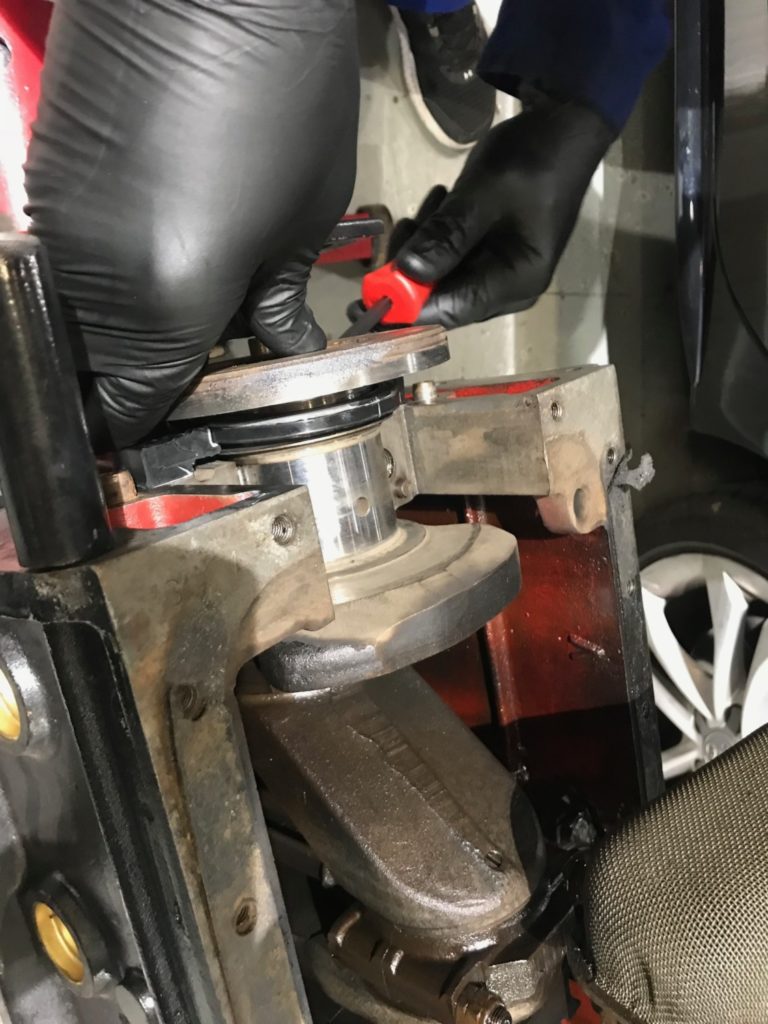
Winters on… June 1 and I’m in the back of the shop with little blue. Some good progress today. I was donated some axles from my good friend Paul, who I blame for introducing me to landies.. I’ve removed and replaced the bearing and seal collars. Also assembled the RH front swivel assembly to the diff housing, set up preloads etc. Diff is on hold, needing shims to set up the pinion bearing pre-loads. (

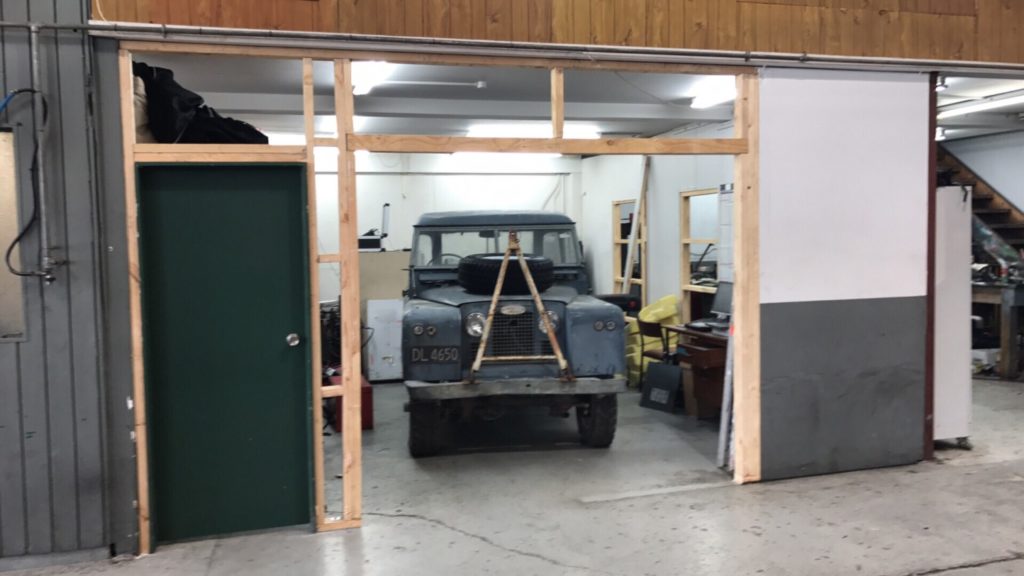
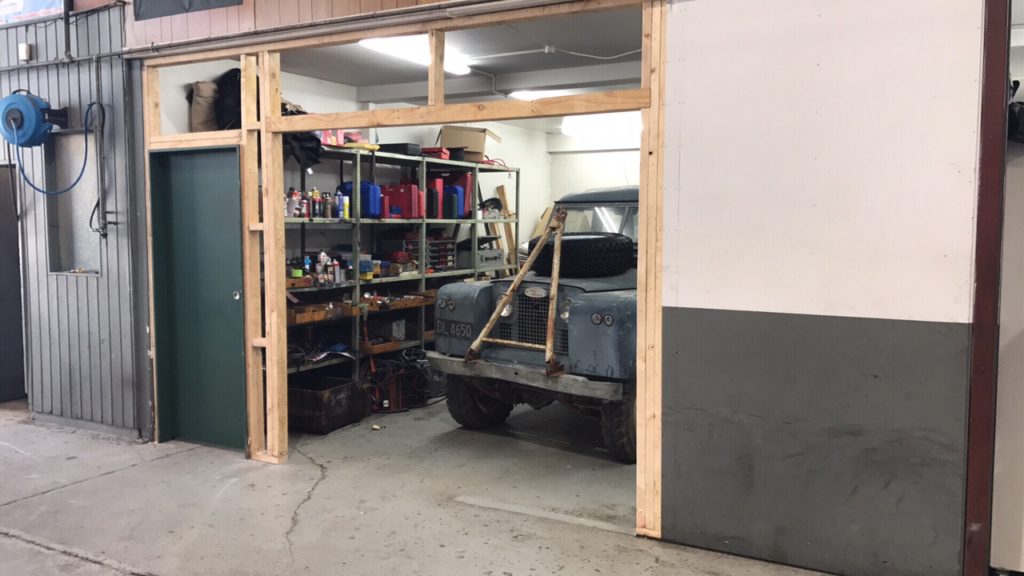
So I thought I might do a fresh blog on our little Blue ute. We started out with a blog on the green one, but the search for parts unearthed this little beauty. We’ve had both utes in the shop for a while now and its been great hearing everyone’s stories that they have. Apart from one Saturday spent firing it up nothings been done, with the re-brand and building spruce up being the focus..
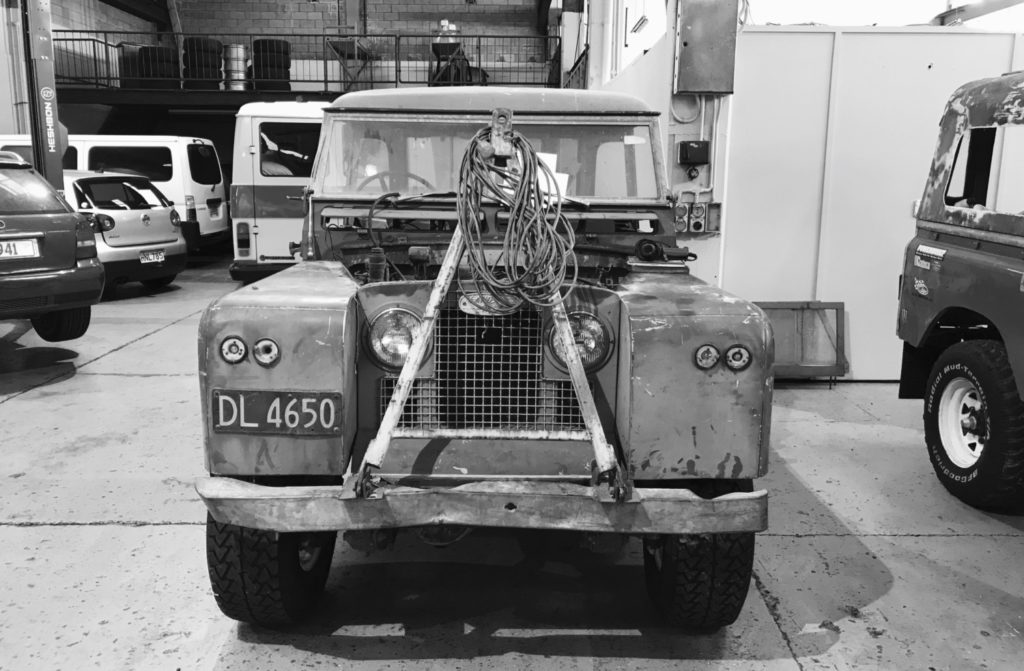
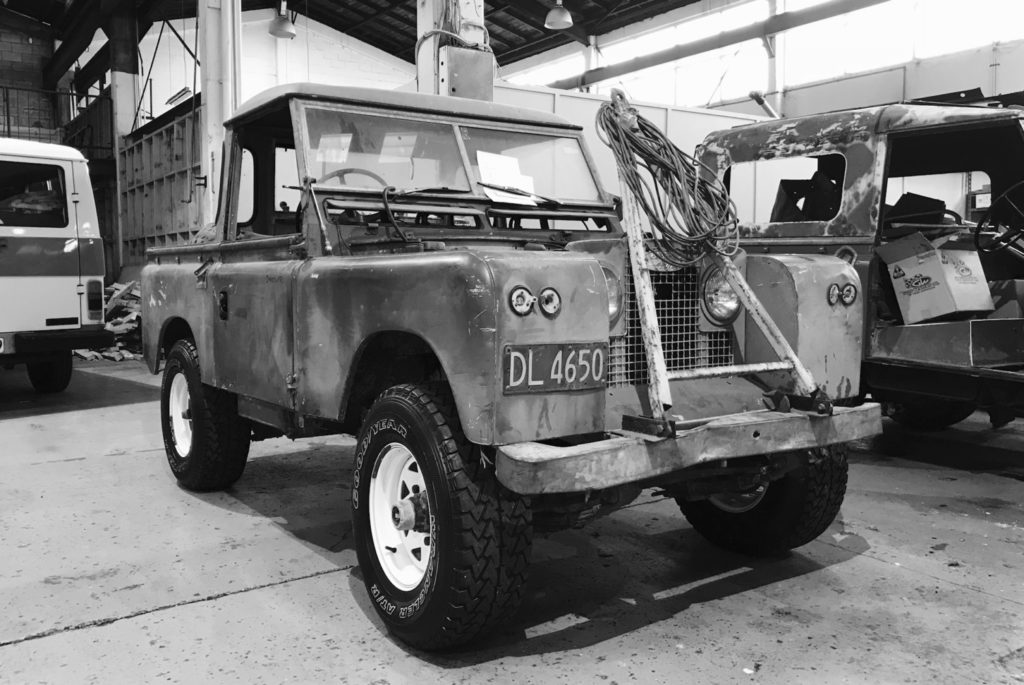
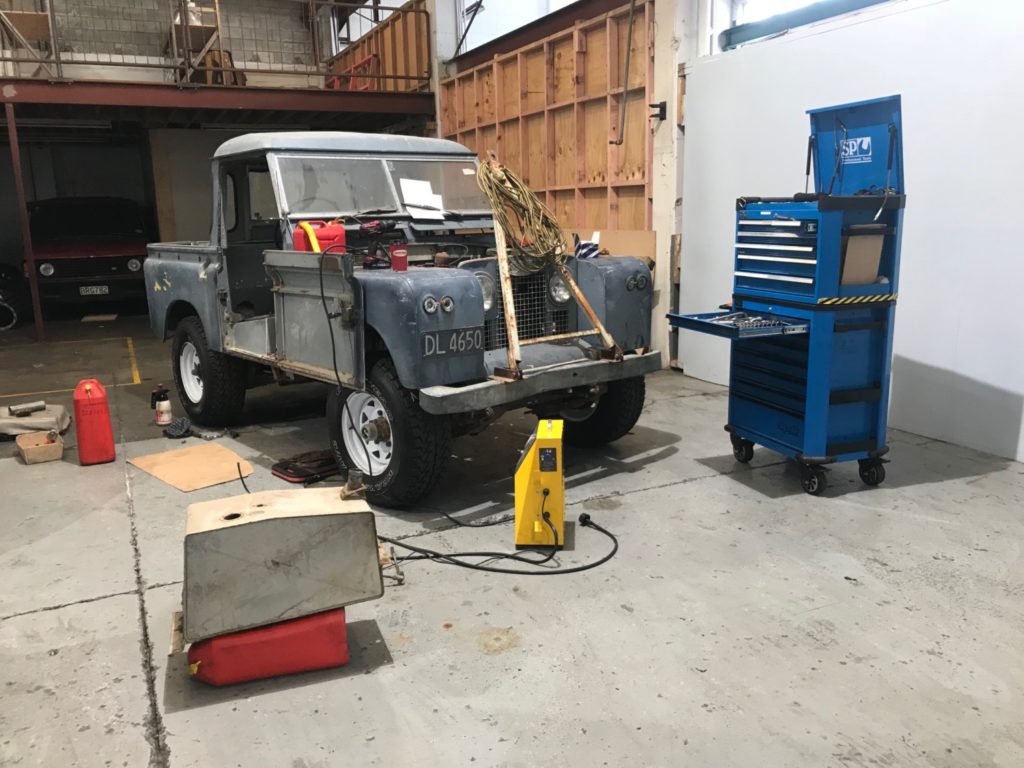
This little ute hasn’t had a WOF for over 26 years, and we found it in a barn down south where I believe it hadn’t moved for 8 years. Getting it going didn’t take too much effort, we took of the rocker cover and turned the engine over by hand to make sure all was well and valves etc weren’t seized. All looked surprisingly good so there was nothing else to do but buy some petrol and give it a go. It took some persuasion but eventually fired up and ran under its own steam. Down side was the list of ‘to do’s’ was also started. Everything is leaking oil, the carburetor throttle shaft has completely worn through the carb housing, and it was fairly obvious not a lot of the electrics are working.
Whats the end game?, (umm, to keep me busy on a Saturday)
As much as I would like a mint old landy to show off and promote the business thats not going to happen with this little truck for a couple of reasons. Mainly being it just has so much cool factor as it is, everyone who’s made comment on its looks have said it has to stay as is, it has serious patina going on. Secondly its just a little to far gone in the paint and panel department for our liking, its repairable for sure but if we were to restore one I think it would be wise to start with something a little better/straighter/cleaner…..
So the plan is to keep the exterior look as much as we can as it is, within the limits of WOF requirements and safety. We need to sort out the lights and light fittings. Doors need to be aligned and function, clean the glass and we are set. We have gone for some bigger white spoke steel wheels because thats what I like. Other that that I think thats the outside finished.
But then the work begins, wiring, brakes (it has none at all!), clutch, suspension etc. Everything underneath requires attention. Not sure where to start so figured the first thing that would be nice would be to have the engine starting and running easy. I just know the fuel tank and system will be nasty. We now have distribution for parts so I started looking through the listings and ended up with a bunch of random bits, from engine mounts and brake hoses, to a fuel pump and electronic ignition kit. Amazing how much $400 will buy in bits and pieces for these old landy’s!
Work required to be updated as we go. Photos to come also, watch this space….
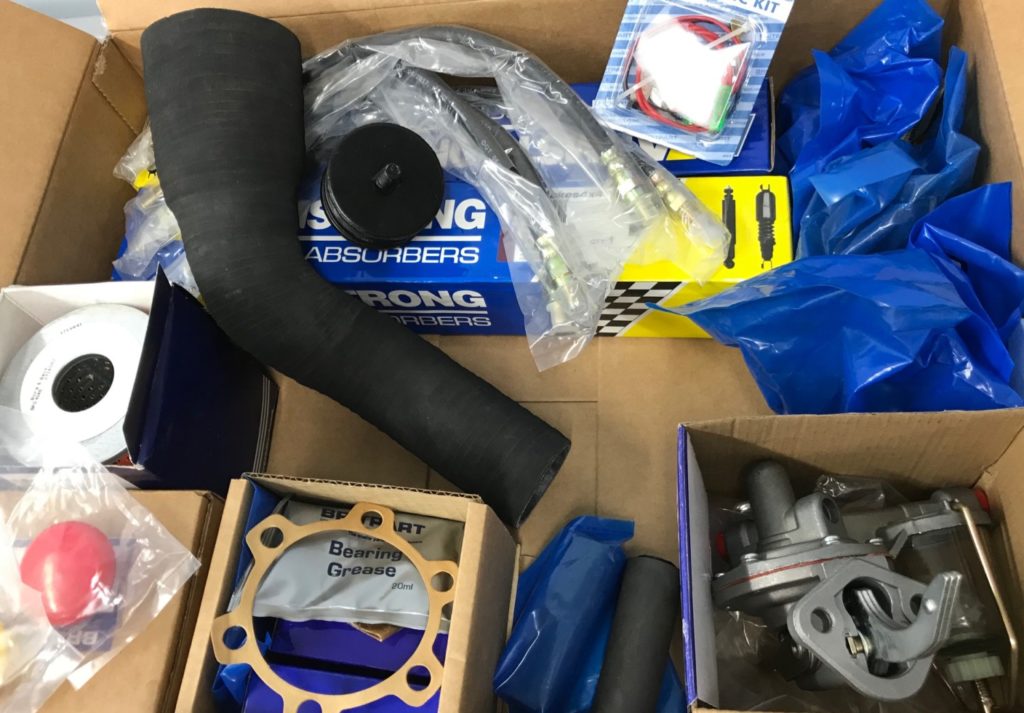
31/5/18 Parts arrival. Some parts turned up to get me started, not shown are some engine gaskets. Items include, fuel pump, electronic ignition, engine mounts, brake hoses, front shock etc.
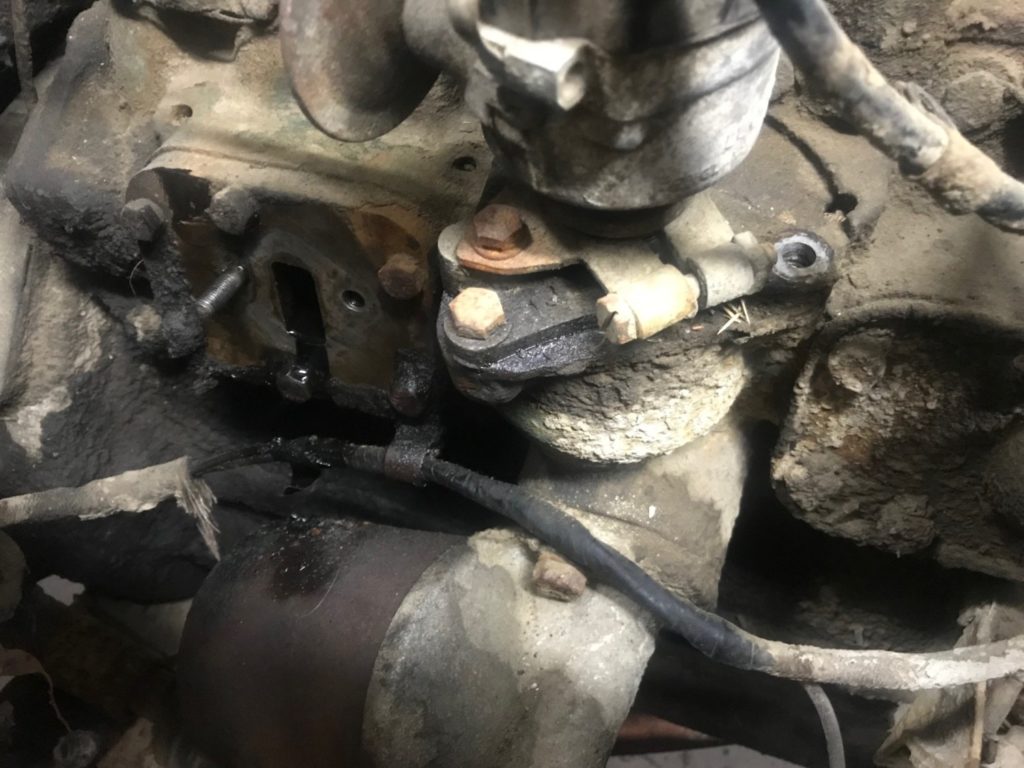
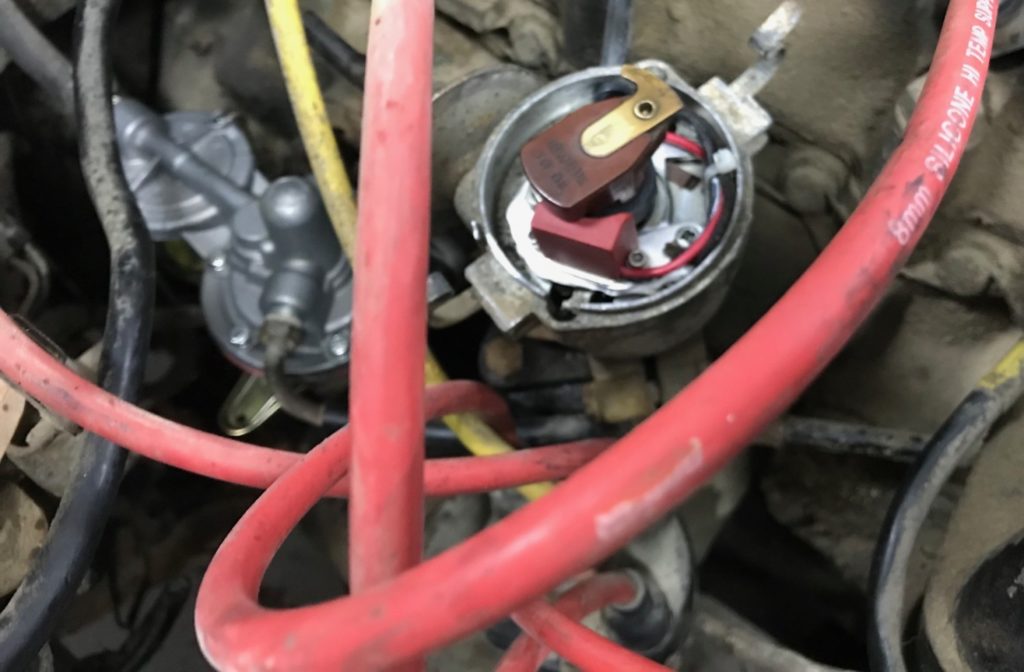
2/6/18. So today we made a start at fitting some of these goodies. Started with the fuel pump and moved onto the electronic ignition. Both very easy and satisfying jobs. I made a separate loom for the distributor to coil, just to try and keep things tidy, and reliable. The electronic ignition was very straight forward with a handy set of instructions and an even easier to follow you tube clip. I did a before and after basic spark test with a tool I have and there is a very noticeable difference. Fuel pump done with the added bonus of sorting out one of the very heavy oil leaks from the engine…
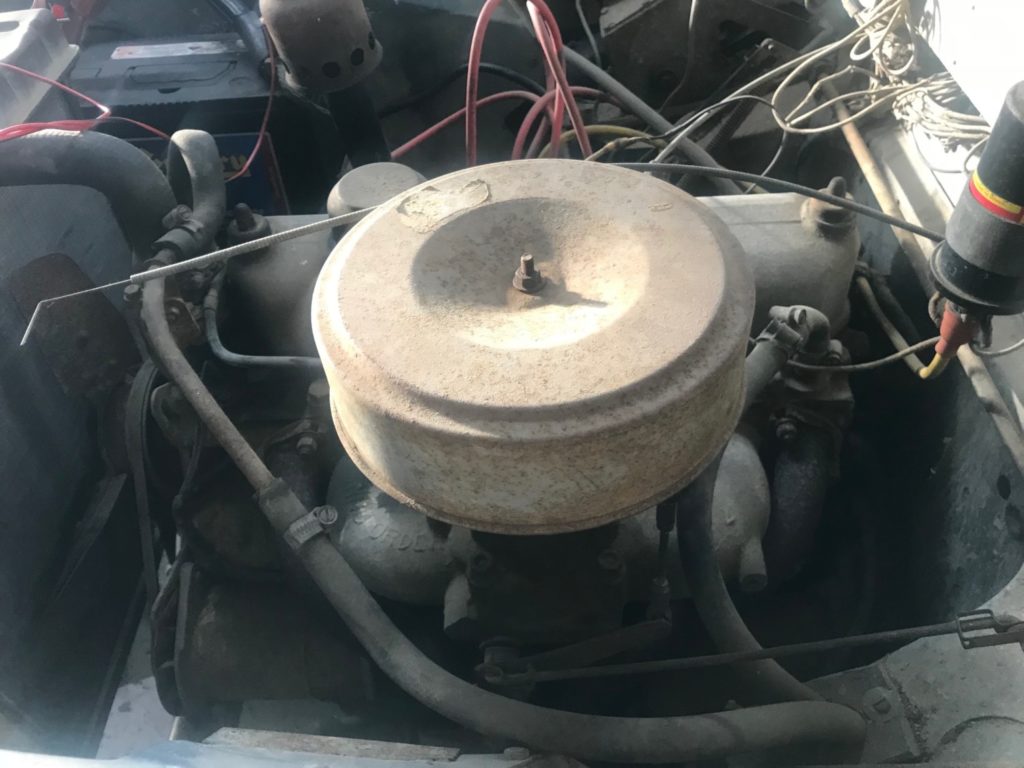
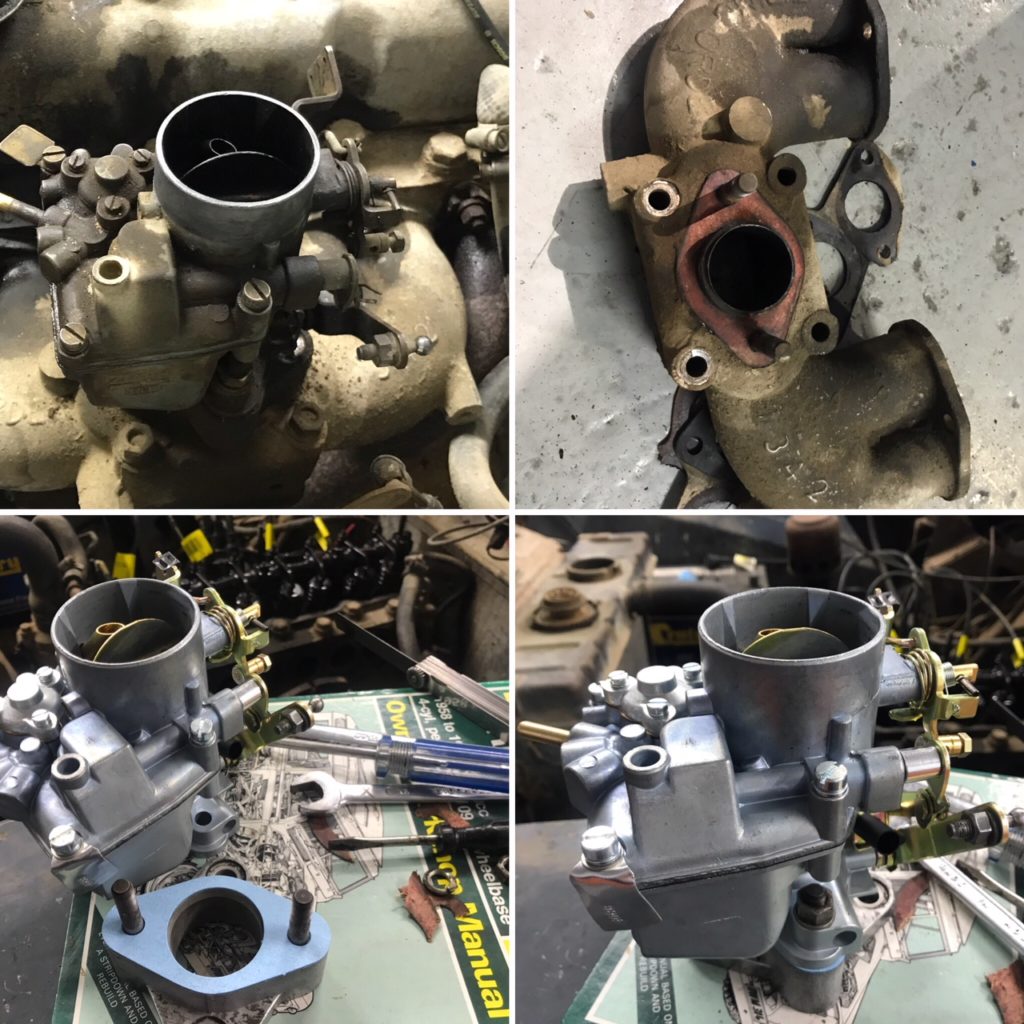
Above and below are a bit of a before shot. As you can see everything is a mess. I’m going to overlook a lot of this and focus on the mechanical, IE get it running and see what other issues present themselves. We already know we have some heavy oil leaks. Hopefully the rear main seal isn’t or we will be pulling the engine. The Carburetor is pouring fuel out the throttle spindle, so I have a replacement carby on order. For peace of mind we will do the water pump and thermostat, all the hoses, temp sensor, oil sensor etc.

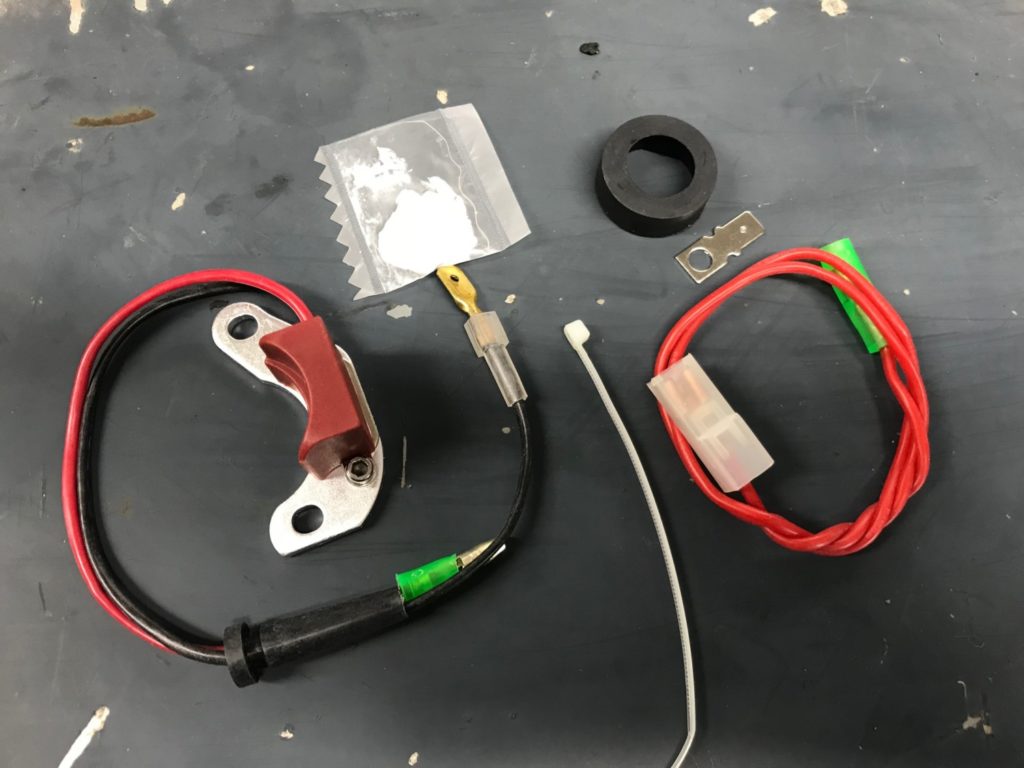
Electronic ignition kit, very cheap and very easy to install, I think a great upgrade for an landy, no points wear means no ongoing timing adjustments etc etc….
See what our new ignition can produce here.
In and done… Still want a new rotor and cap (on the shopping list). New fuel pump lurking below as well…
Went with new plugs and leads while in there. Want to have a sturdy ignition and fuel system in place.
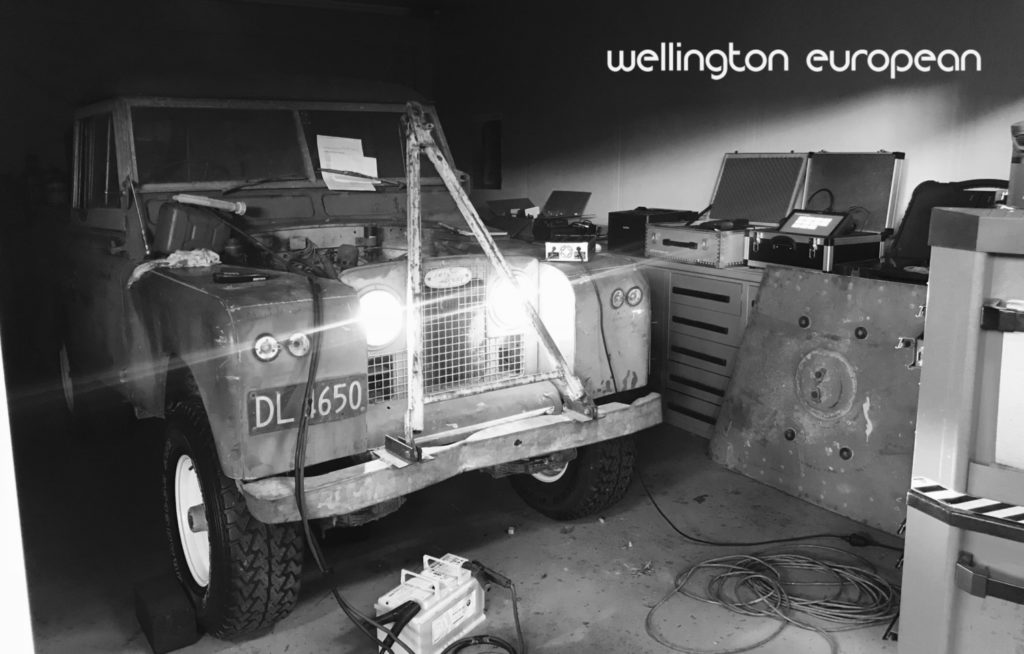
Check out our youtube link of the engine getting fired up, still some tune work to come but its coming along.
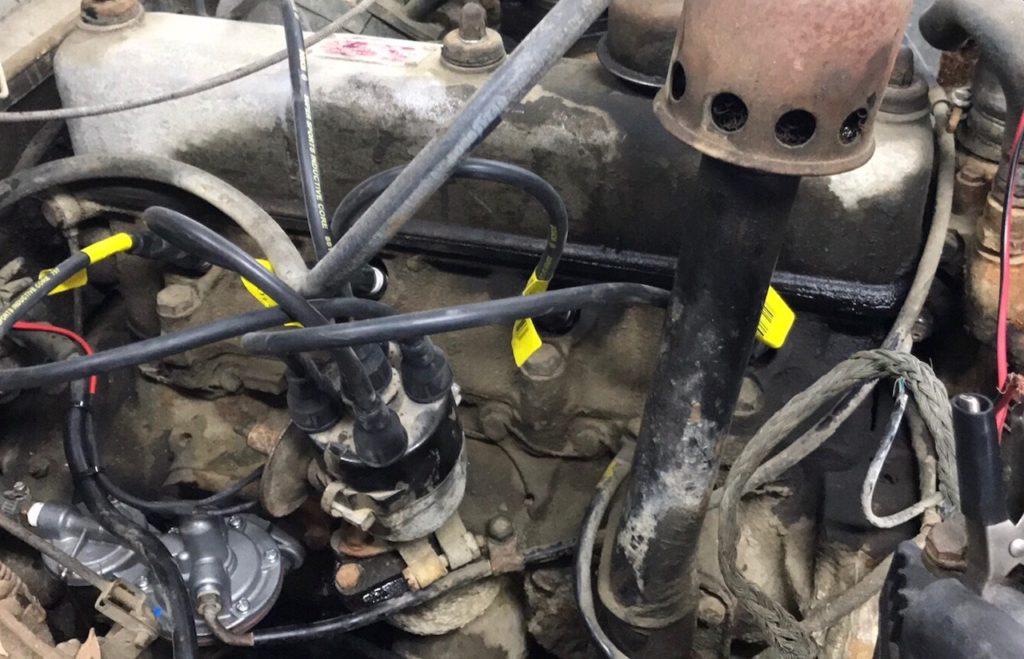
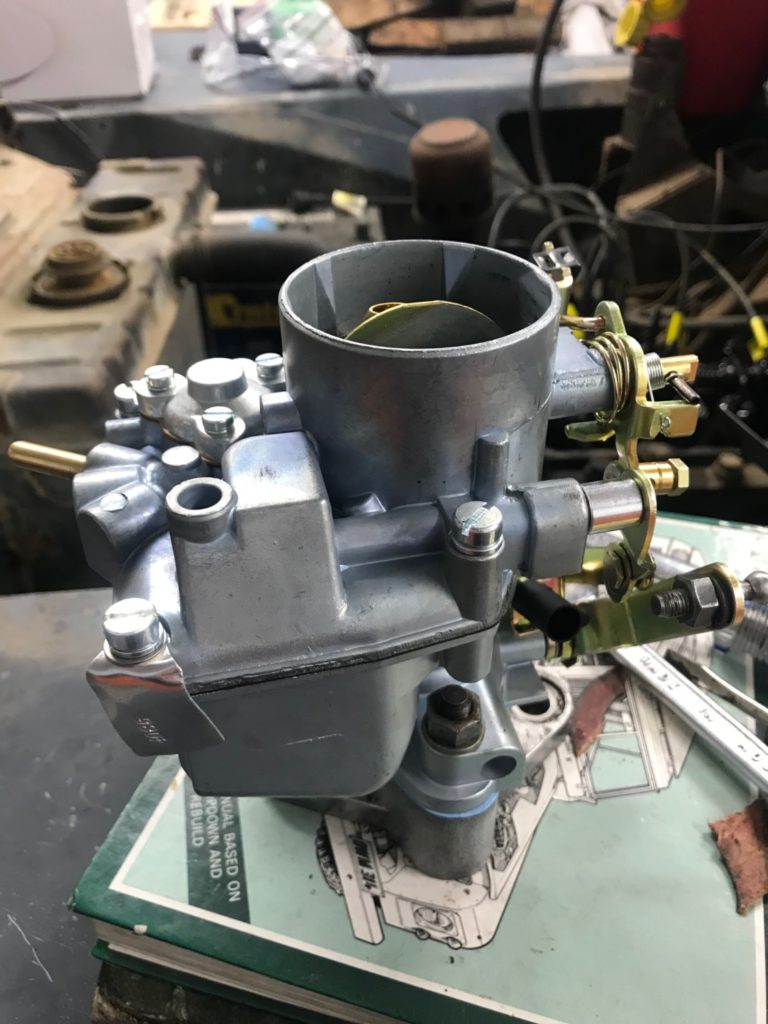
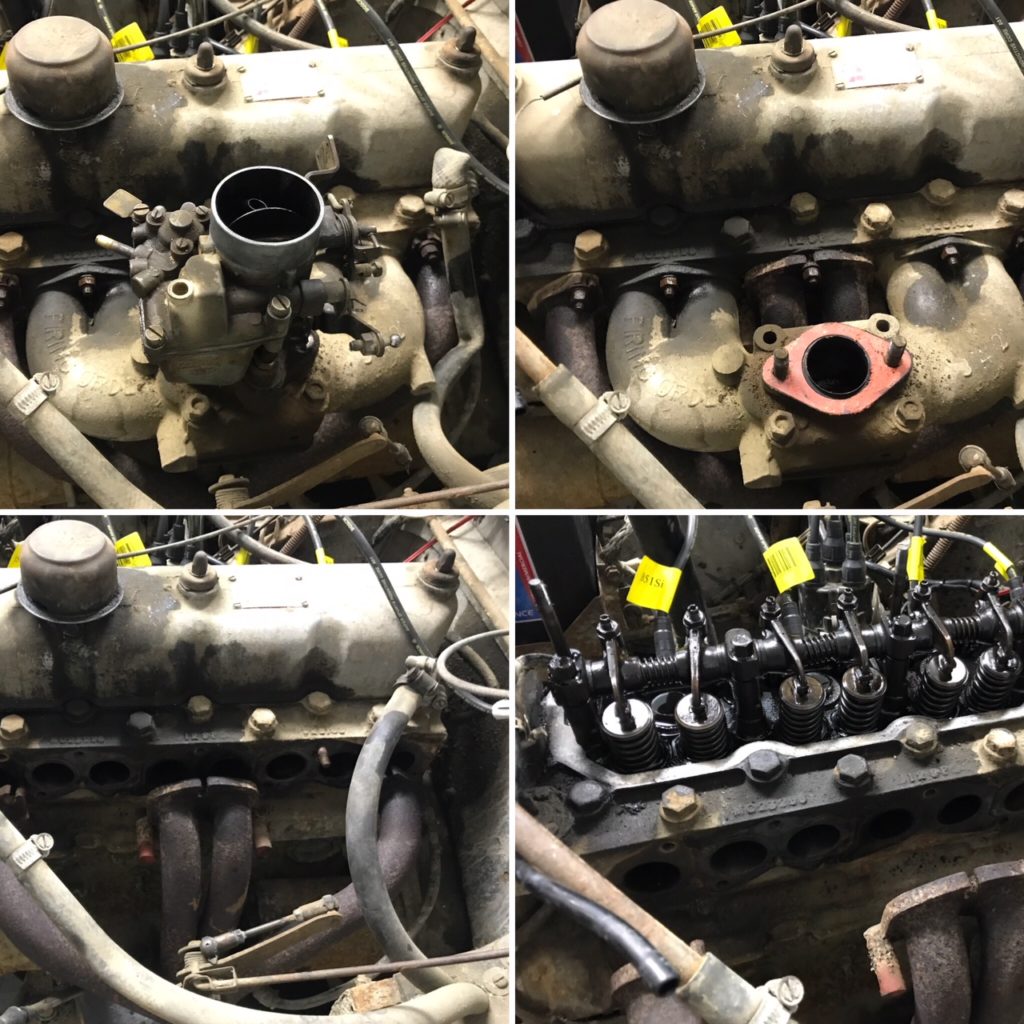
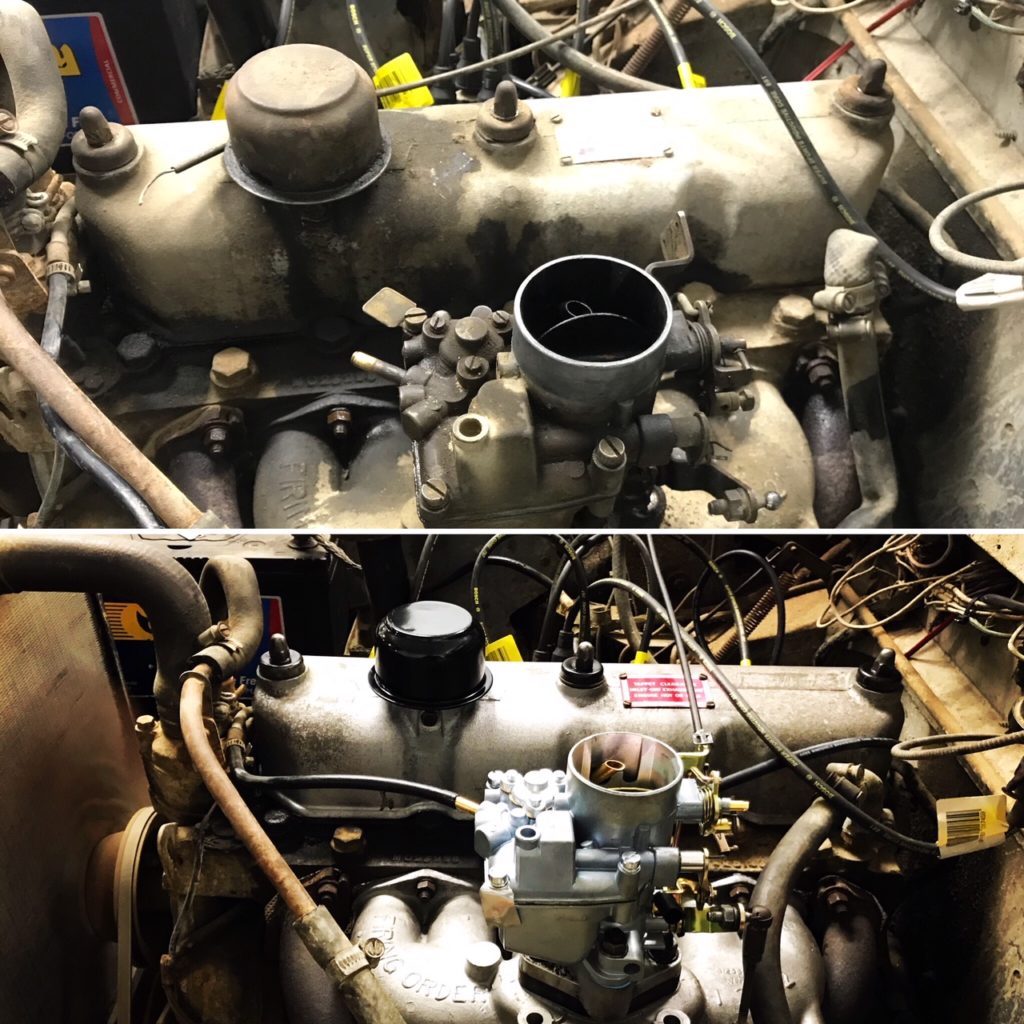
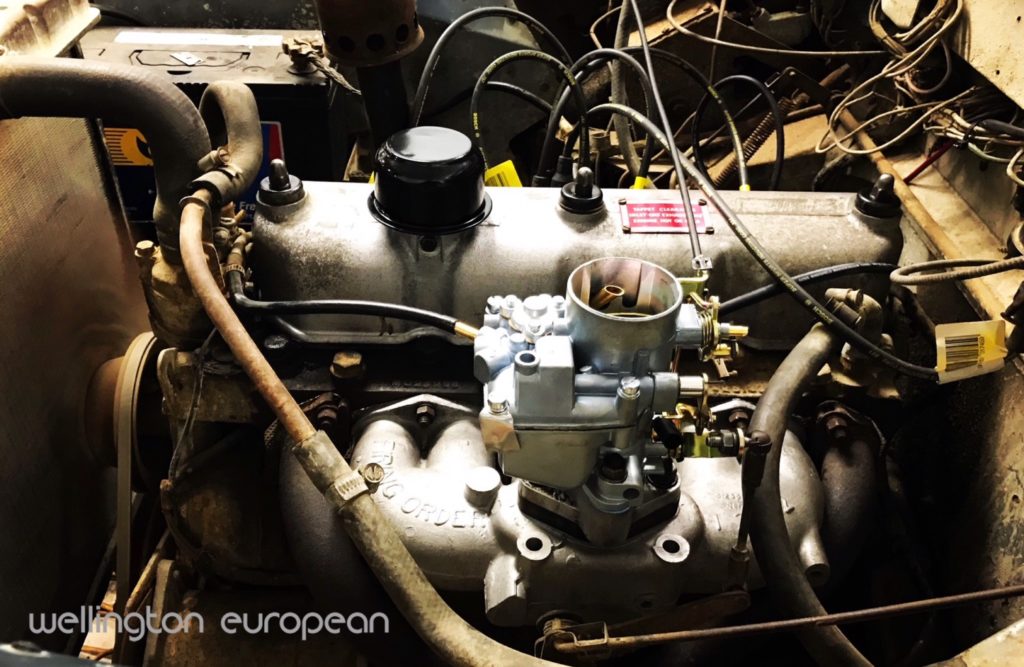
June Week 1. (Parts 1). I’ve hadmore parts arrive and just haven’t been able to wait for the weekend. More gaskets, senders, water pump, thermostat and a carburetor. Short term focus is on getting the engine starting and running reliably. Fuel system still needs a tank removal and inspection, and the carburetor is a write off, the throttle shaft is eating its way through the aluminium housing. To all the purists, sorry but I’m on a budget and I’m not building a show truck, so I’ve opted for a knock off carb. Initial thoughts are it looks great/ lets see how it runs. As with most jobs like this things can escalate quickly, carb swap ended up with manifolds off, rocker cover off, starter motor out.
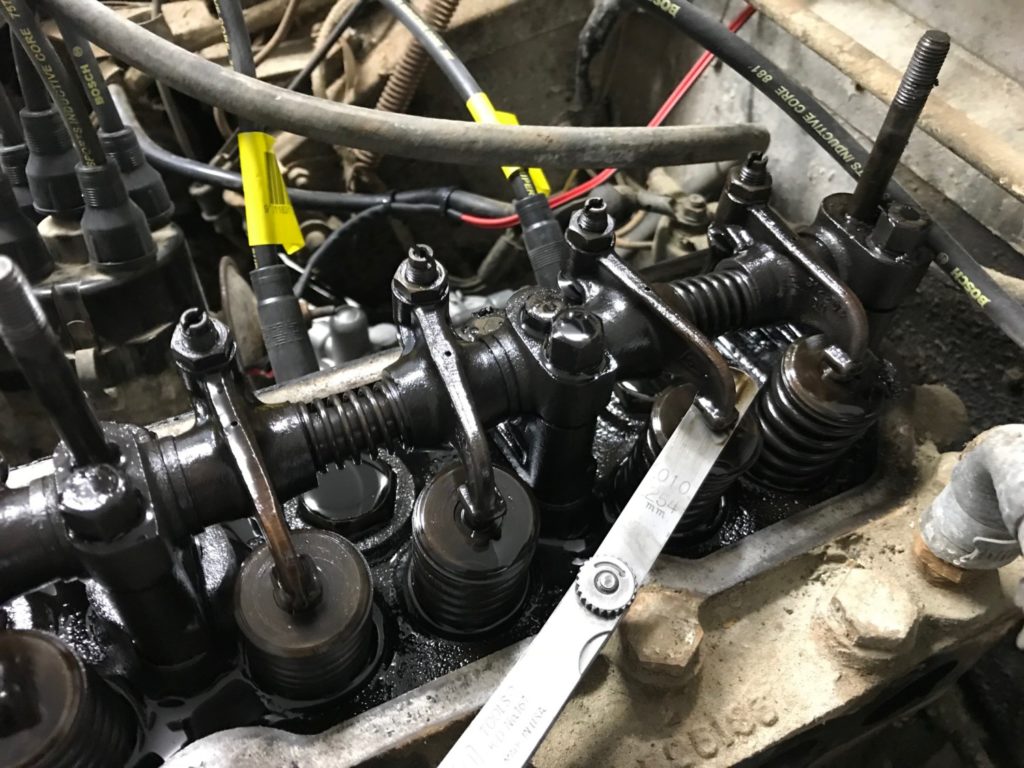
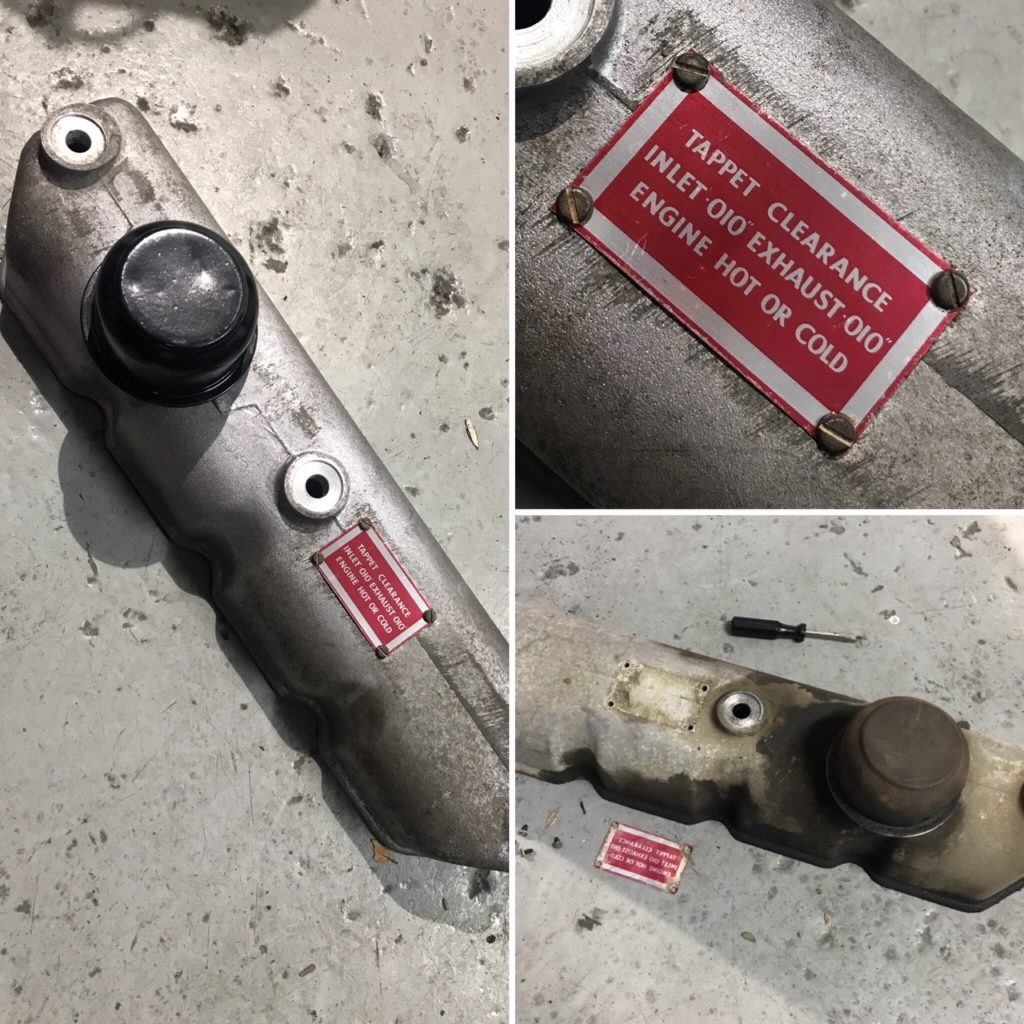
So while the carb was off I thought I would take the opportunity to set the tappets, I’m glad I did as they were all far too loose. The rocker cover is currently getting a acid wash along with the intake manifold, excited to see how these come out.
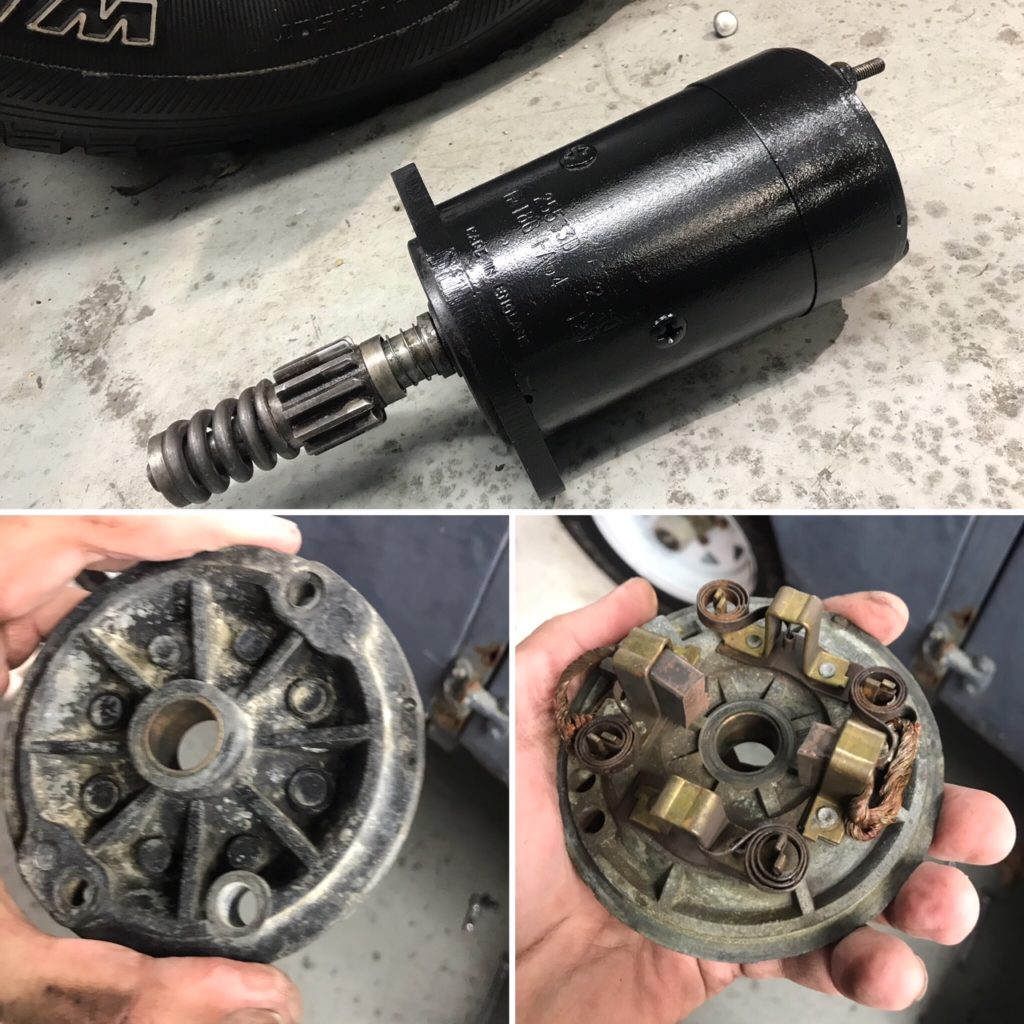
At some stage in its life someone has fitted extractors, a great addition to this high performance machine…). Again, while things were apart I took the opportunity to remove the starter as its buried under the exhaust. The starter has had a good clean out and I’ve improved on the pinion gear return action, I could hear it staying engaged sometimes so am hopeful this will be an improvement. The starters pretty well worn out but still works so for now its getting a aerosol rebuild!!
Belows aerosol rebuild, brush pack required soon
June Week 1. (Parts 2).
So everything is back together, new carb on, manifold and rocker cover cleaned up and new gaskets, even a splash of paint in a couple of places. New choke cable needs to be routed inside the car, but I’ve connected as a temporary measure to check every thing works. Looking forward to the first cold start after making all the initial adjustments tonight having had it up to temp. Other news is it now has a working temp gauge and oil pressure light having replaced the sender units. Thats was a super quick and cheap repair.
Getting excited about lights and gauges!!!

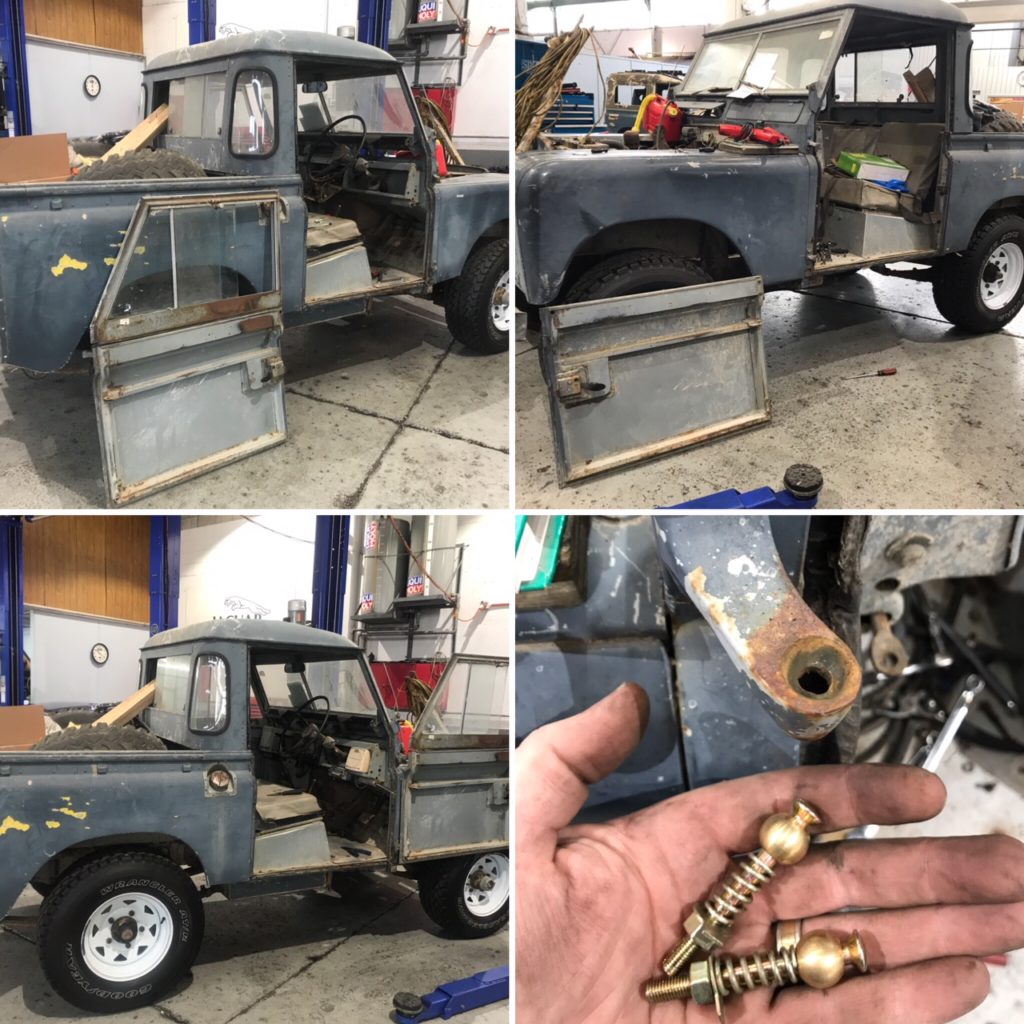
New hinge repair kits when in, This mostly aligned aligned the doors again, however they were still away off, ended up loosening all the hinge mounts and fettled into place… much much better. They even close and latch now which wasn’t happening
June Week 2 updates.
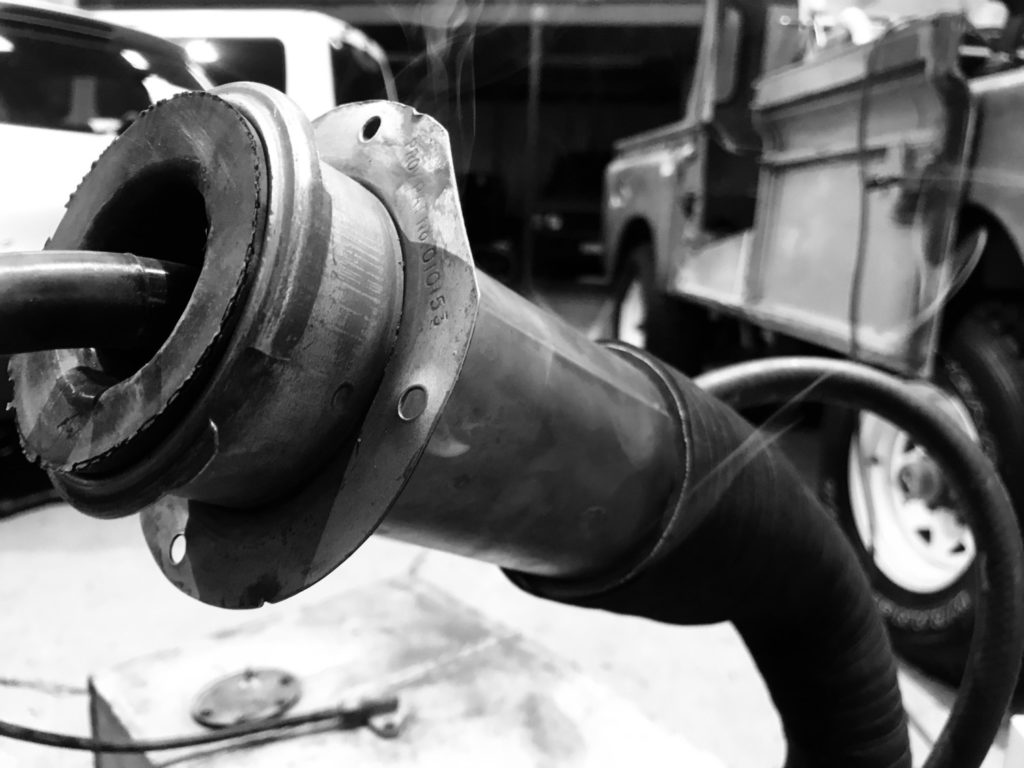
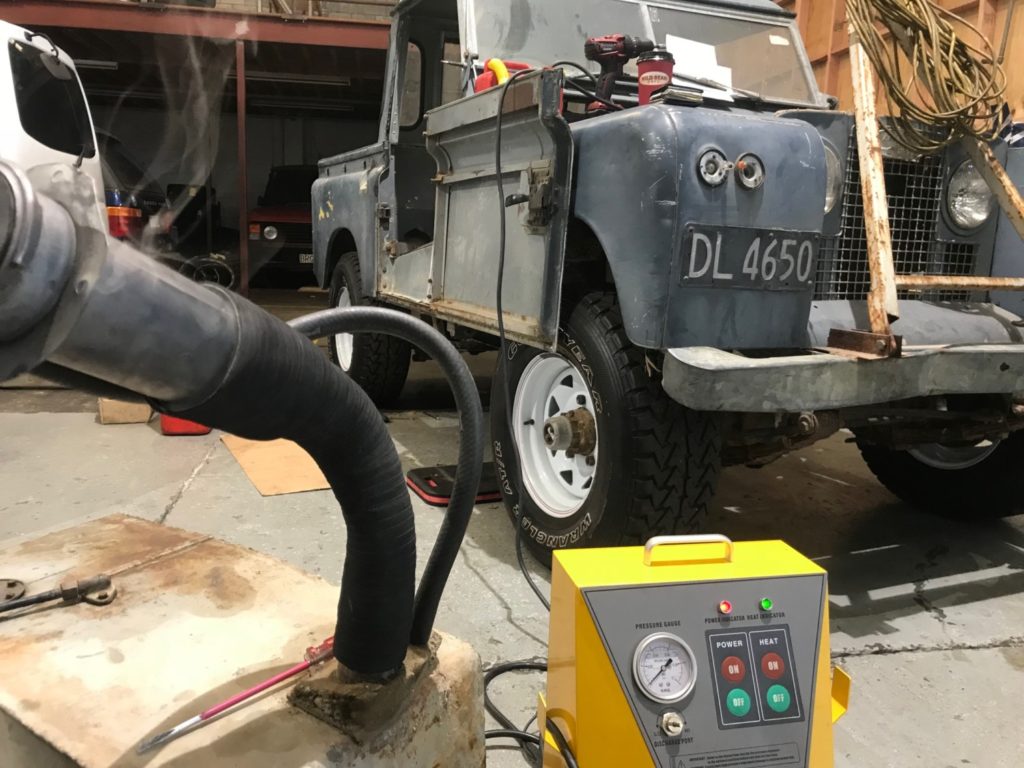
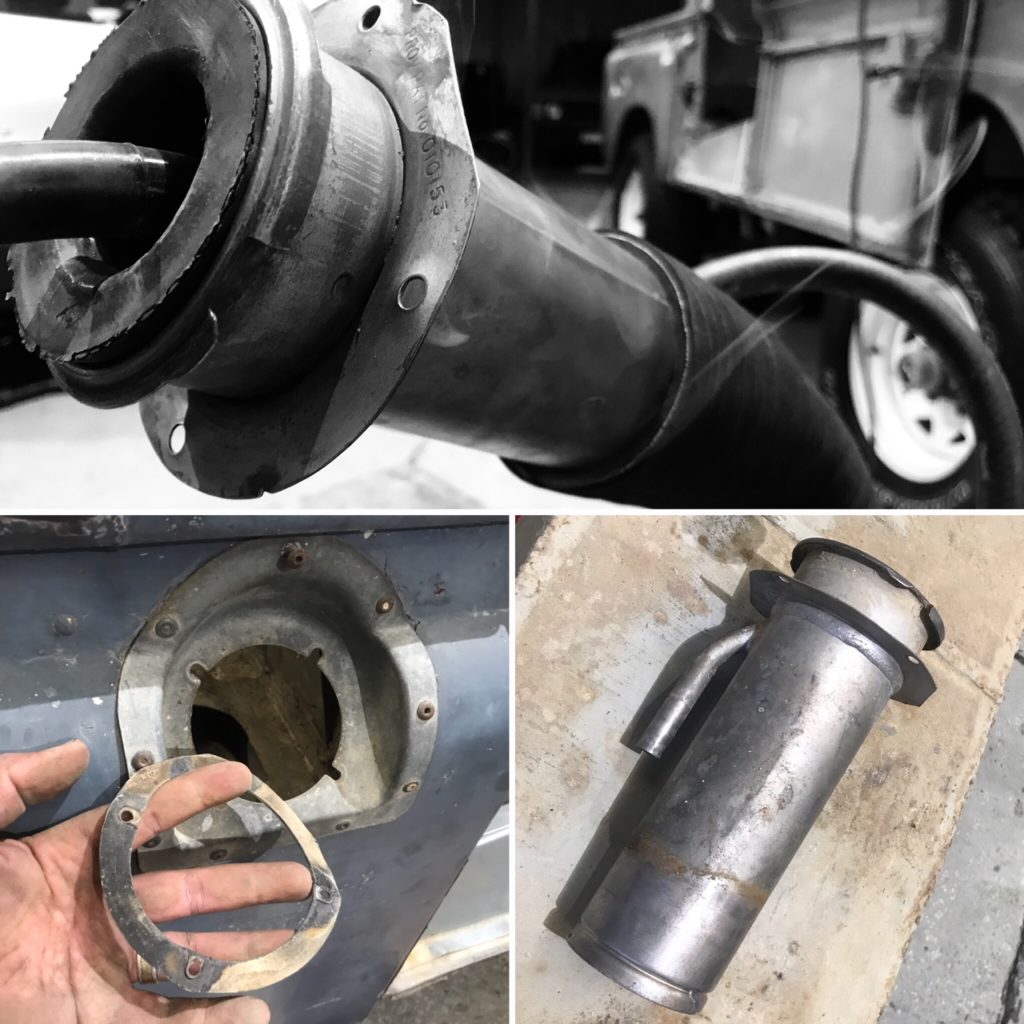
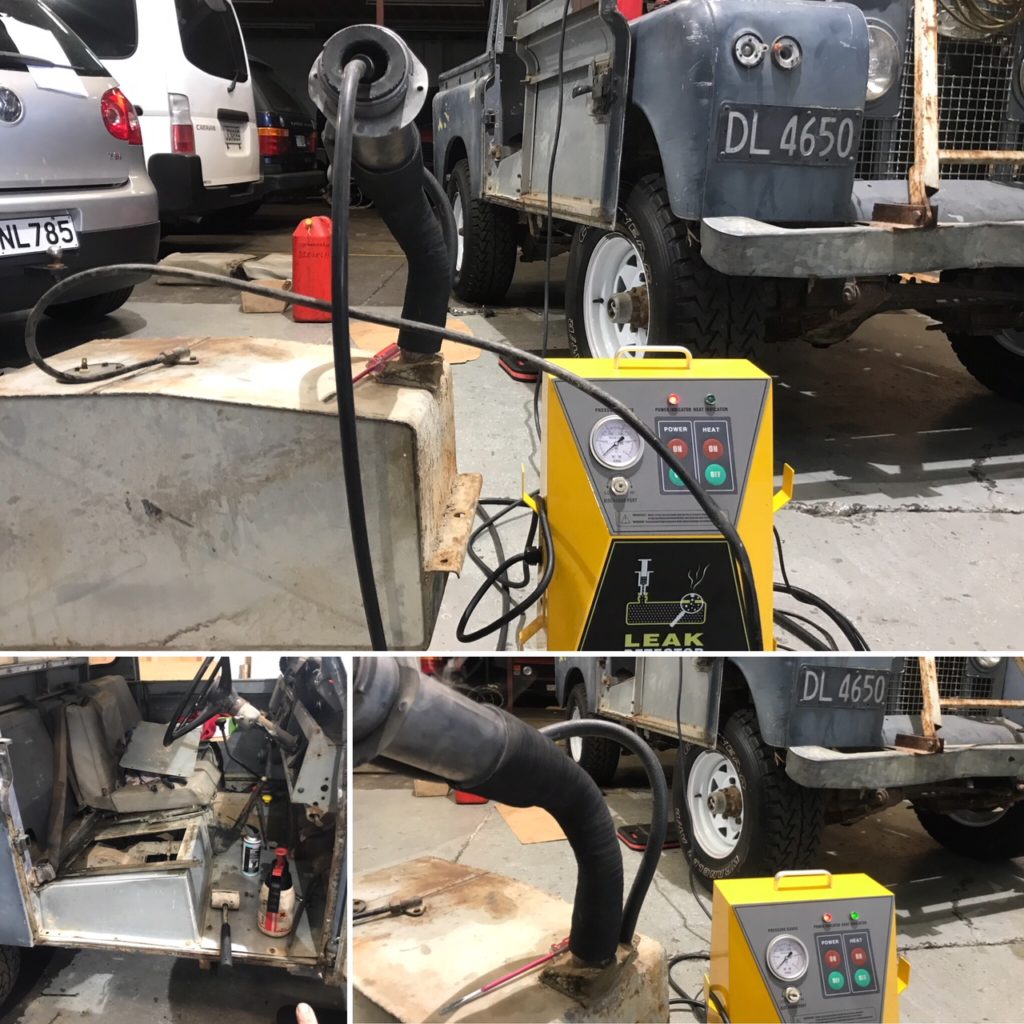
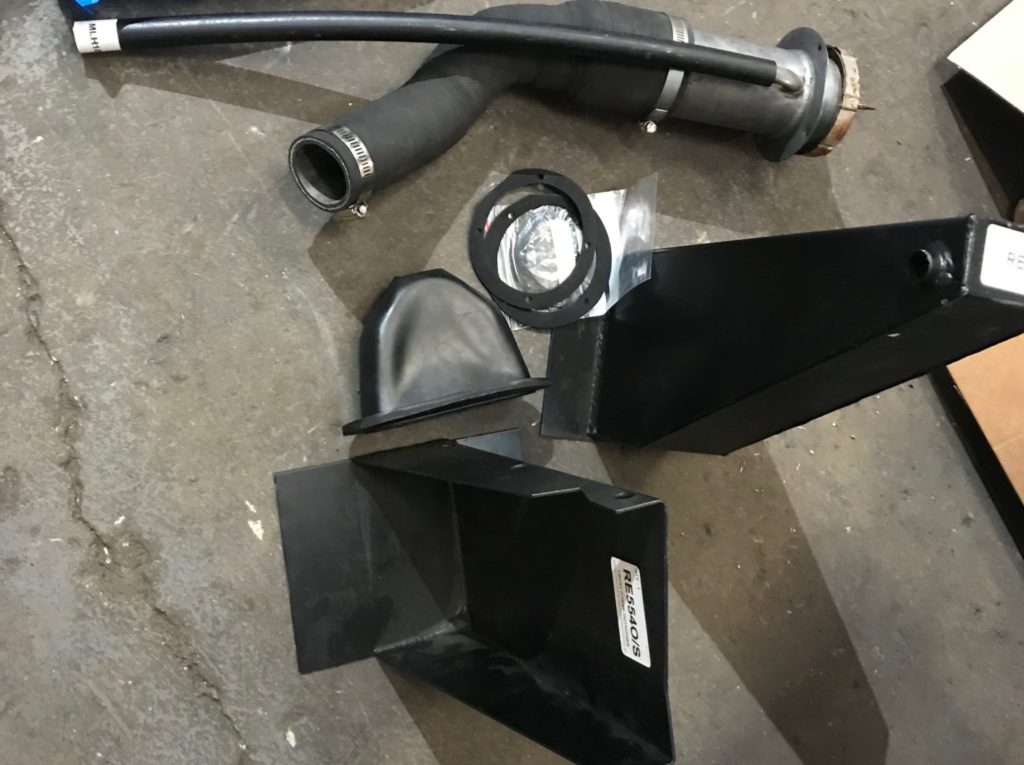
Some real invasive work here, wanted to check out the fuel tank condition, started with a smoke test. No issues except for the hose fittings etc which will be getting renewed anyway. I did eventually find a small job to do on the breather pipe fitting at the tank, however tank very clean, bone dry. Tested the fuel gauge and fuel sender unit, all seems to be working. Down side is there is a rotten outrigger which i kind of knew about but hadn’t had a decent look, as well as one of the tank mounts pretty rotten, so no point putting together until thats take care of….
So more shopping to do before continuing on…
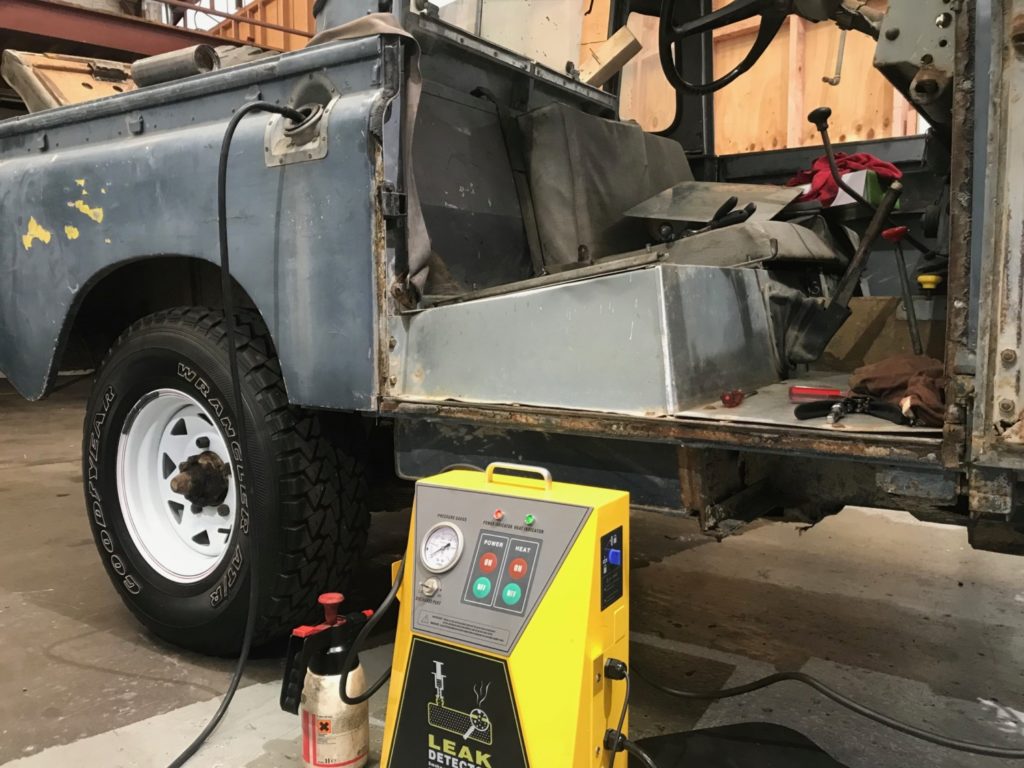
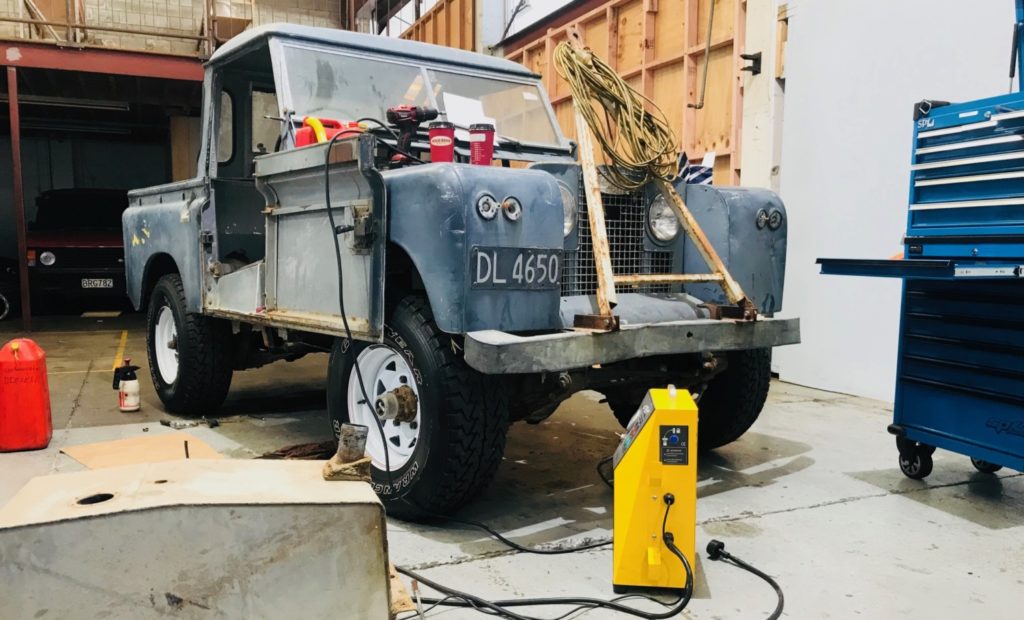
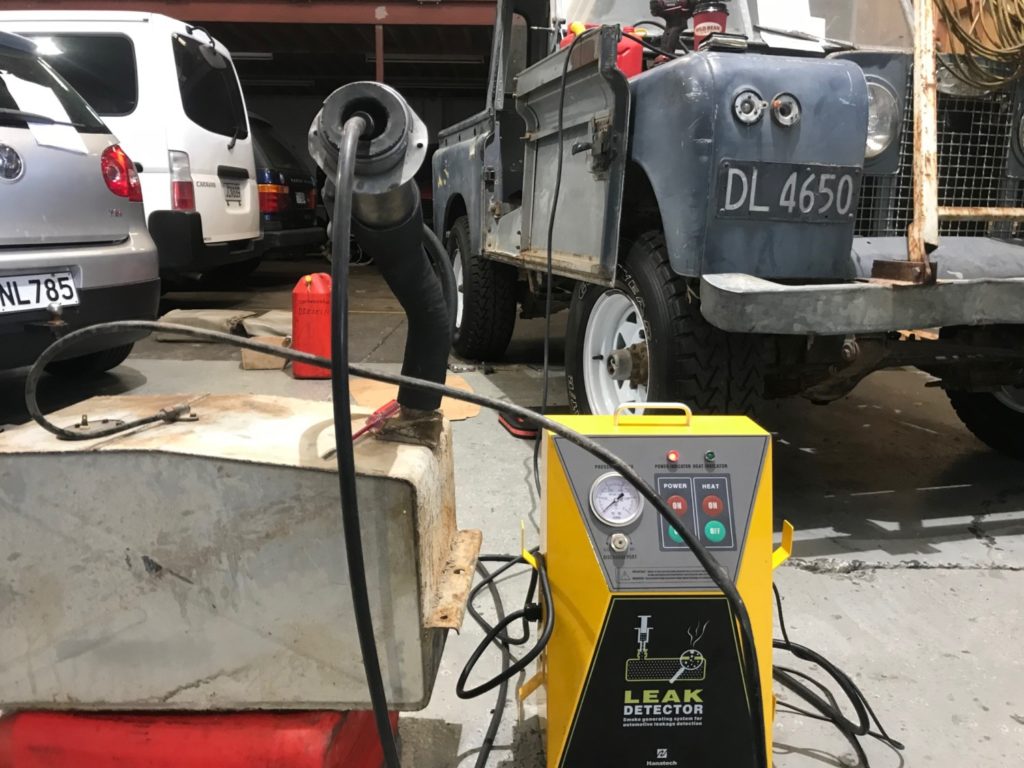
Above and below, smoke testing the tank for leaks, a little waft coming out in the bottom picture, to be expected without hose clamps. Not the usual use for our smoke machine which is usually used for fault finding with tune faults/ air leaks etc….., but why not a fuel tank…..
See my youtube smoke testing the tank/ Terrible audio, have man flu…))
June 2018 Week 3
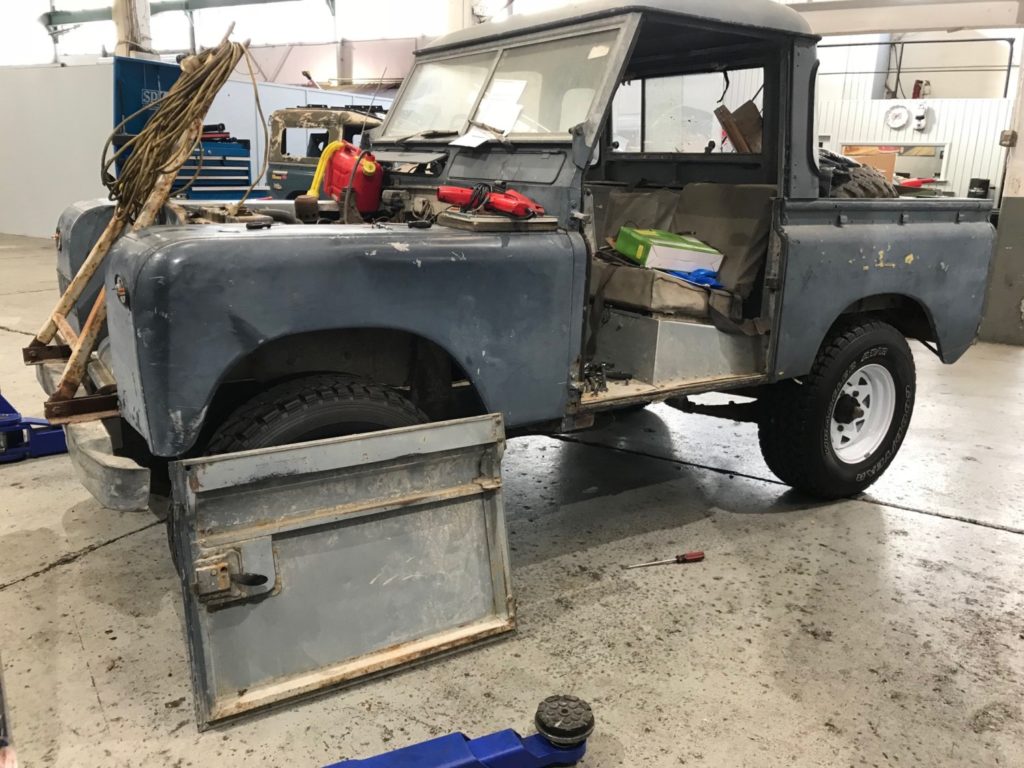
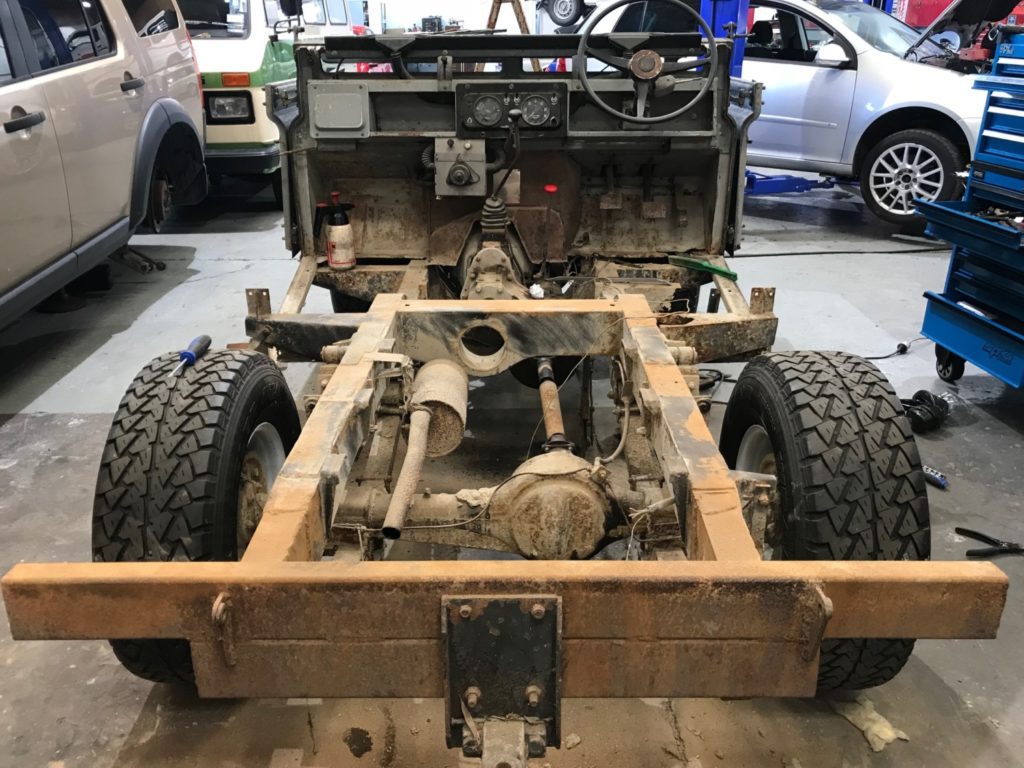
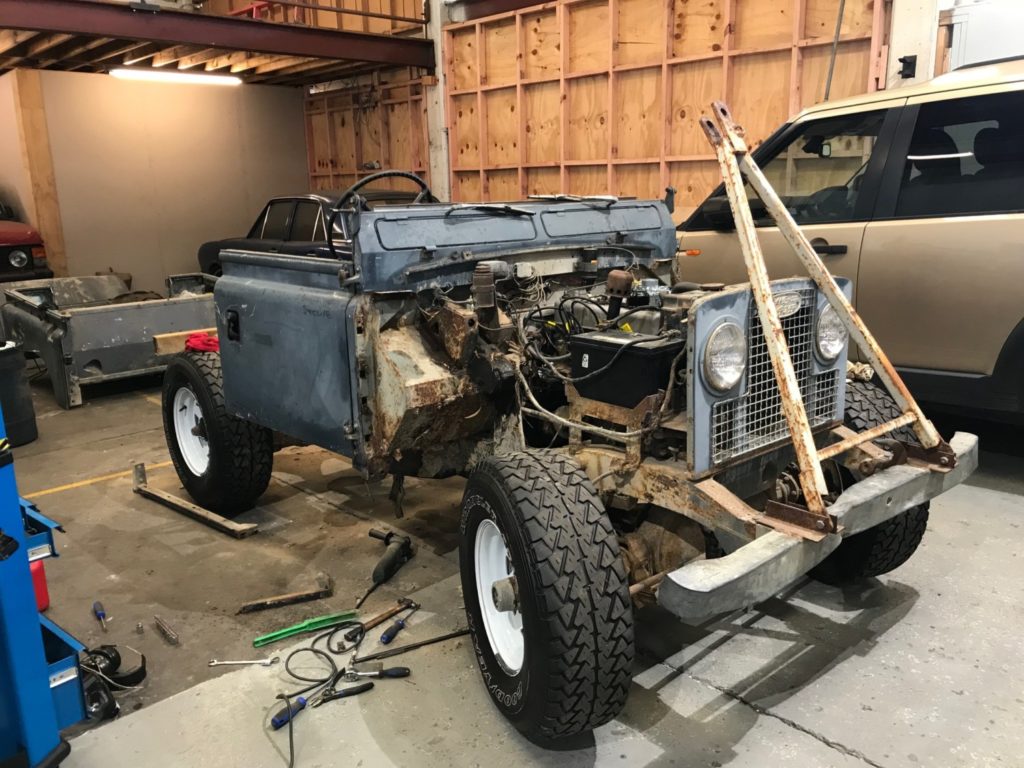
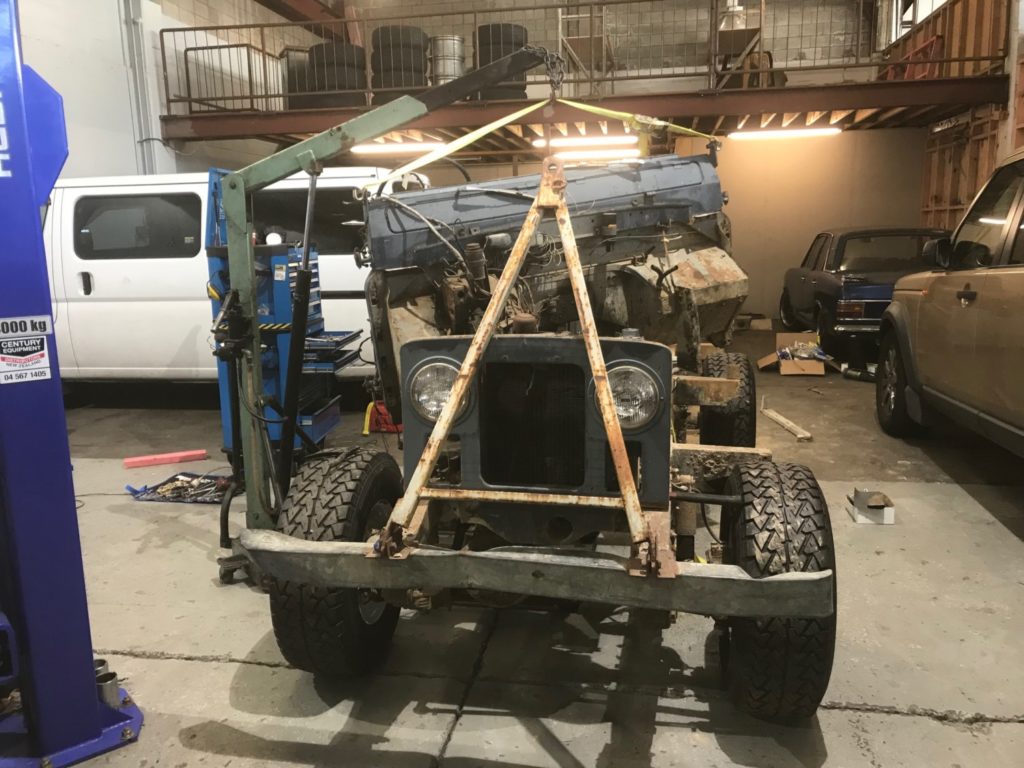
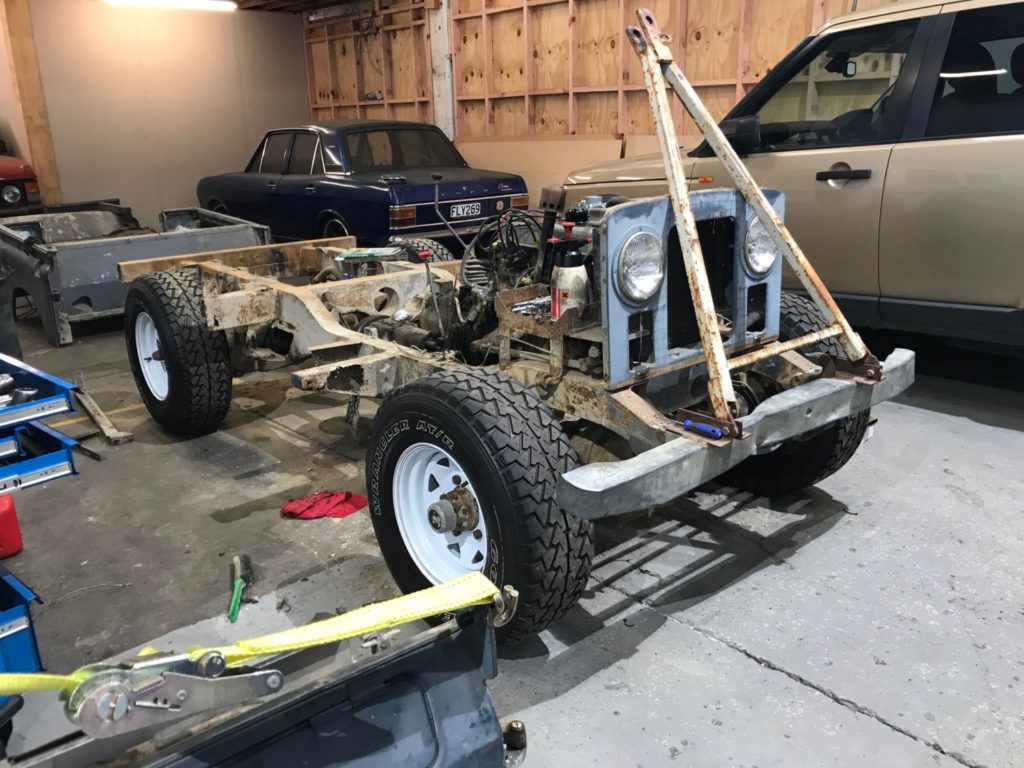
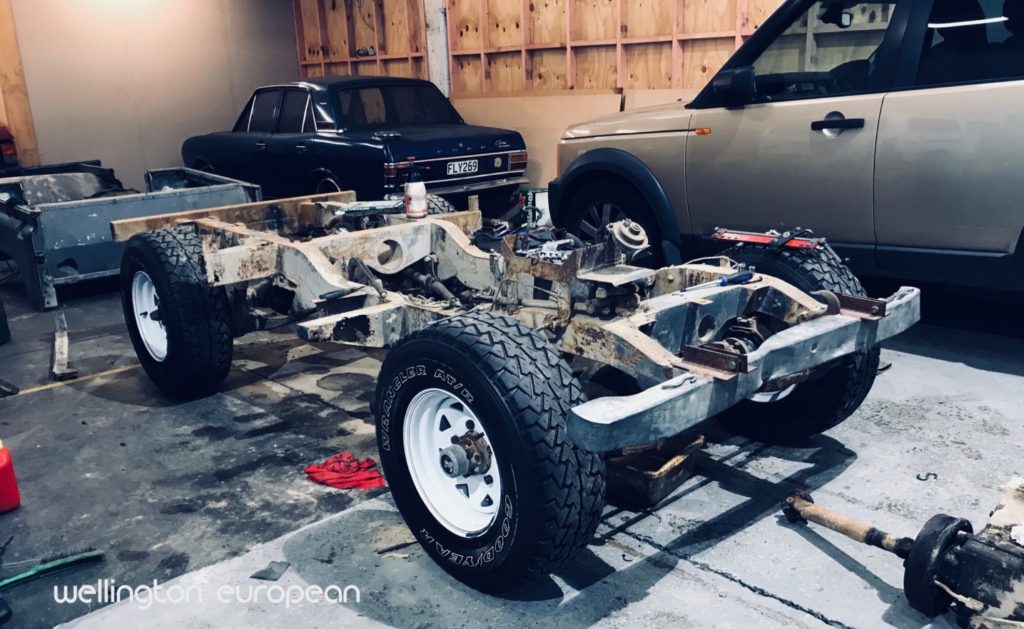
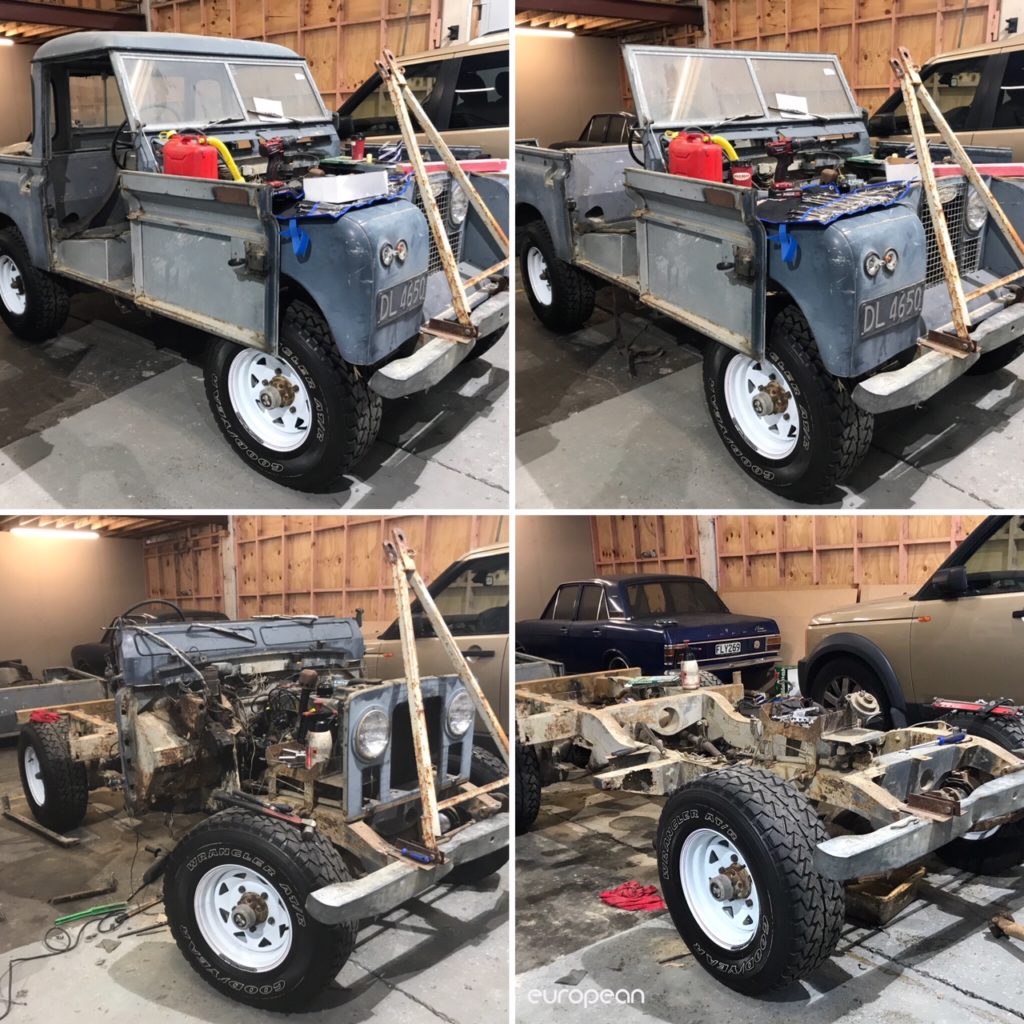
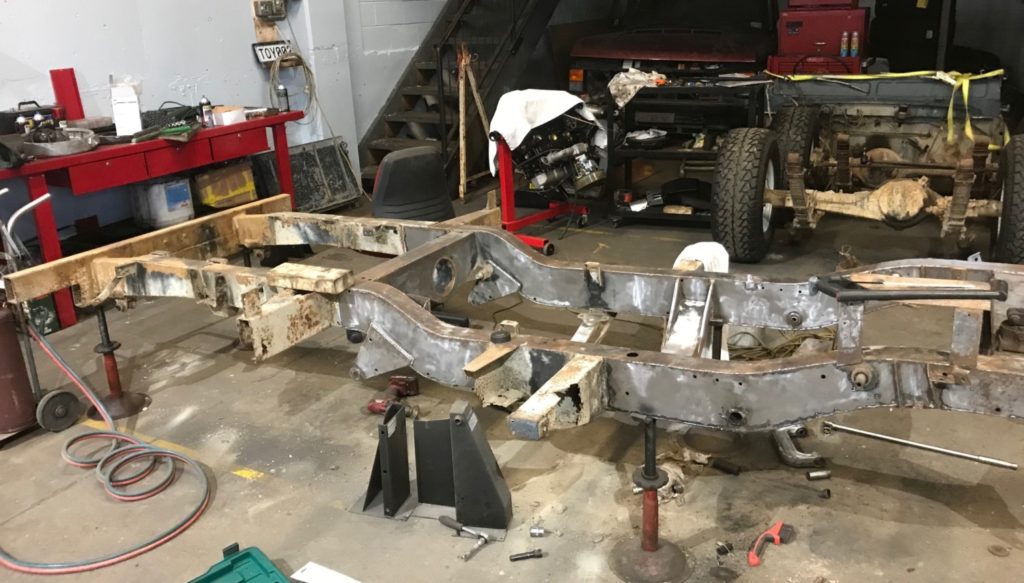
Mission was to get the floor out and the tub off… All went well so actually got quite a lot more done, also found myself some more work to complete. Some eye opening moments as up until now we’ve not had a decent look underneath, we found the rear tub largely held on by gravity, 2 small bolts up the front, Also the main mounts for the bulk head, bulk head – out rigger had no fixings at all. This most likely will contribute to the body lines not being great as well as door alignment being way off. As we got the rear apart super quick we pushed on and removed the front guards and grille etc…. That also came apart very easy so we continued on to remove the bulk head as well as the gearbox and engine assembly. Some heavy lifting here….
Where to from here, well I’m going to get somebody in to assess the chassis and do some measuring. Will be trying to do as much as we can in house/onsite. New outriggers all around are the minimum requirement remembering this has a dead rego so will be getting a thorough road worthy inspection, and we intend to get this started before putting the body panels back on..
Engine and gearbox are out, from what we can tell, aside from oil leaks this is all in order, so i think, new gaskets while its out, definitely a rear main seal and clutch…. Waterpump and thermostat sitting there waiting to be fitted.. And while its down to a rolling chassis we can start planning where too with the remaining suspension and drive-train. To dos include all spring hangers and bushes, all shocks, all brakes including lines and and hoses… Some work ahead of us….
Above, a sample of this weeks deliveries., now know we need all the outriggers…

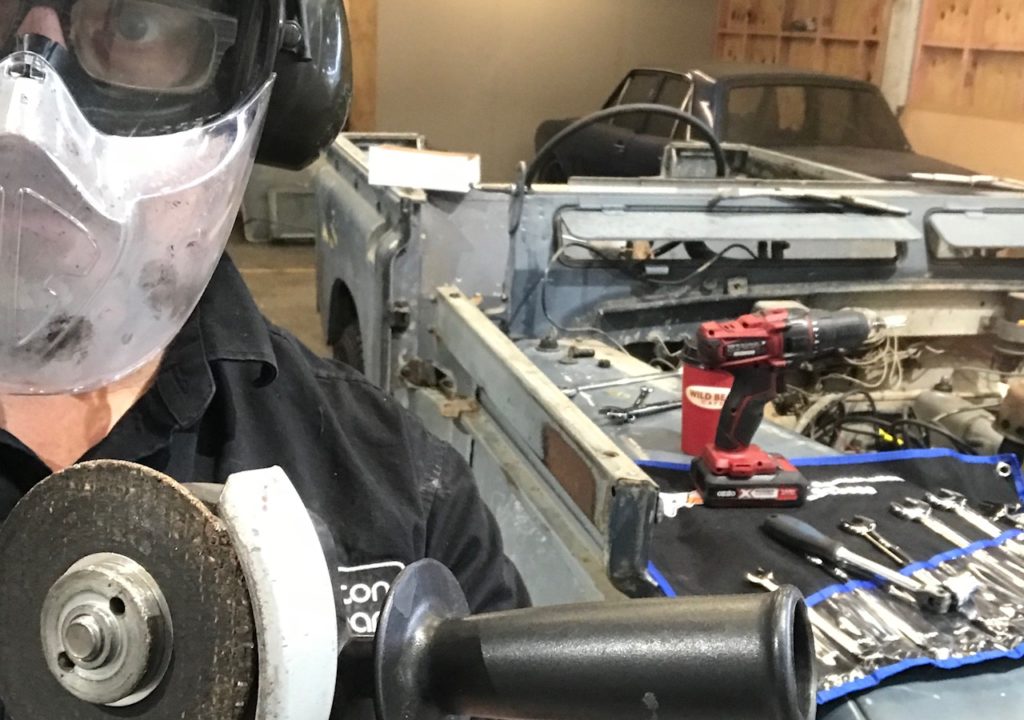
Me and grinder/ Scary
Some rear mods done previously, including zero mounts for the chassis/ Quality!!!
Bulk head coming out
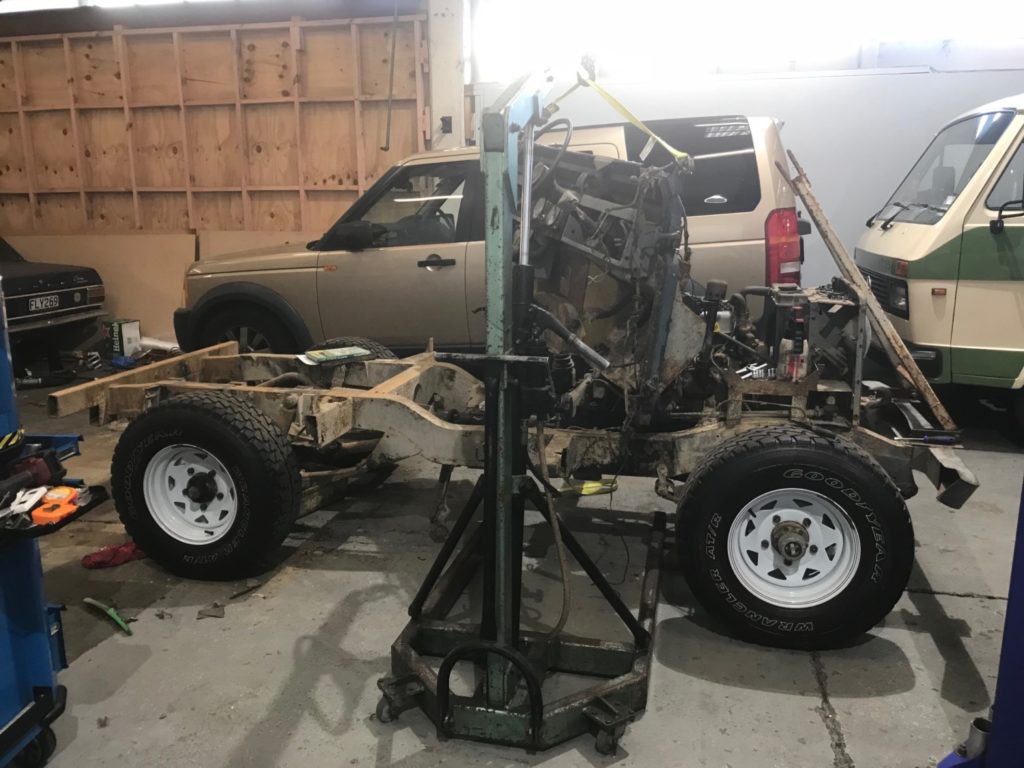
Engine and gearbox assembly out..
Below, roof on, roof off, bulk head in, bulk head off.
Last weekend of June.
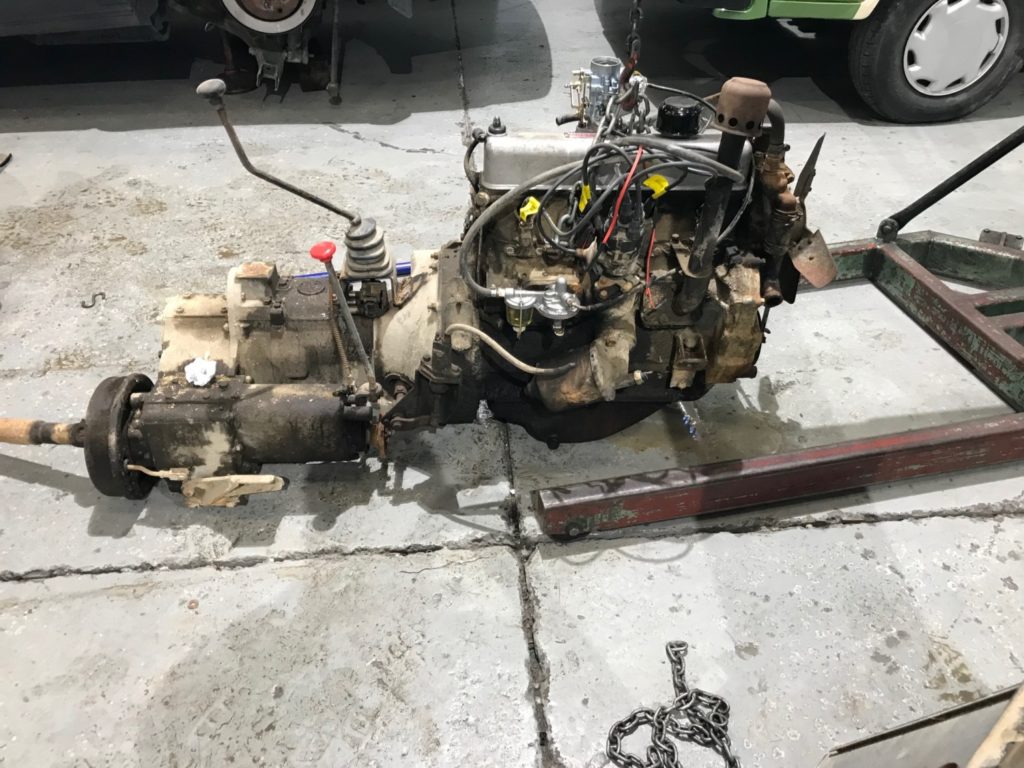
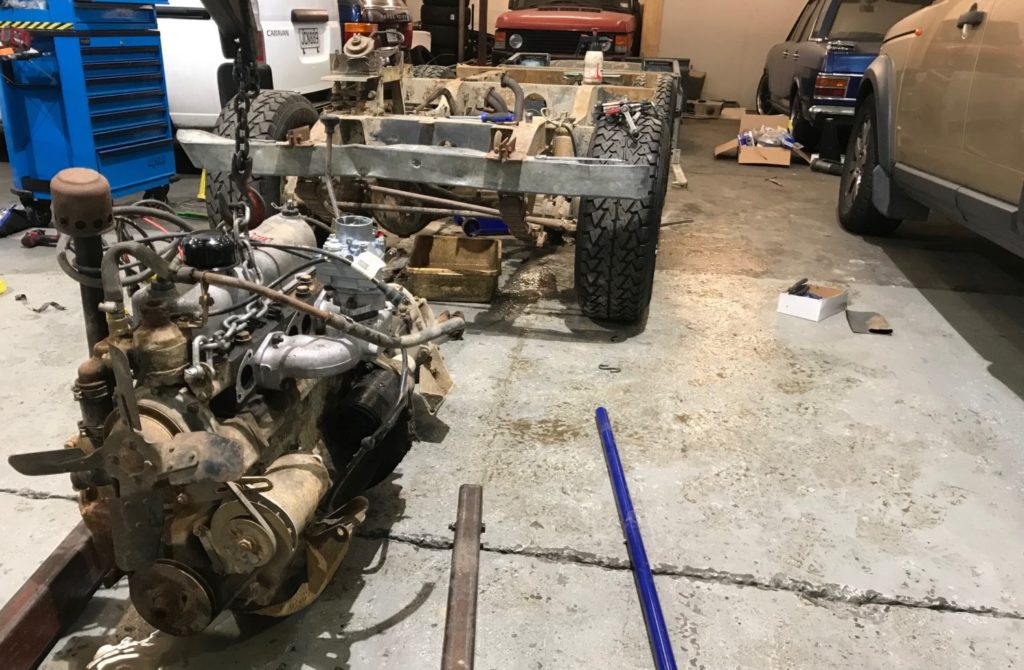
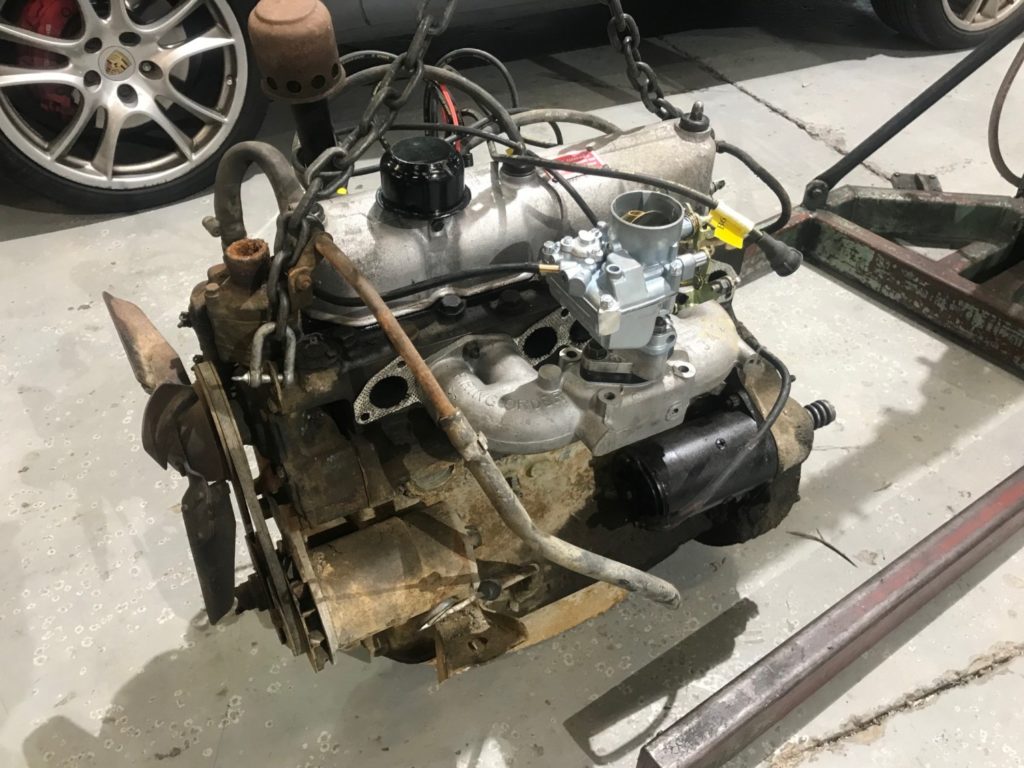
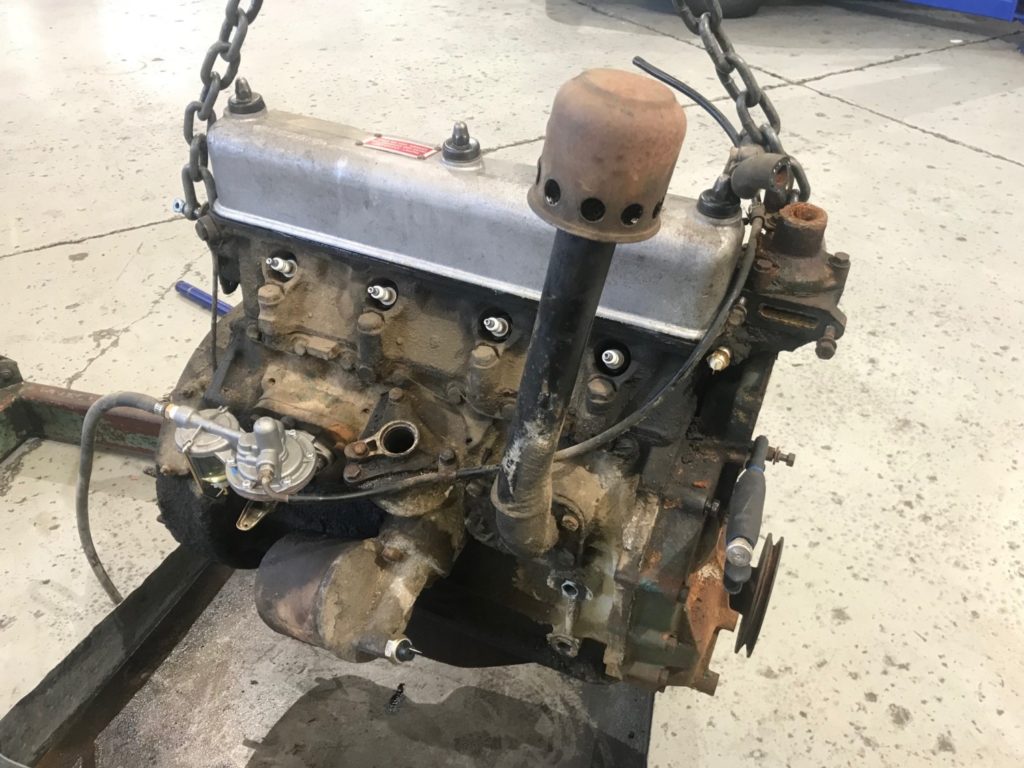
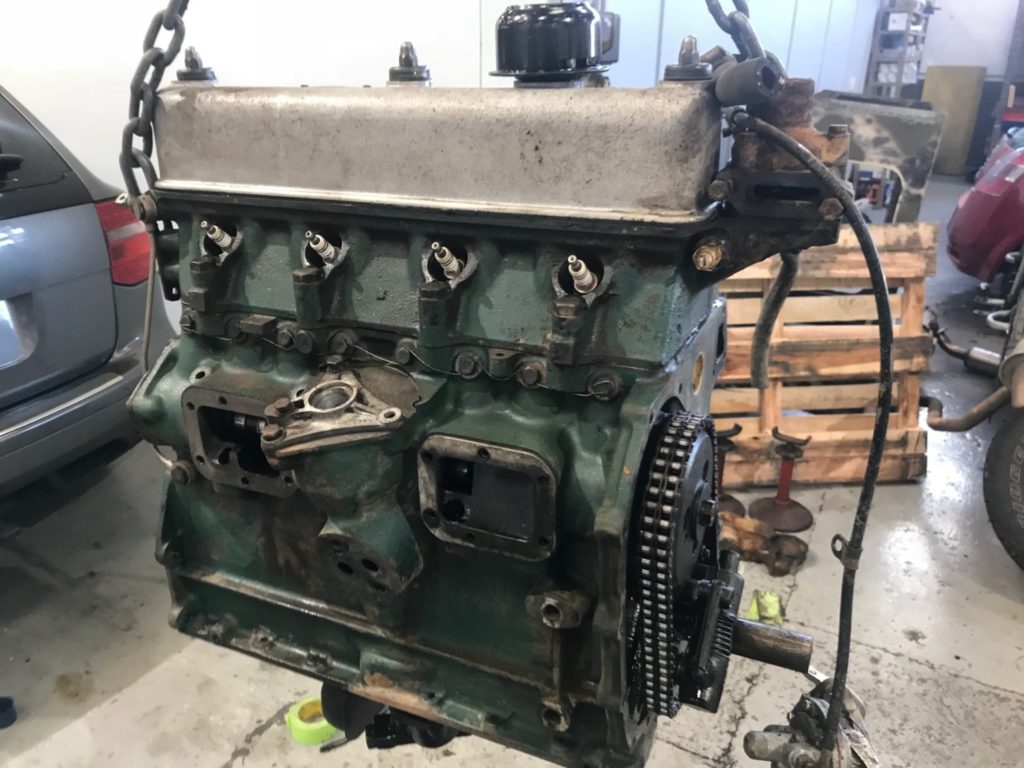
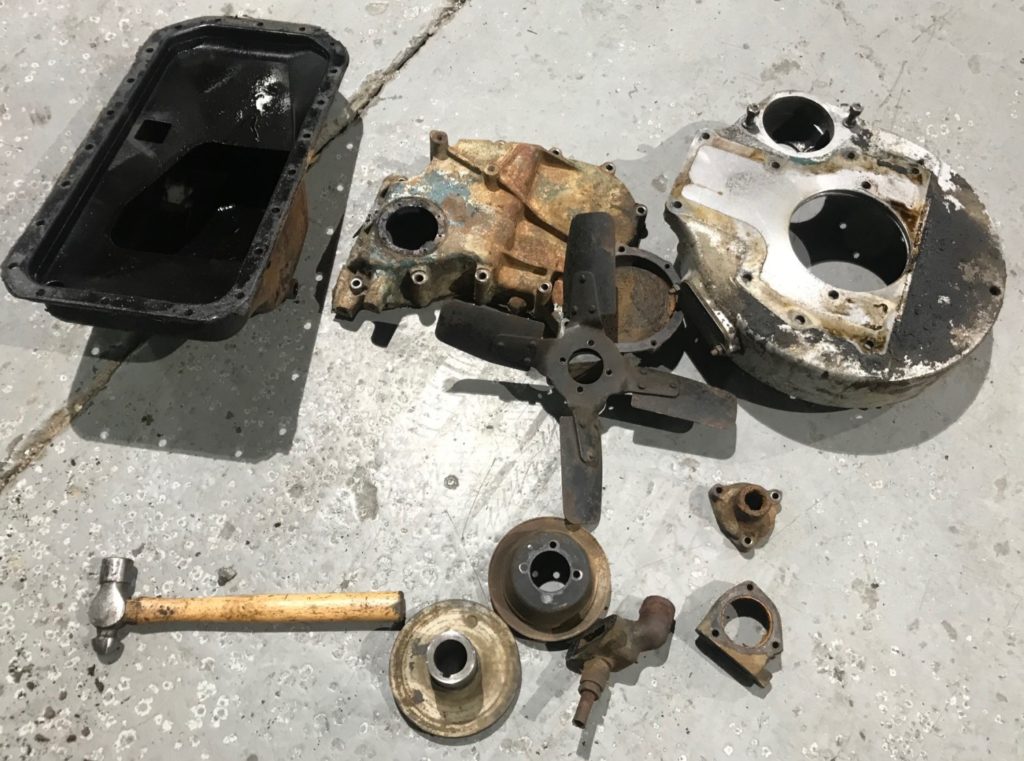
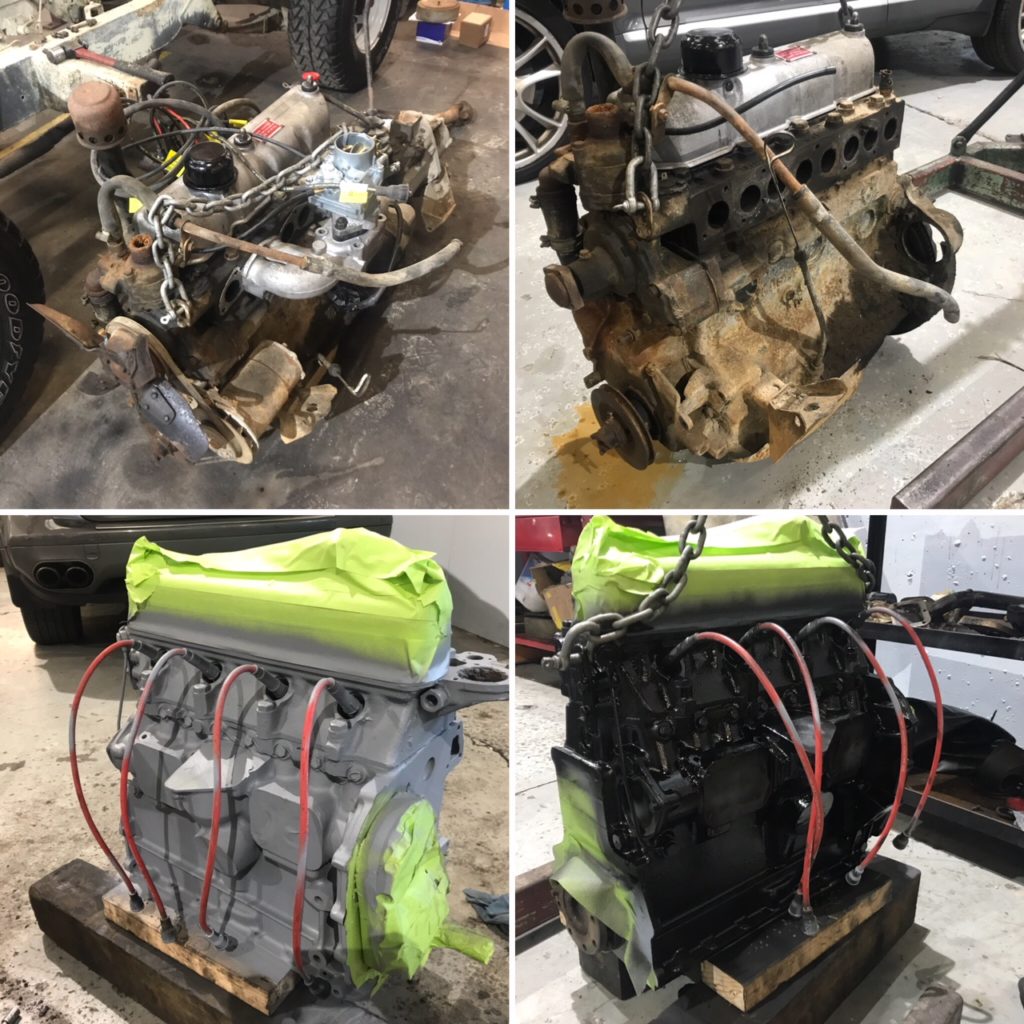
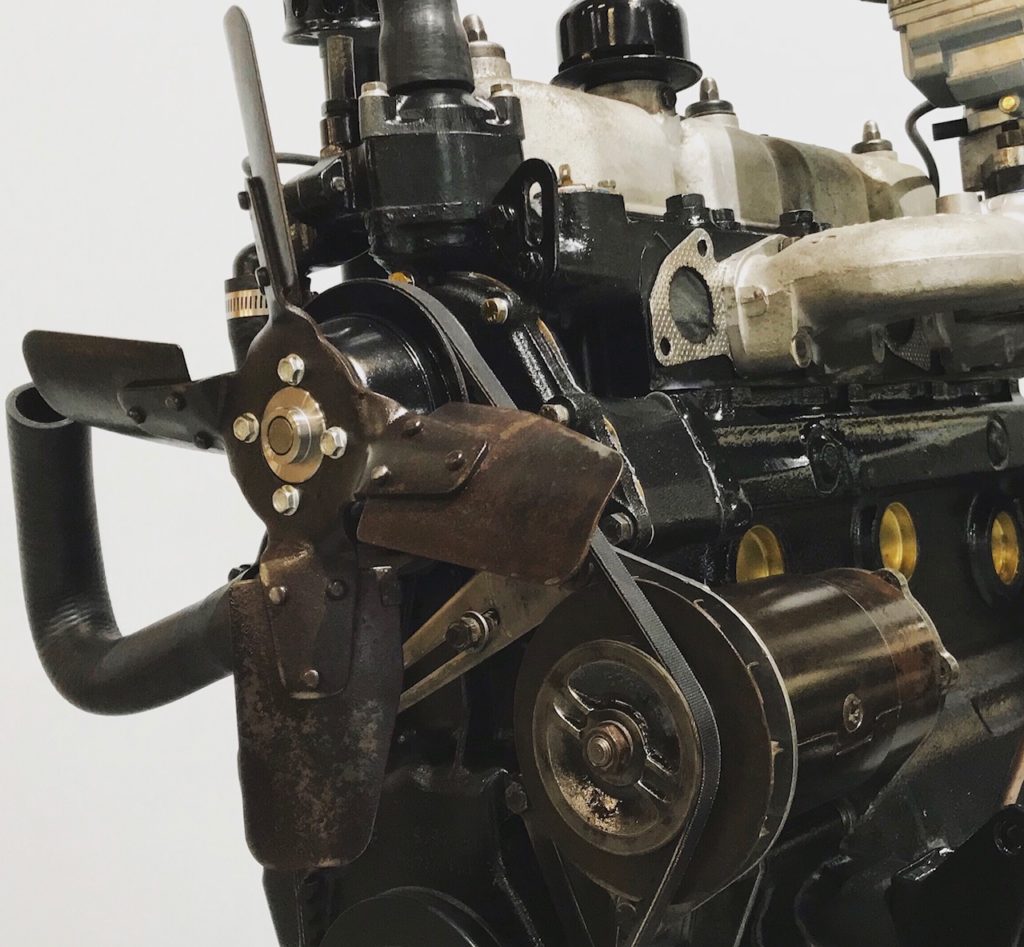
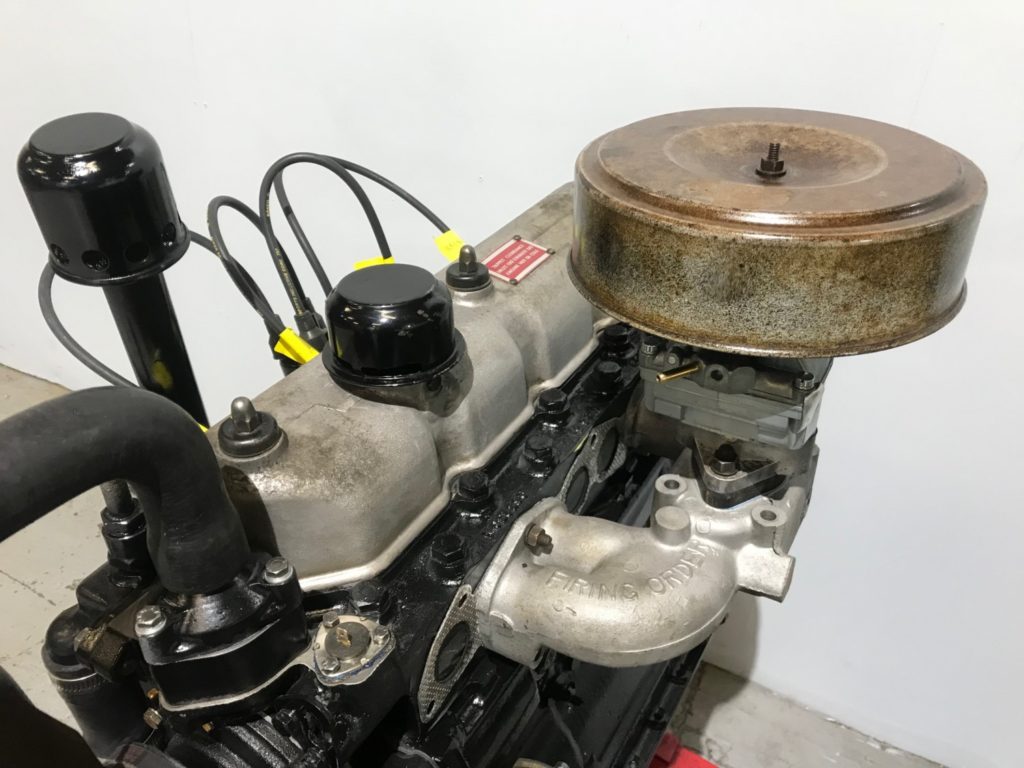
So this weekends mission was to separate the engine from the gearbox and clean up the motor. Well I de-greased the motor, pressure washed, and hit repeat a few times, however even though it didn’t look too bad it had decades of grime caked on. I ended up having to get in with a solvent and clean by hand every nook and cranny… The plan was to in a day to have the engine cleaned up, painted and re gasketed/sealed/ ‘O’ ringed etc, basically all gaskets excluding the head gasket. Any way that did not happen. I have ended up with a stripped engine down to a long block/ cleaned and painted. However all of the externals still require cleaning and refitting. Most of its currently taking an acid dip at Headmaster, the machine shop in our building…. Some more eye opening previous work done included gaskets having been left out completely, very interesting what you find. All can be fixed!!!!
This first pic is as it looked when we first pulled it out of the chassis, already some clean up had happened here while getting the engine running etc, new carb, cleaned rocker cover and manifold etc…
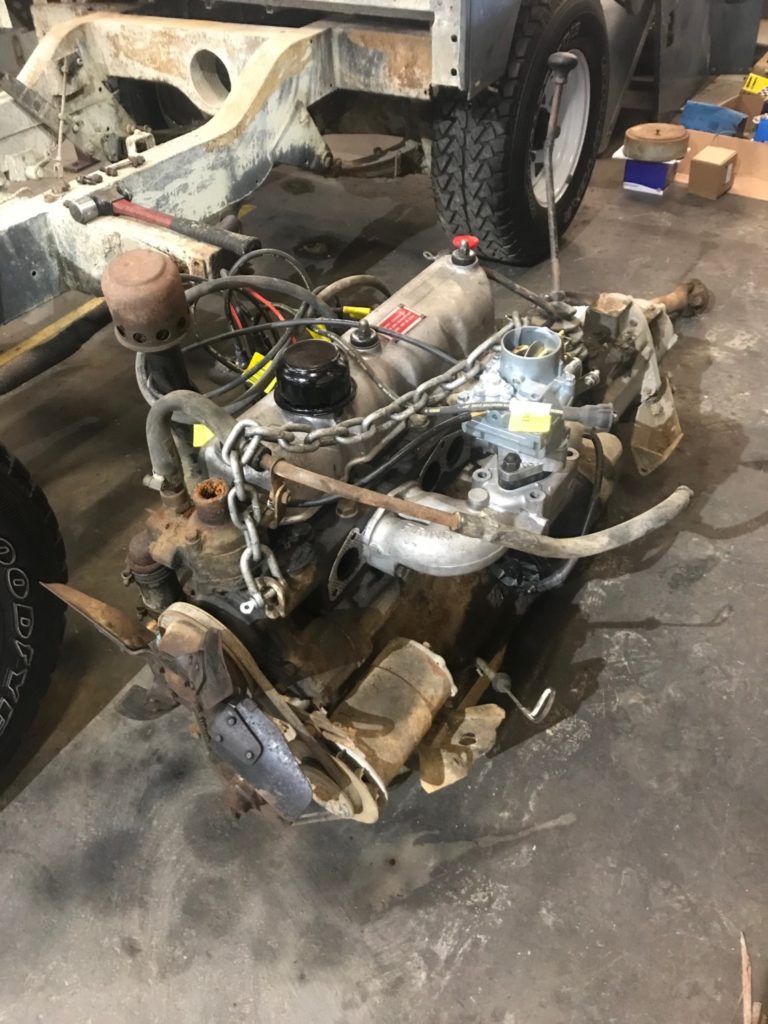
Engine and gearbox separated for the first time in many years most likely…
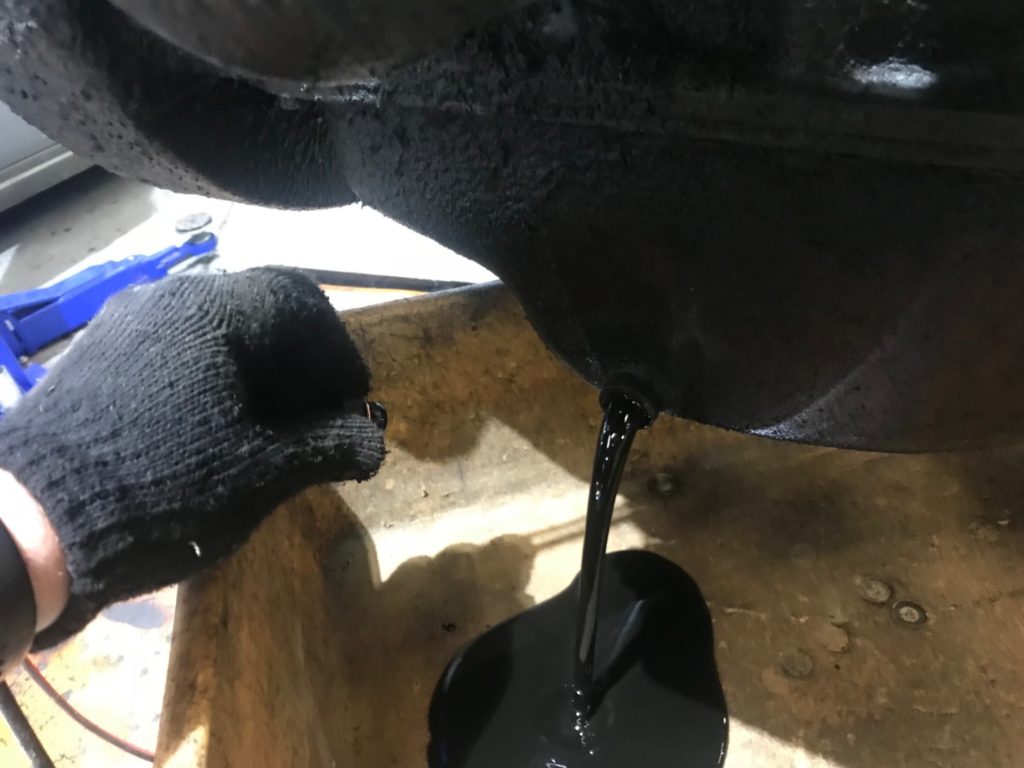
That’s some old nasty looking oil!!
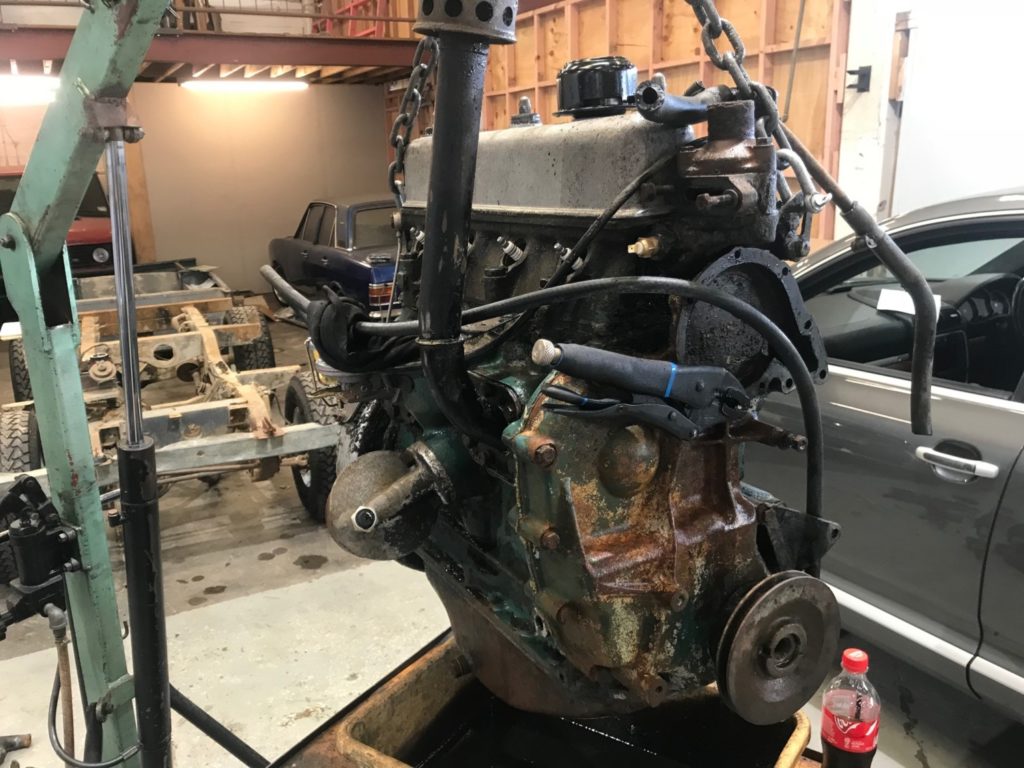
Didn’t know the motor was green, found it under there……
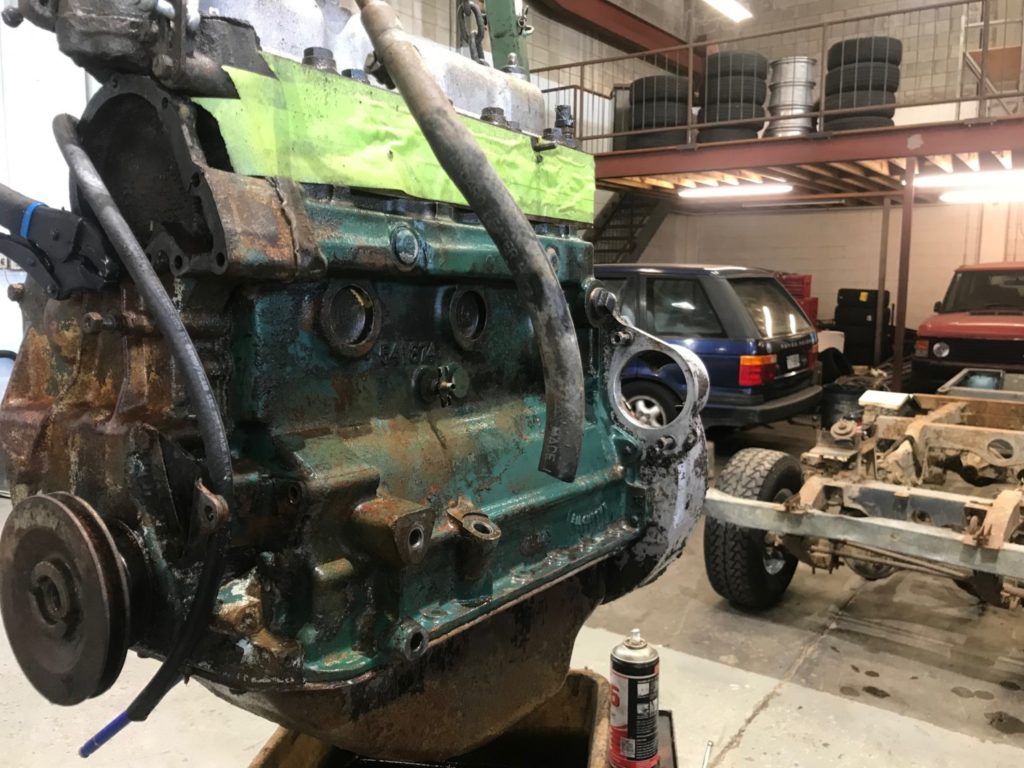
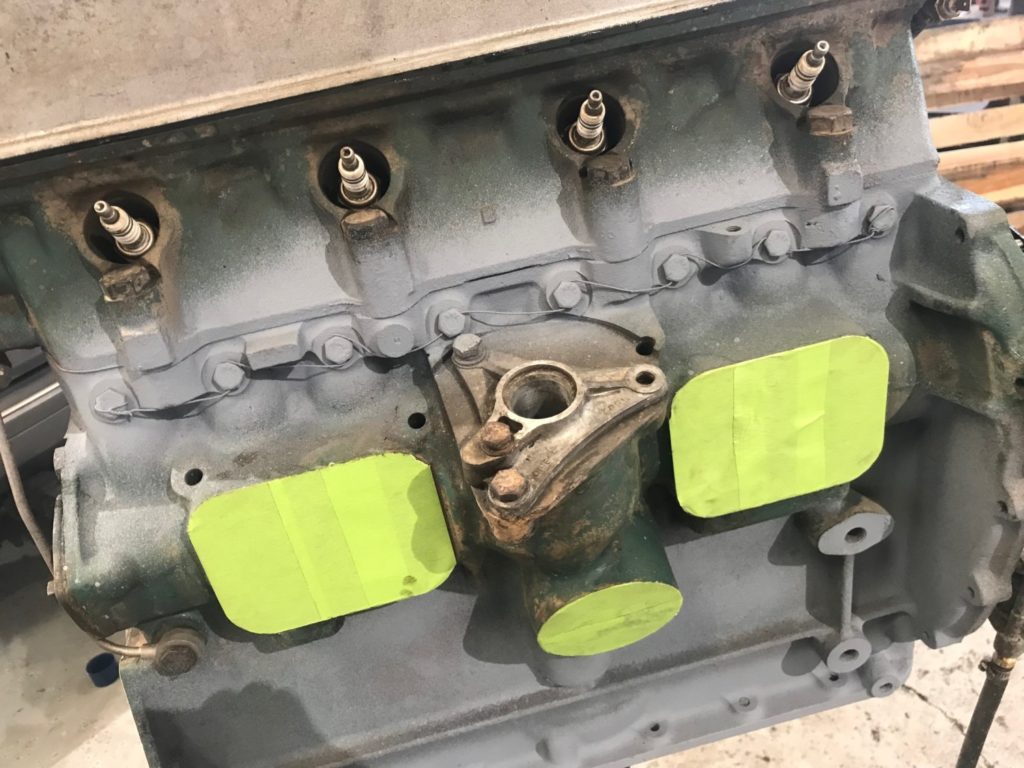
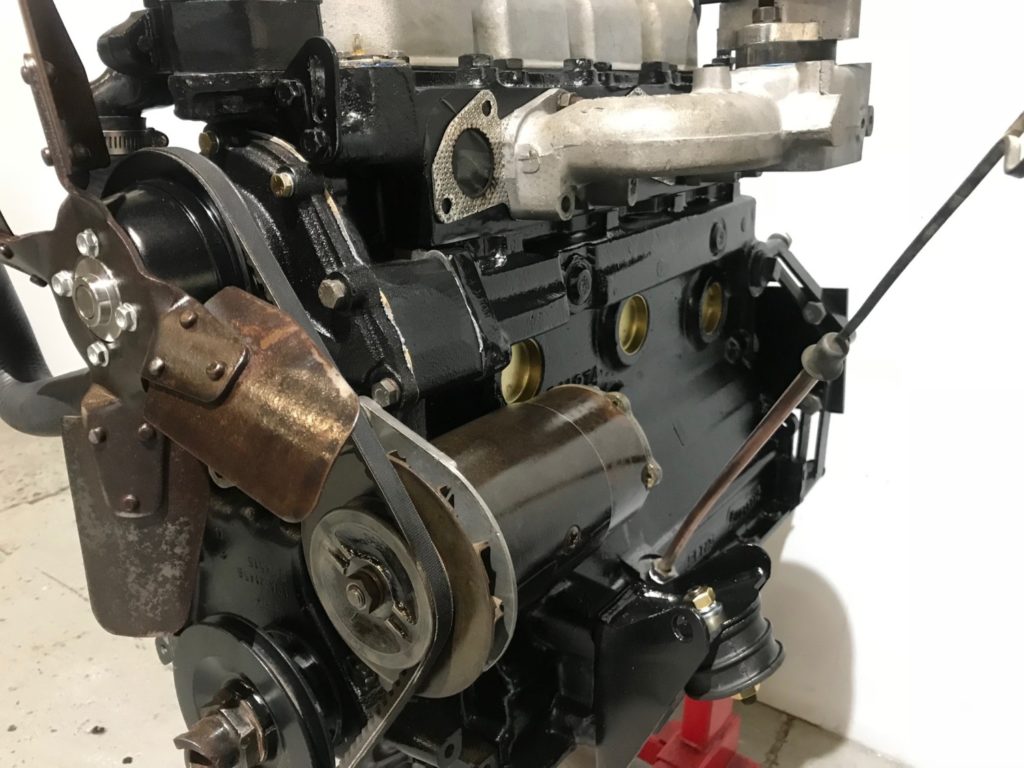
Eventually cleaned and masked off/ time for some primer..

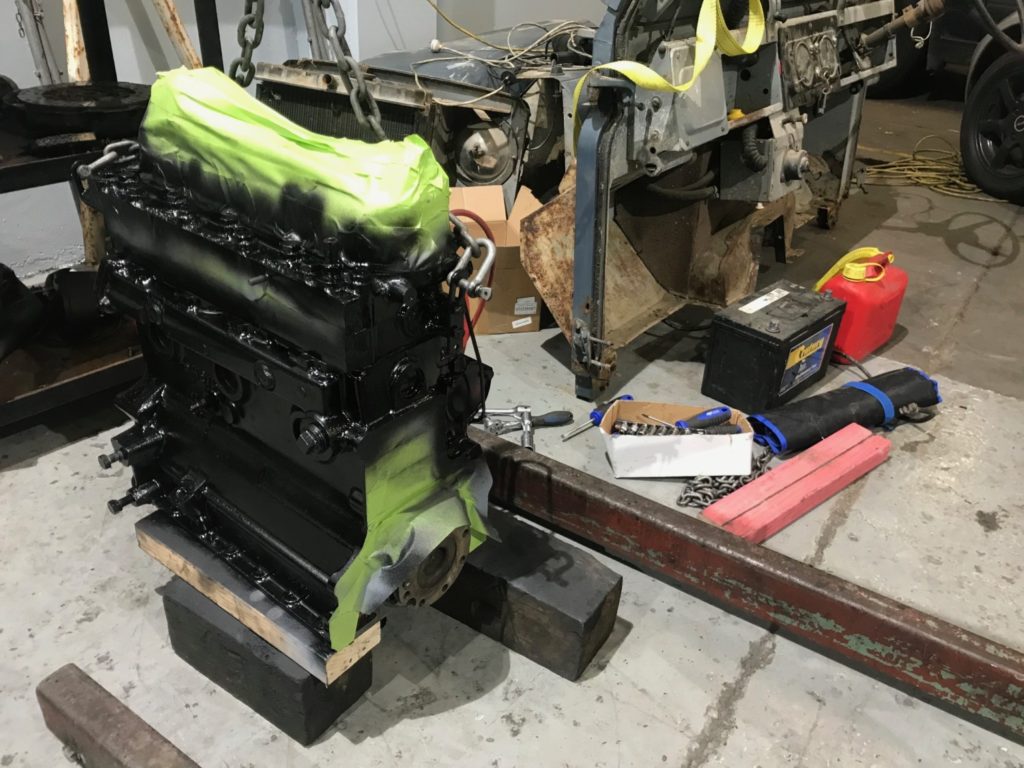
And here is where I got too… Nice black finish… Will look much better with the remaining pieces put back on to add some colour…..
Below pieces are currently getting an acid bath before going back on……
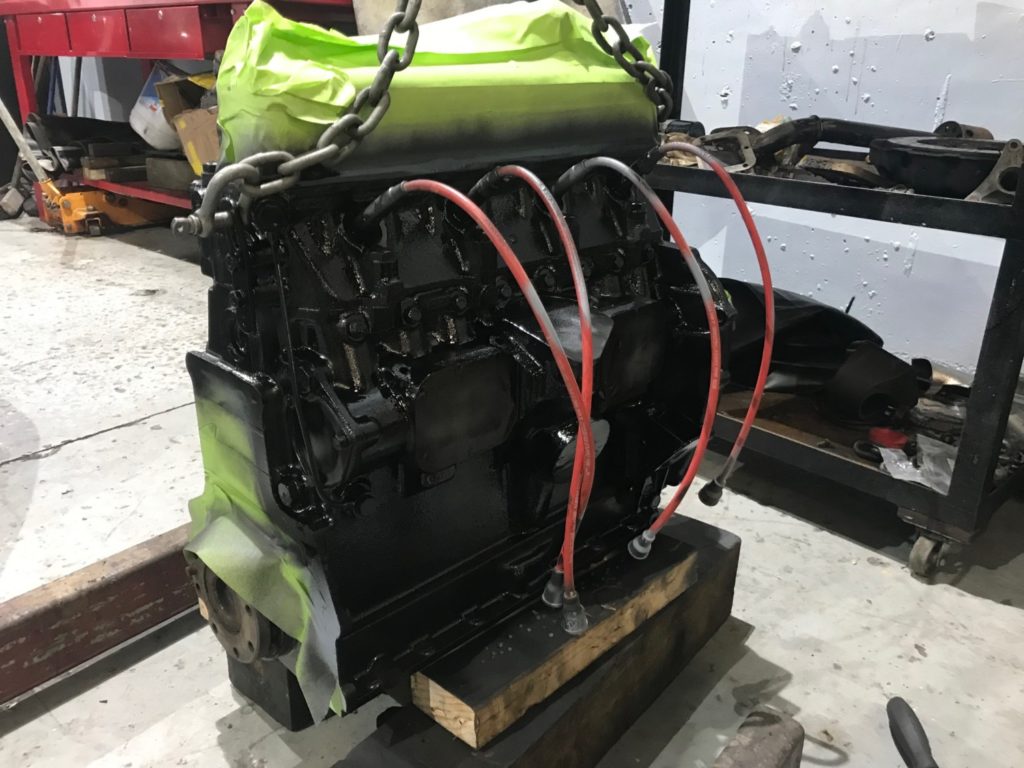
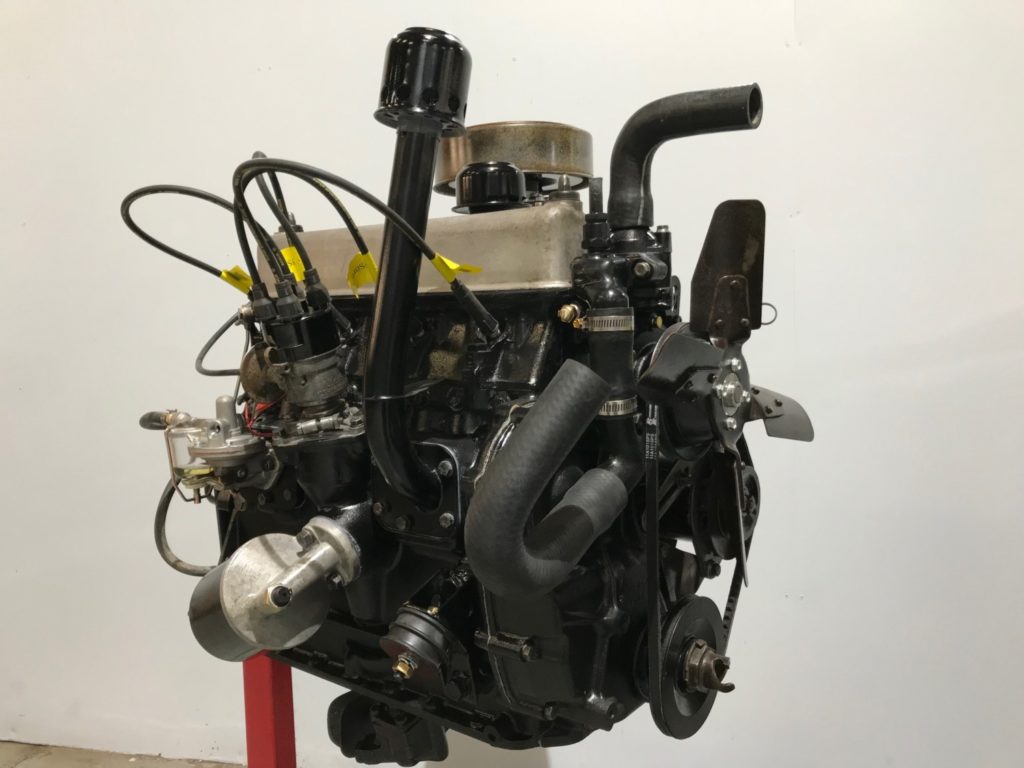
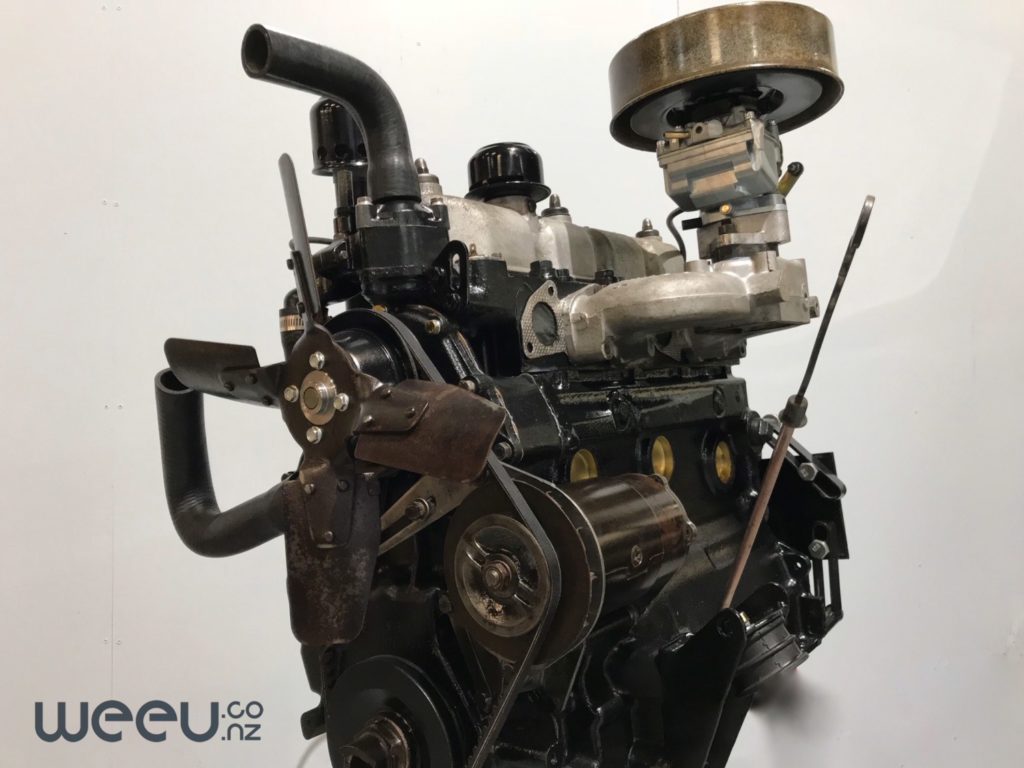
July weekend one, well I’ve spent the week doing early starts and late finishes, cleaning up all the ancillary items, nuts, bolts, generator etc etc. Today was spent putting the thermostat housing and fittings back on, painting the last of the peices and buttoning up what i could. Mostly ready to set aside and start on the next order of business, the chassis work. Still the sump to go on and the rear engine /gearbox adapter, Flywheel and clutch etc…
Paint scheme isn’t original colors etc, and as it was coming together things were looking a bit too black on black, so we opted to clear coat some items and go for a patina look which we like… We think the finish product will look great back in the chassis……
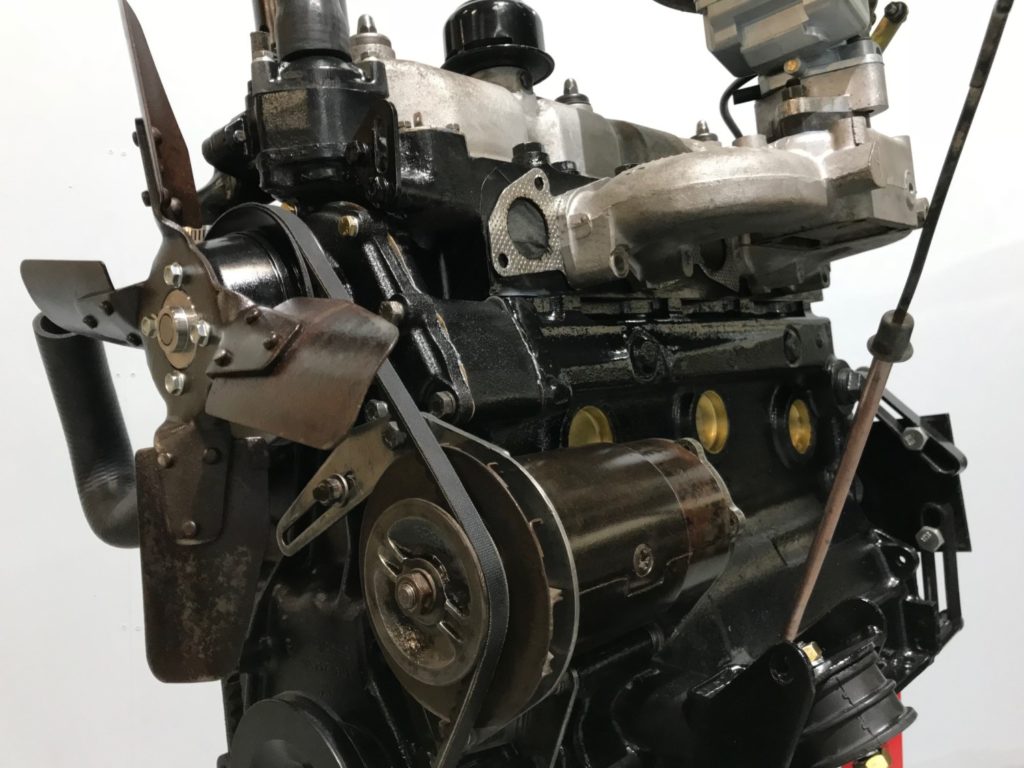
Air cleaner, generator, fan and a few brackets etc have been cleaned up and clear coated….
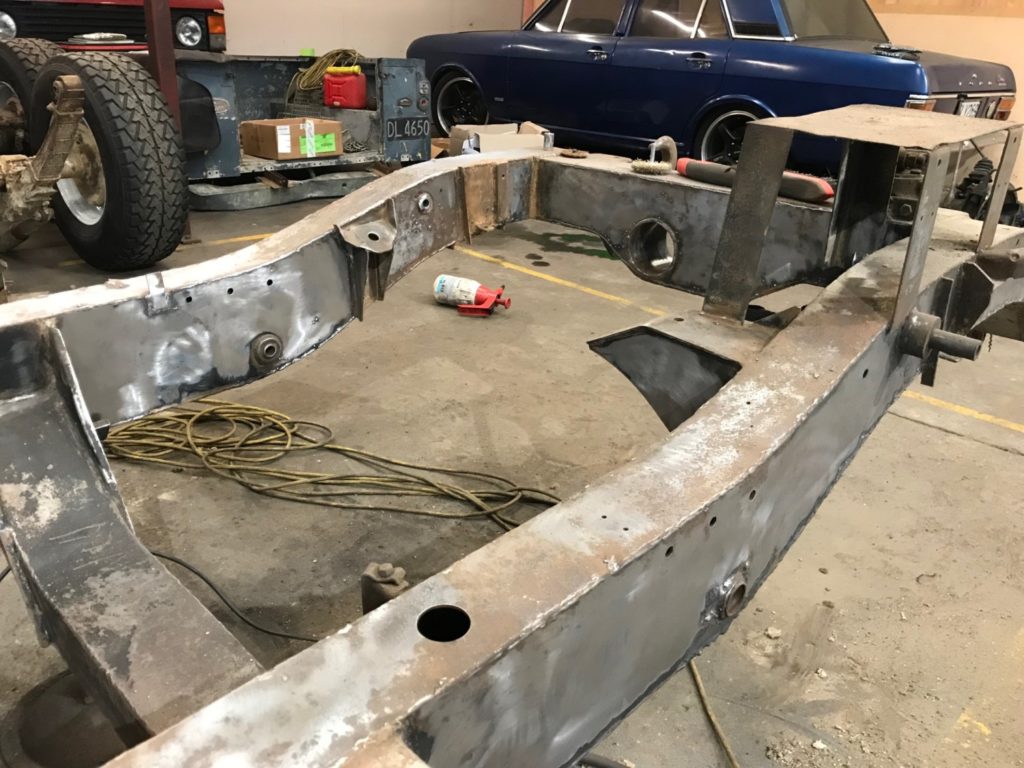
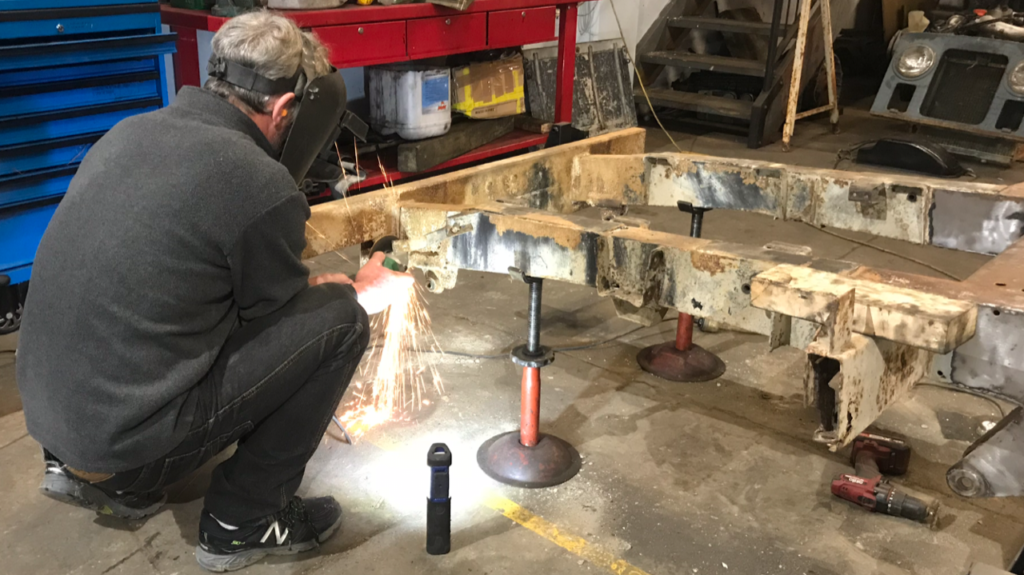
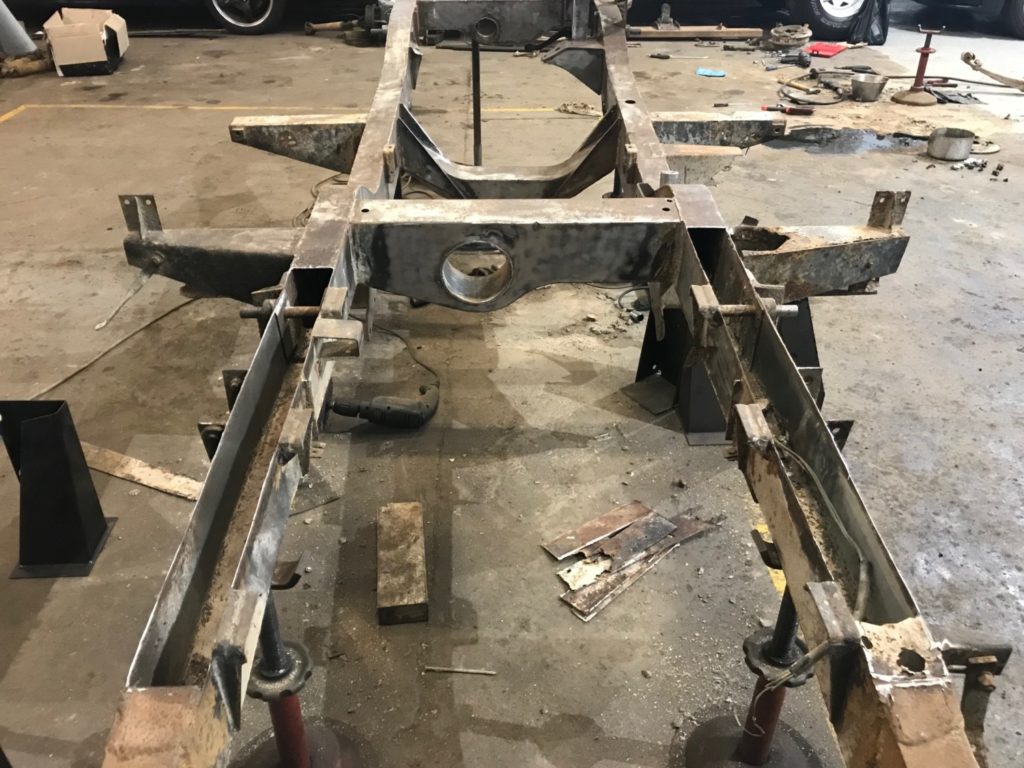
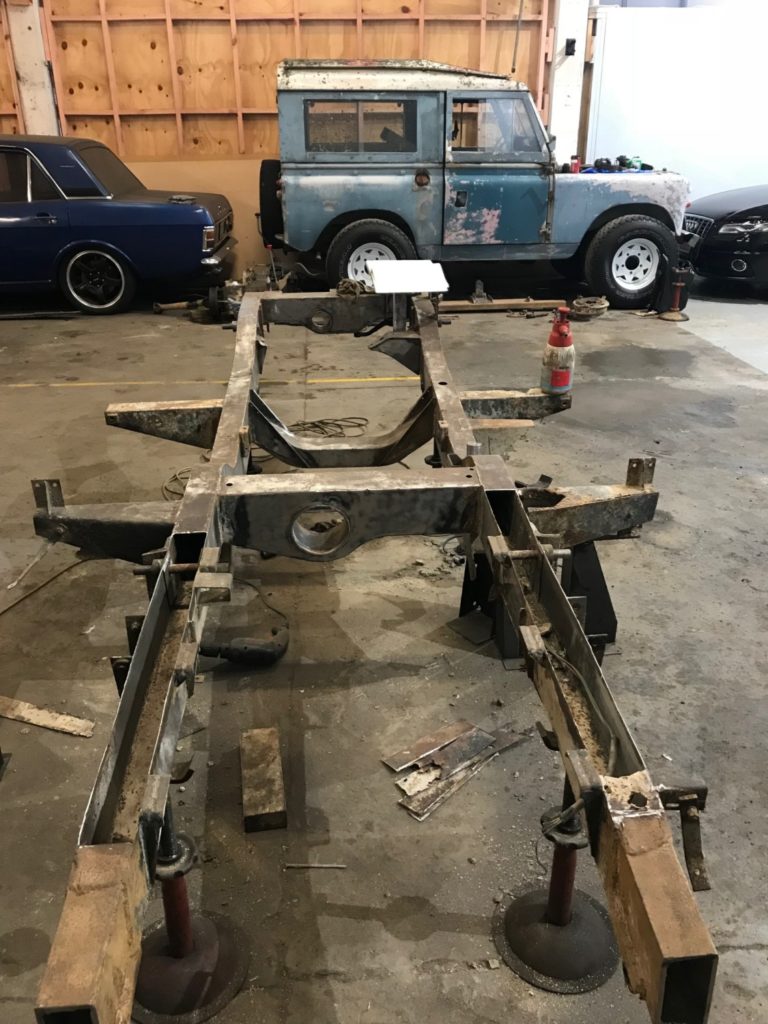
Late July 2018, time to prep the chassis and see just how bad it is. Thankfully no big surprises lurking in there, just a long day of grinding, bugging, wire wheeling……))
Below another 2a 88 we pulled from a paddock, could this be another product, or a doner car… What this space, we still dont know..
August 2018, week 1
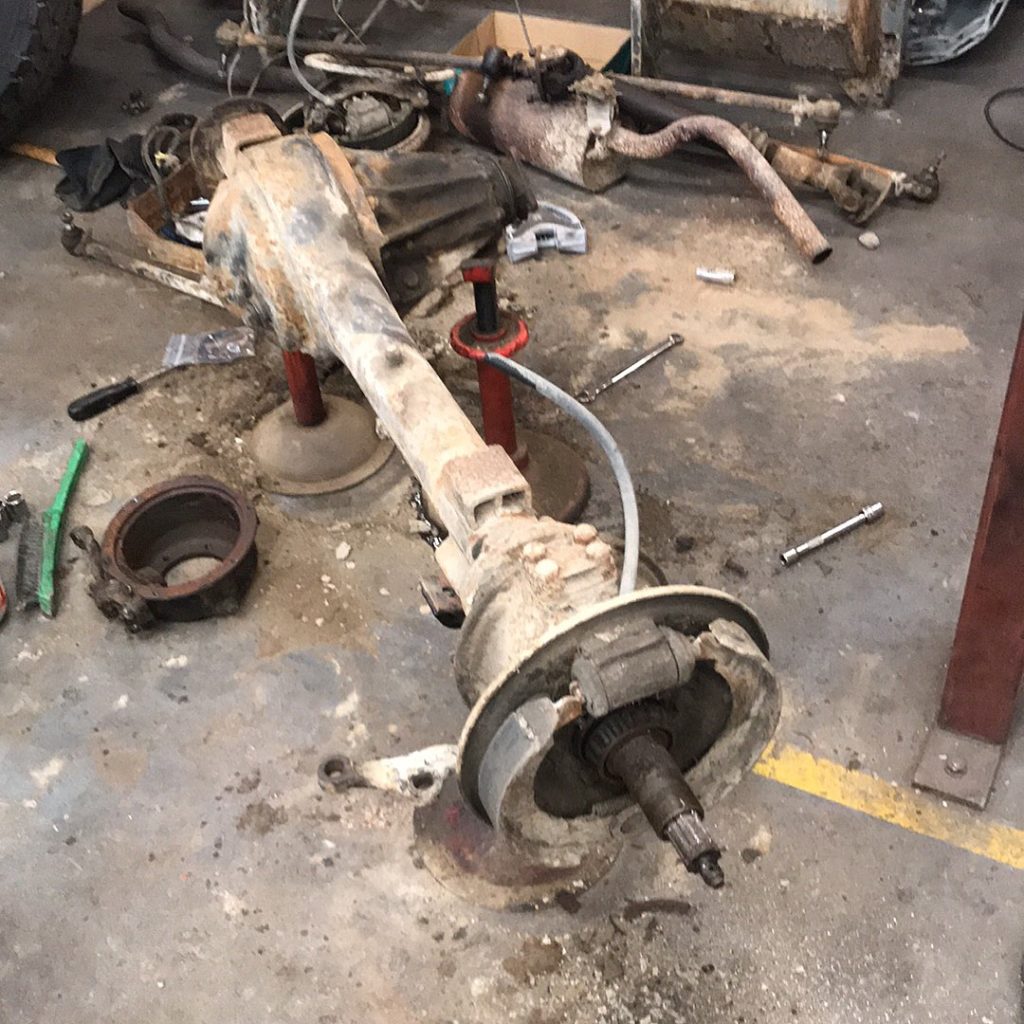
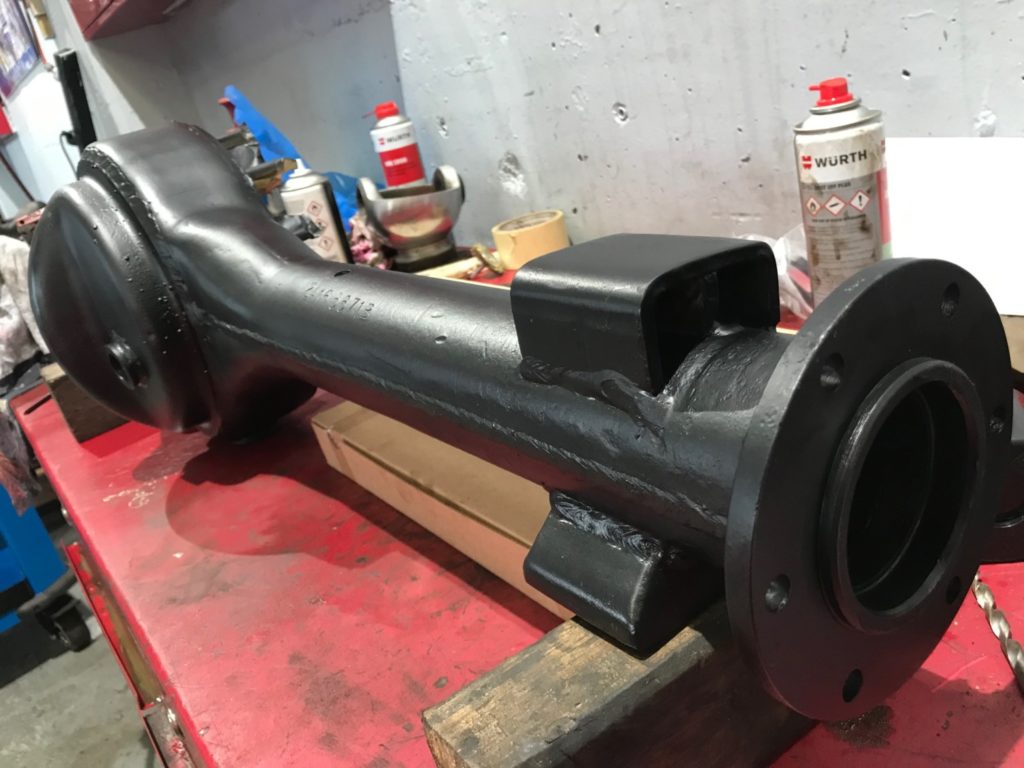
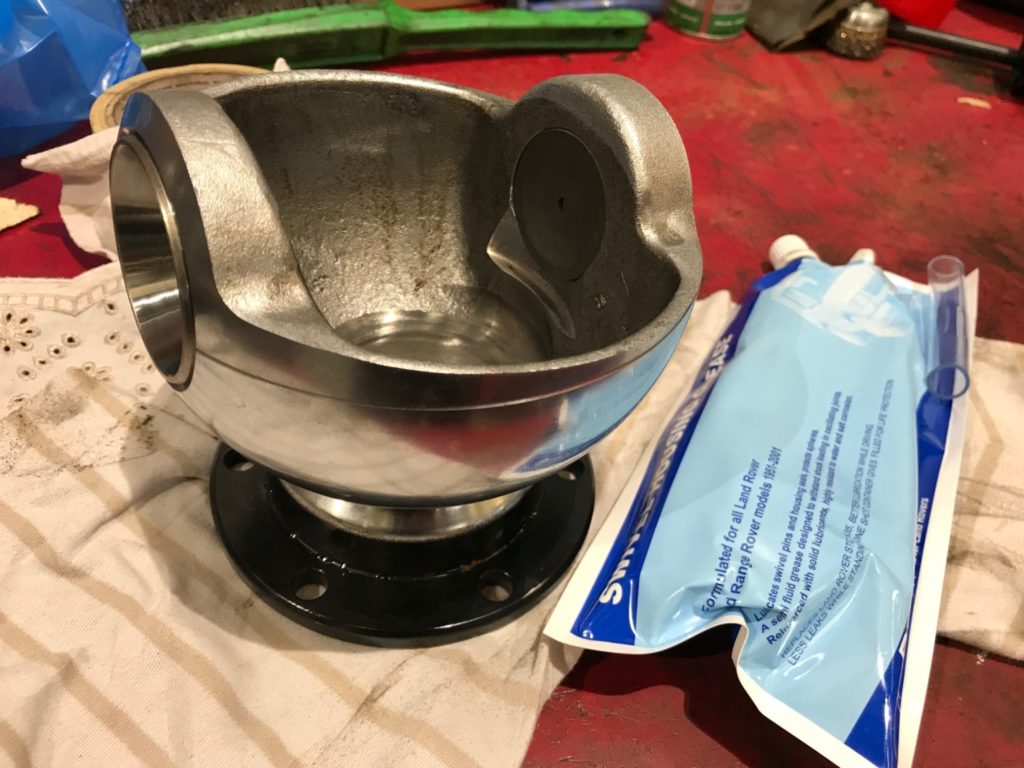
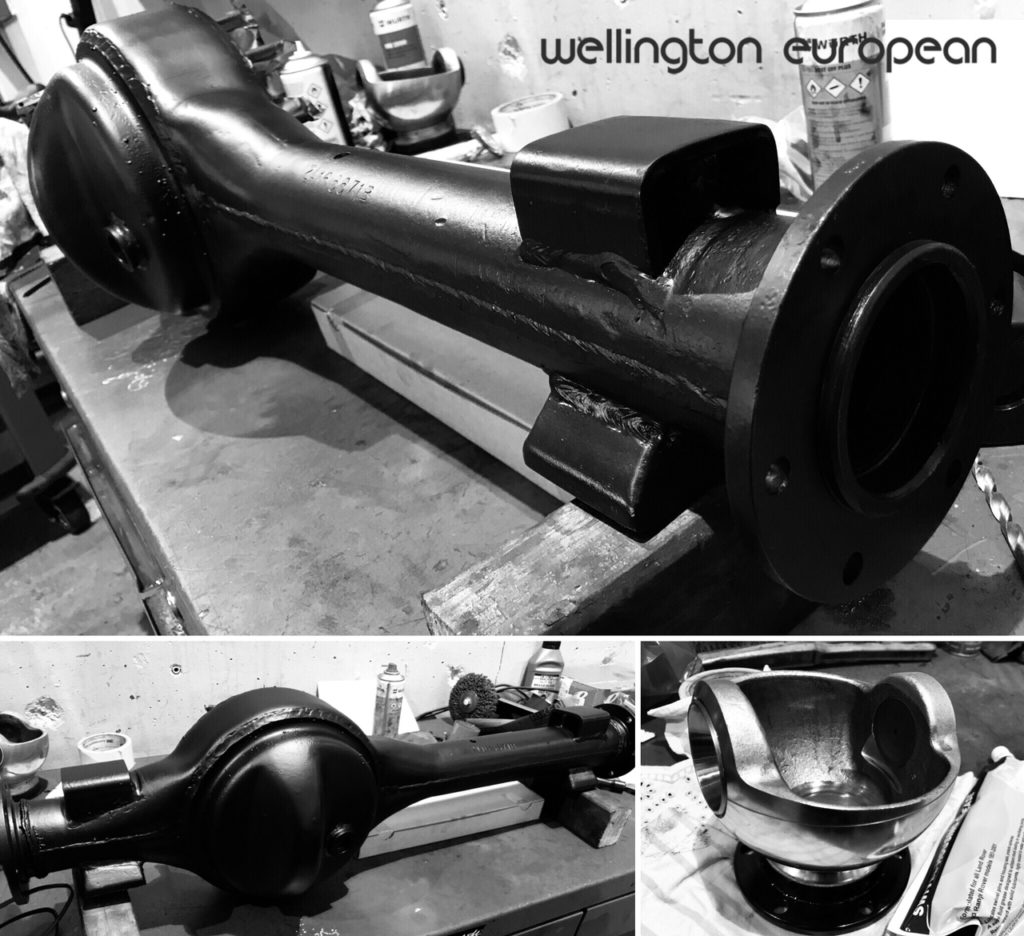
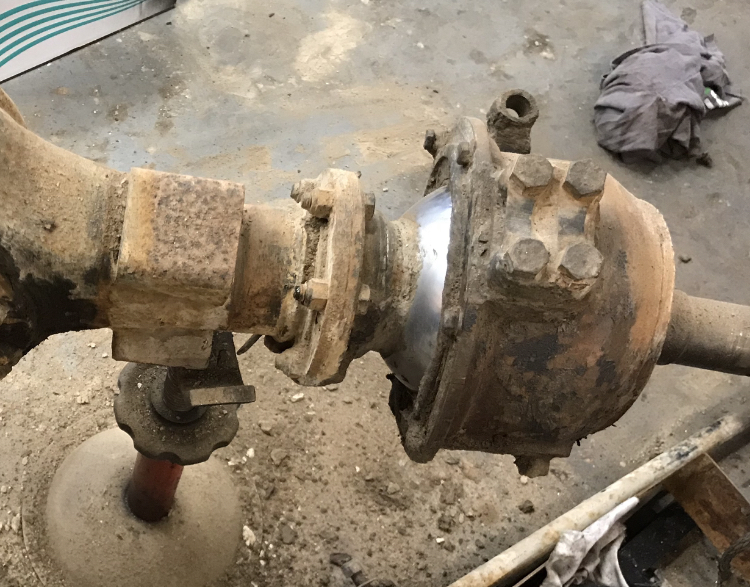
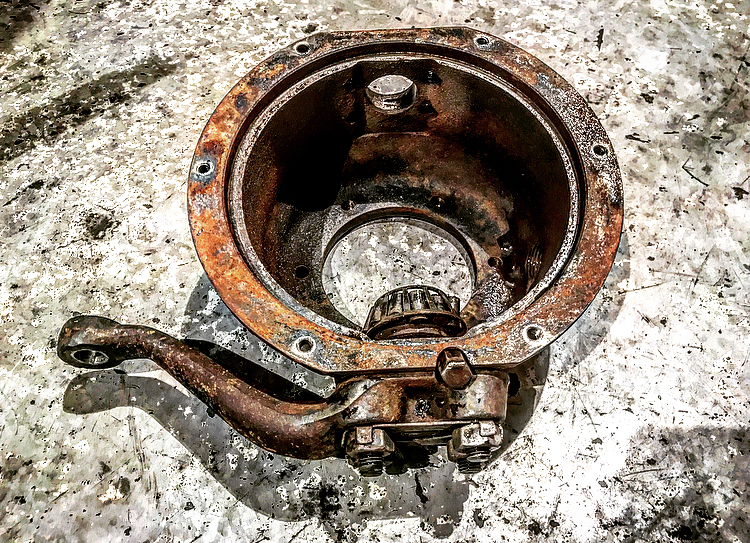
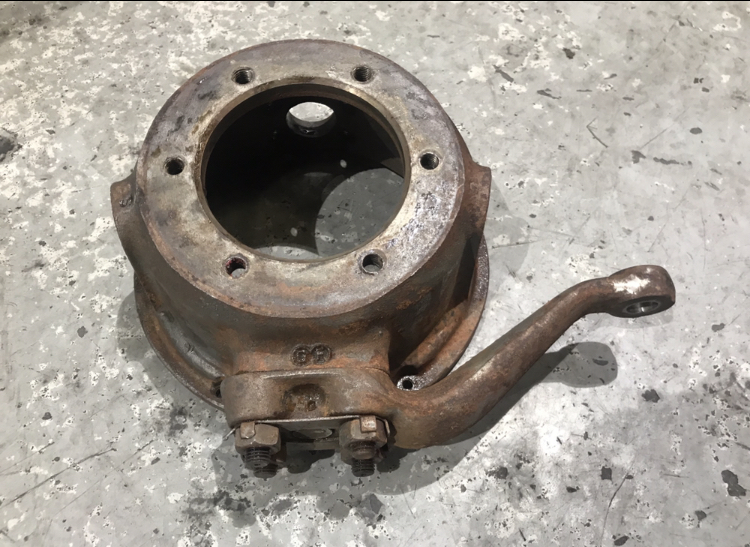
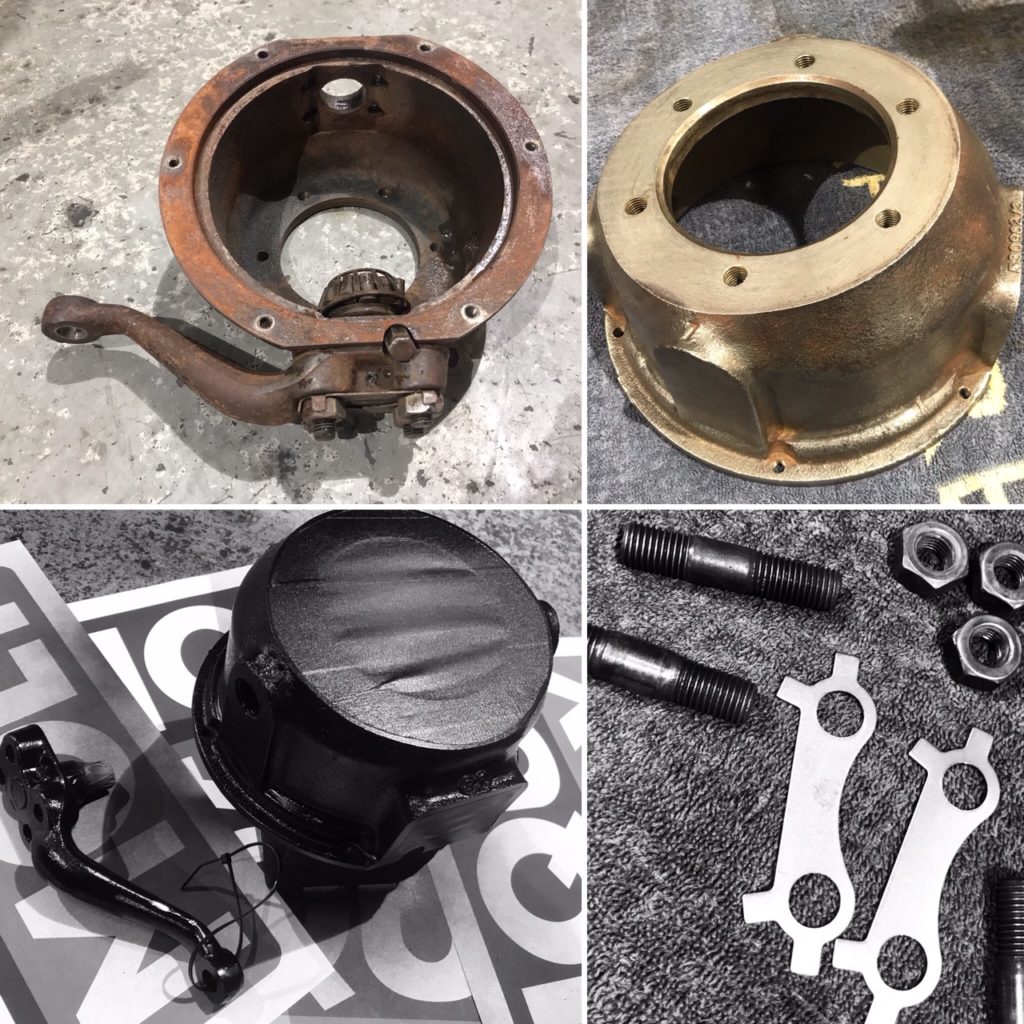
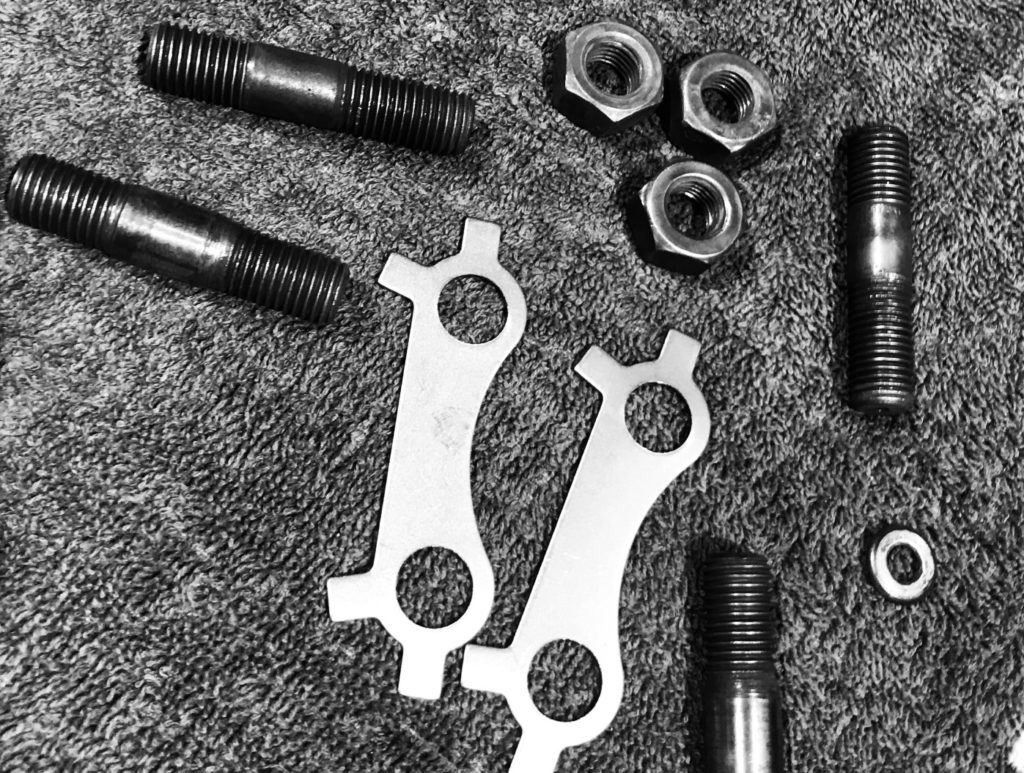
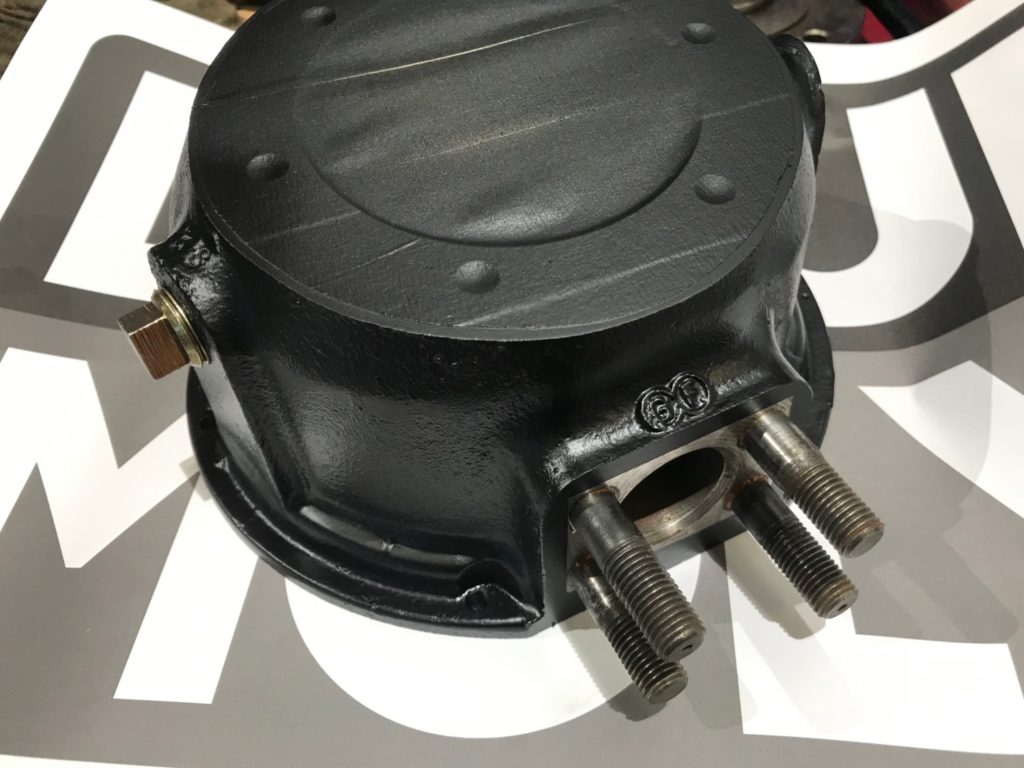
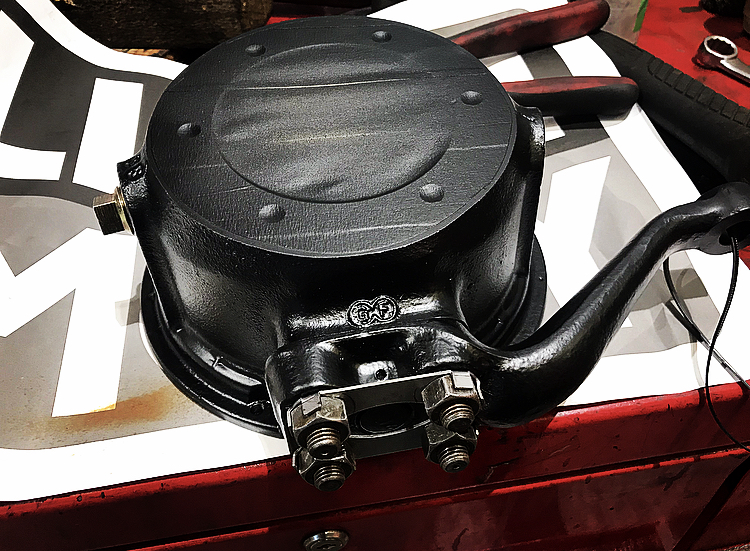
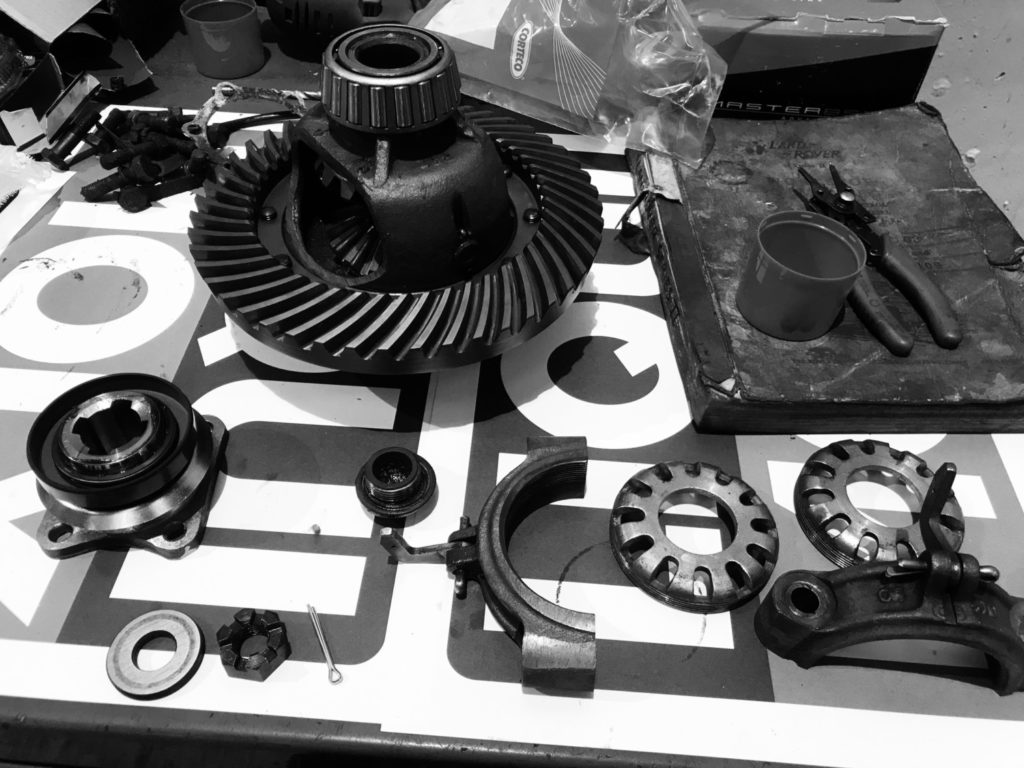
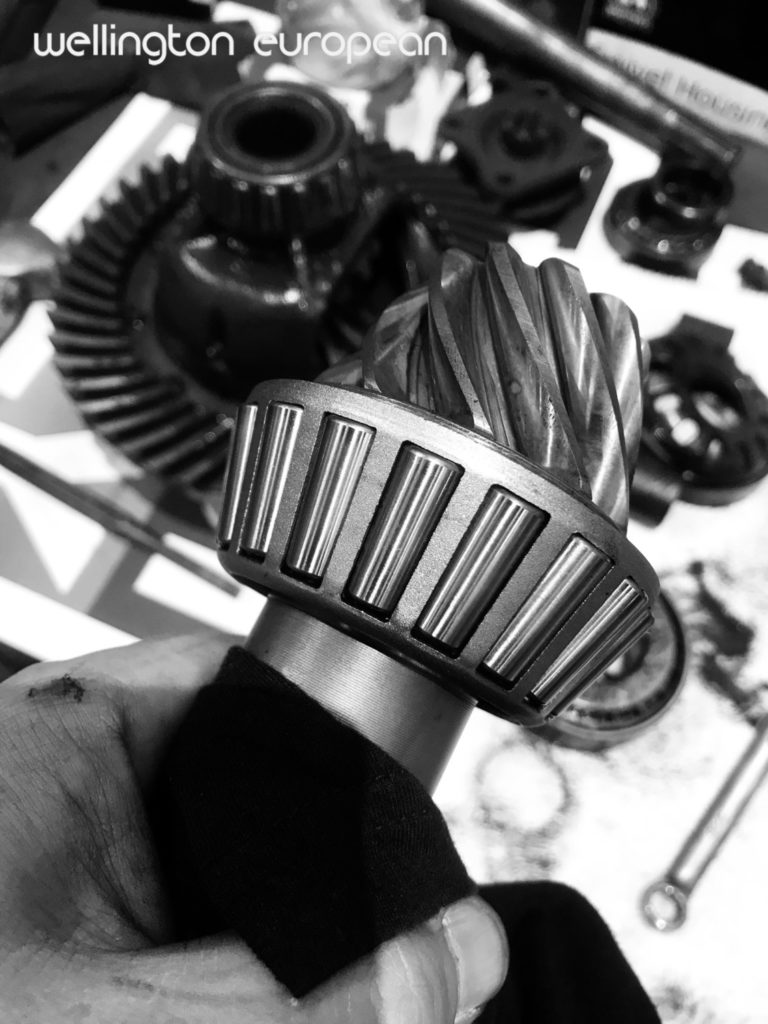
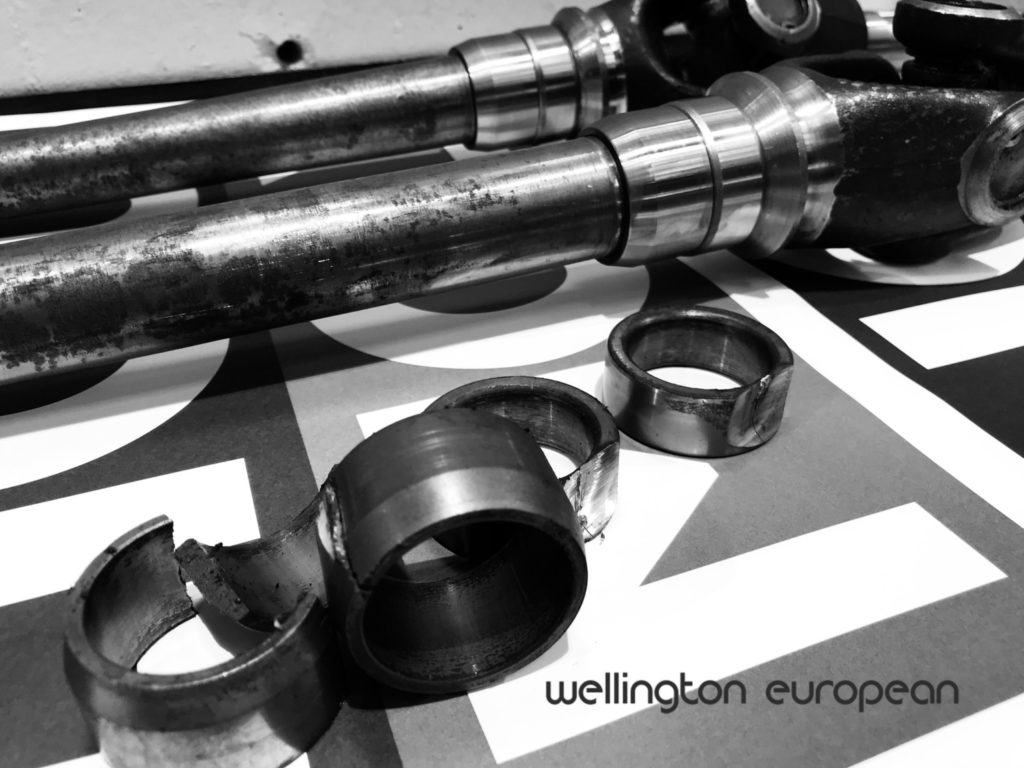
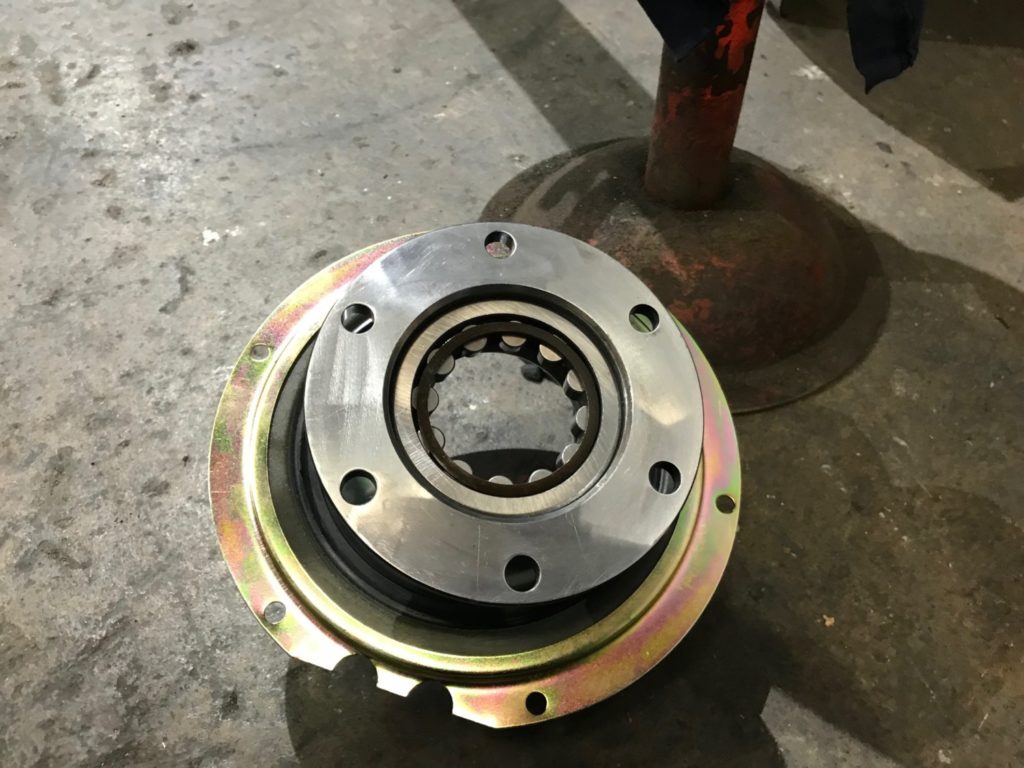
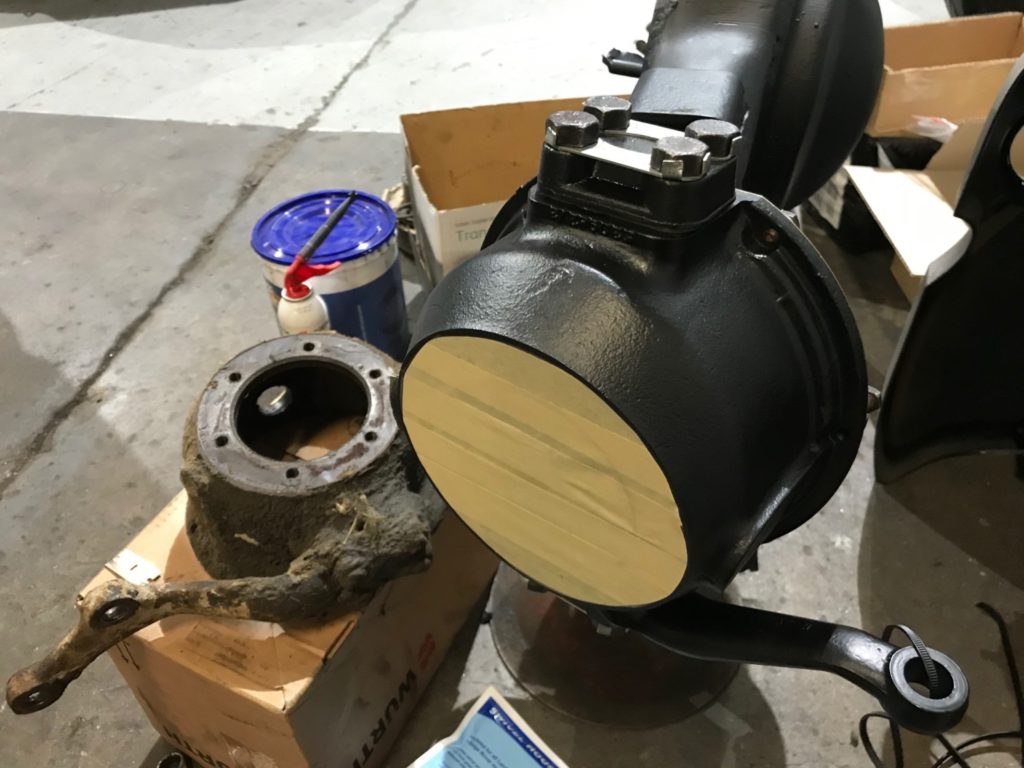
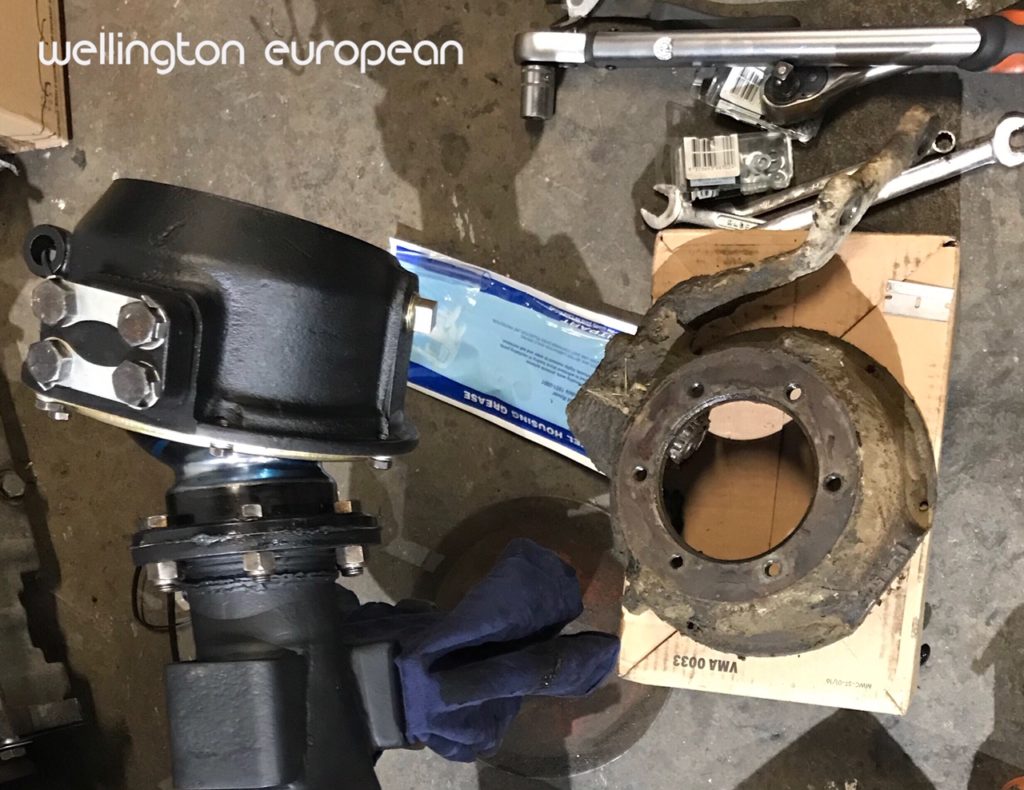
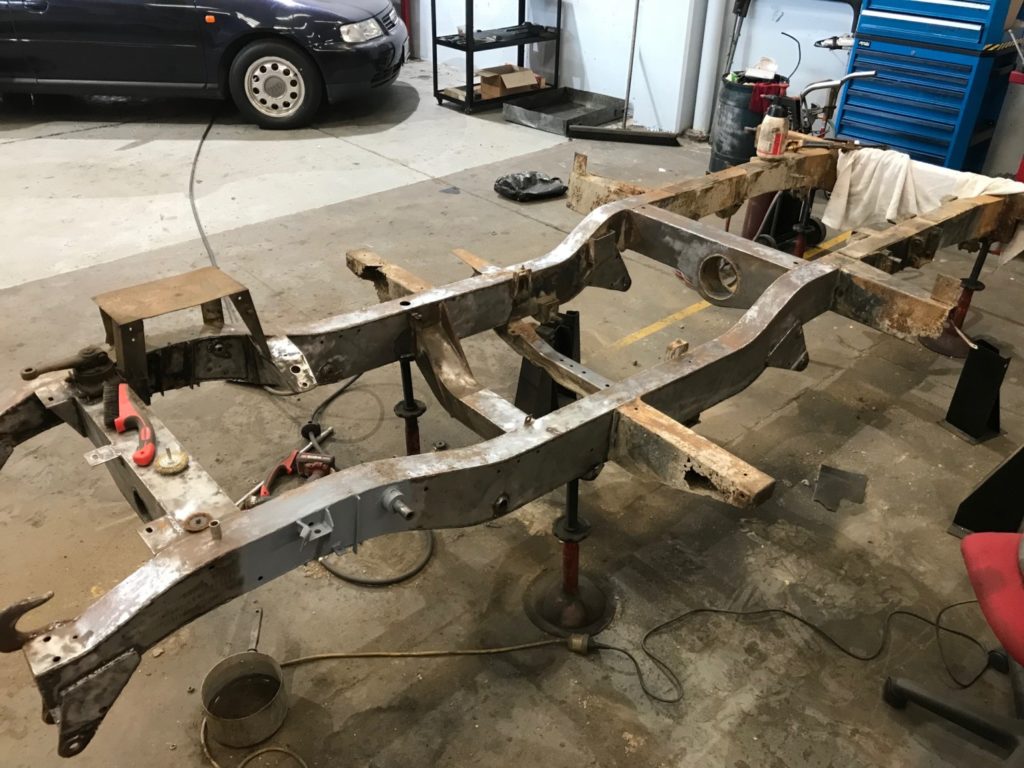
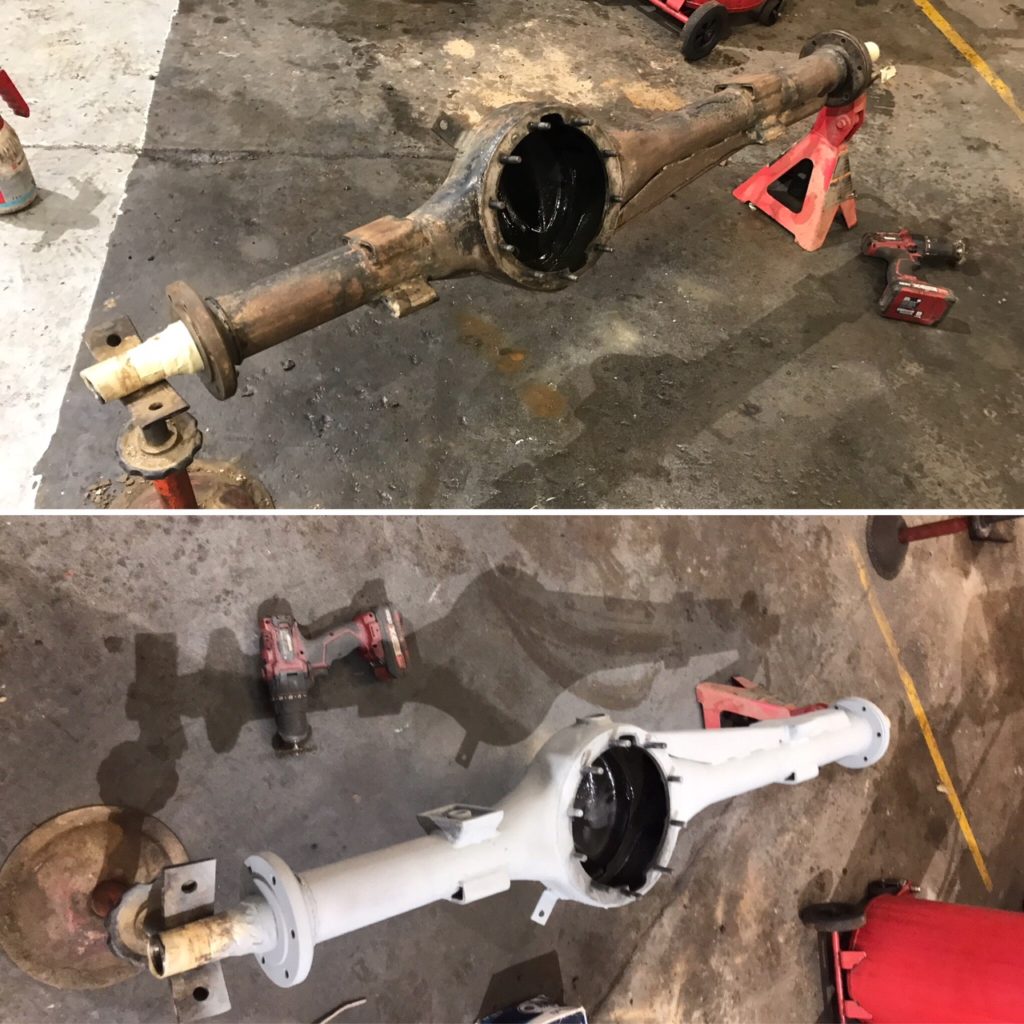
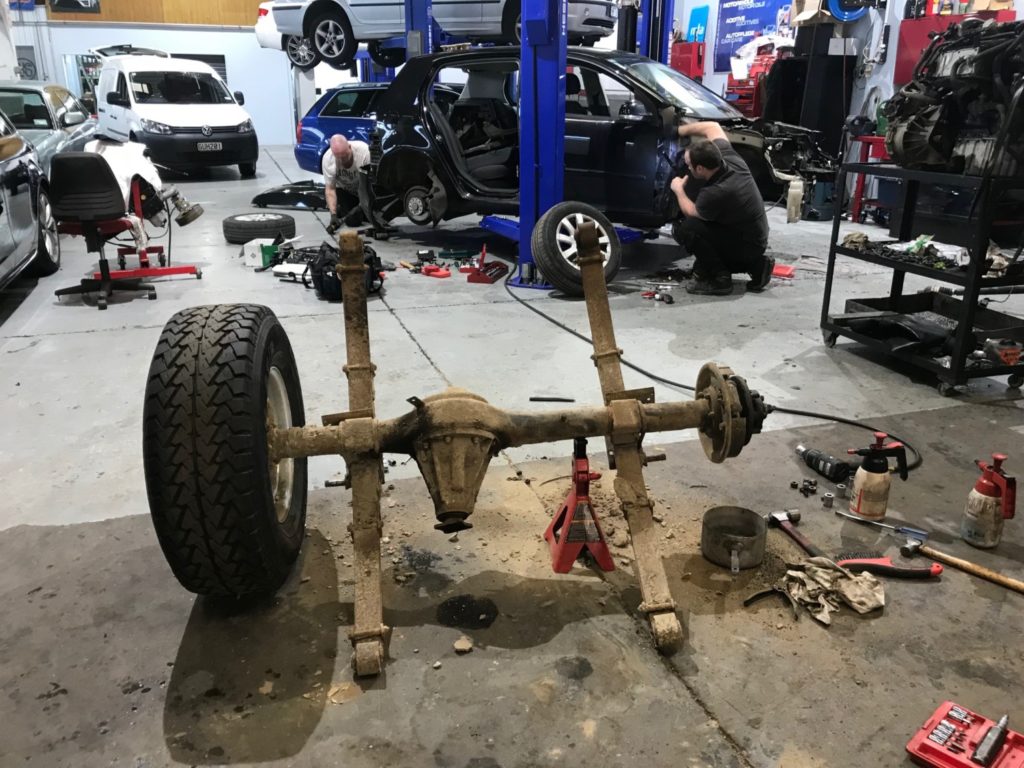
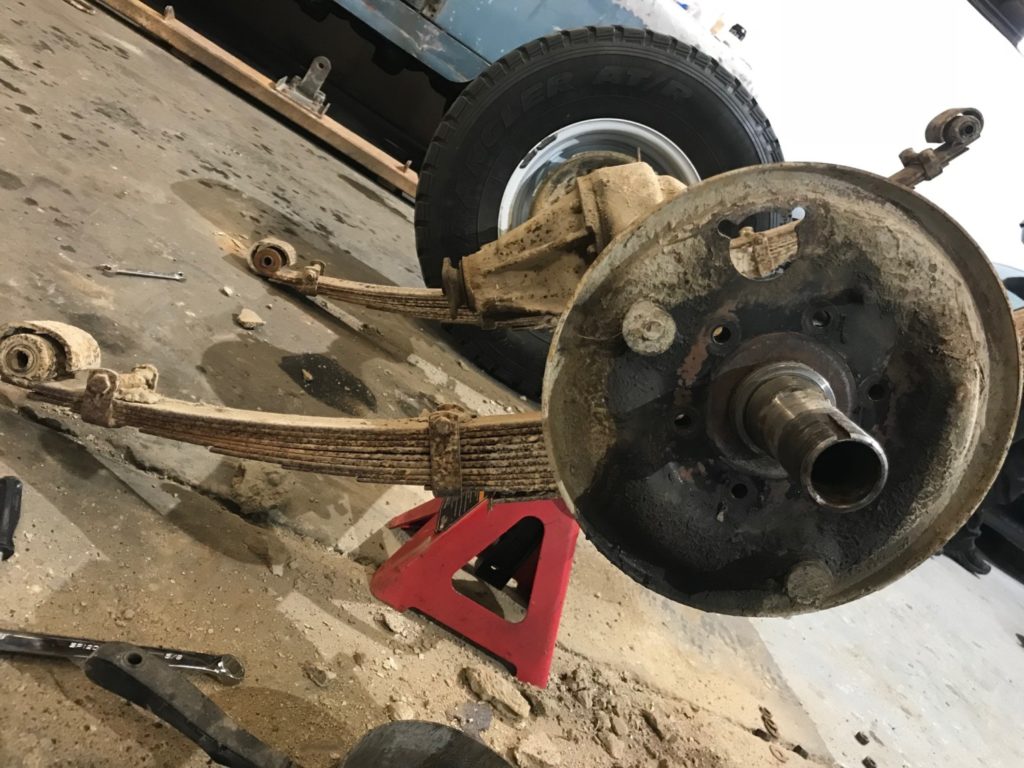
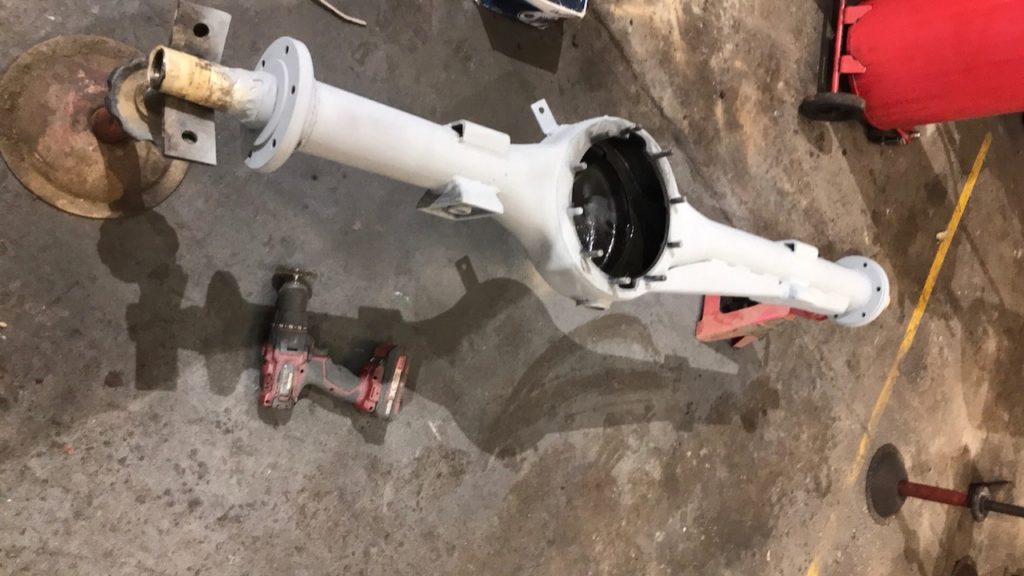
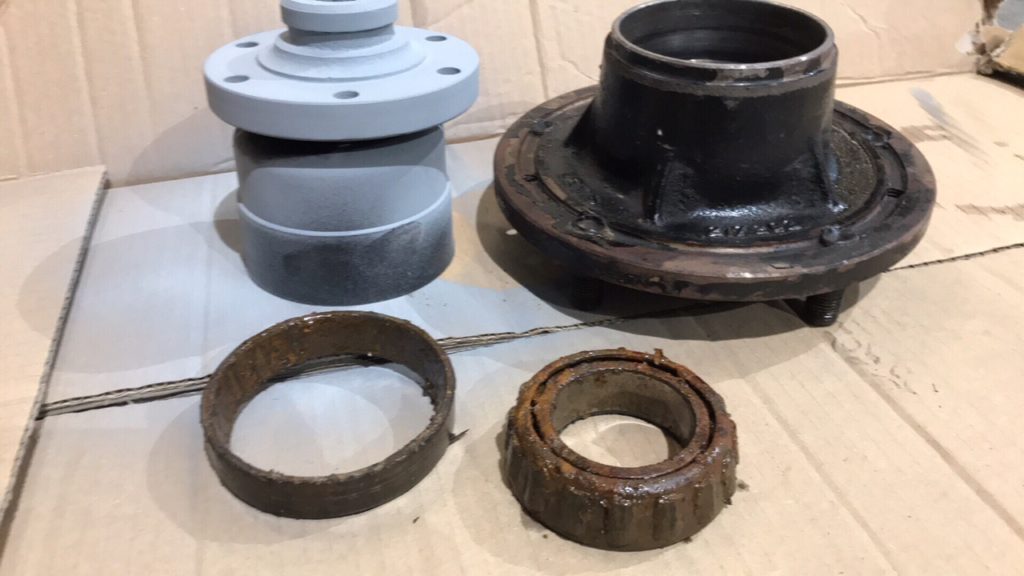
Big mission today, some expert help in to measure and cut the chassis, while that was happening I stripped the rear axle assembly. When water came out of the wheel bearings I feared the worst for the diff, however to my surprise its in great condition, water was contained to the bearings. (I know not the case for the front diff, thats a job for another day…) However the wheel bearings are shot which I had anticipated and have all the replacement parts ready to go. I also have new leaf springs on a courier and all new ‘U’ bolts, so that all just got cut away. So a decent clean up and some primer happened. Still a way to go, but hopefully next weekend I will have an assembled rear end ready to go for when the chassis is done. Also we managed to install the rear seal into the motor, horrible job I had been putting off, thankfully had the boys at headmaster offer their services…
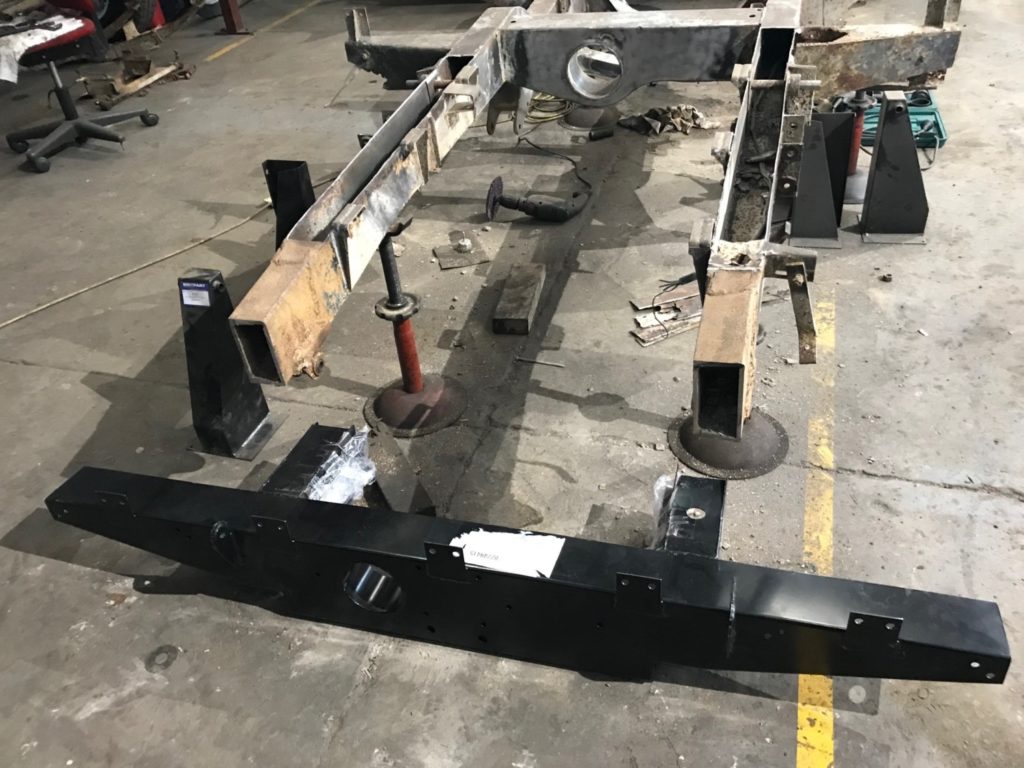
Below, rear home made cross member getting cut off, replacement ‘correct’ part on its way…….
Rear axle housing gets some primer..
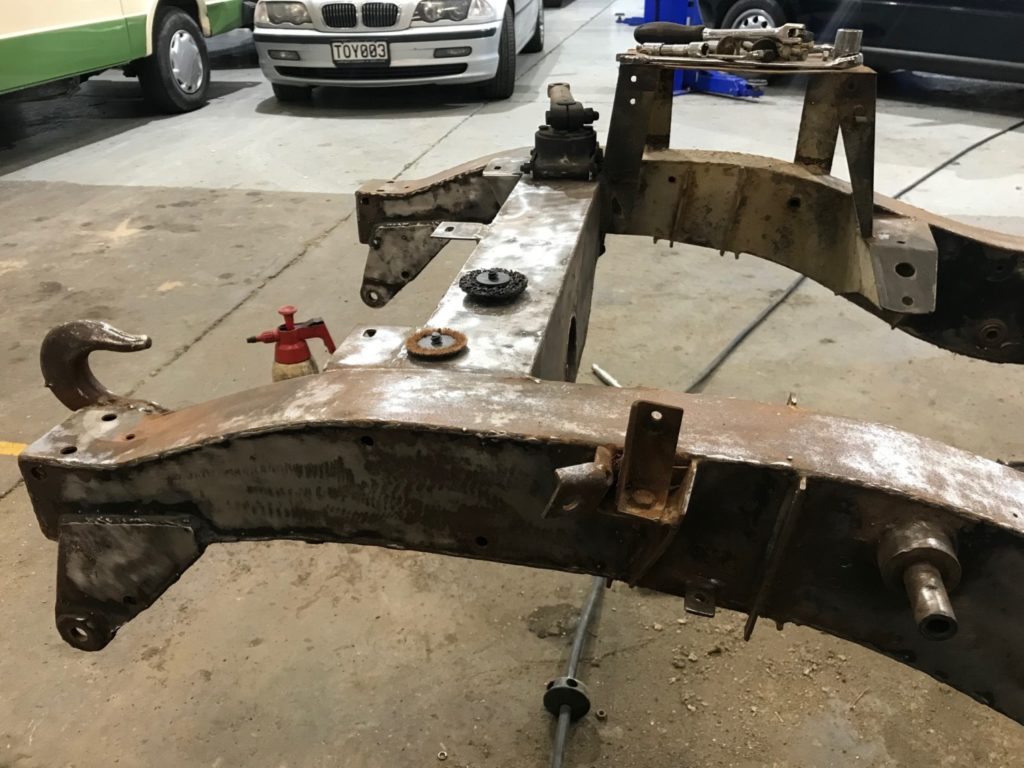
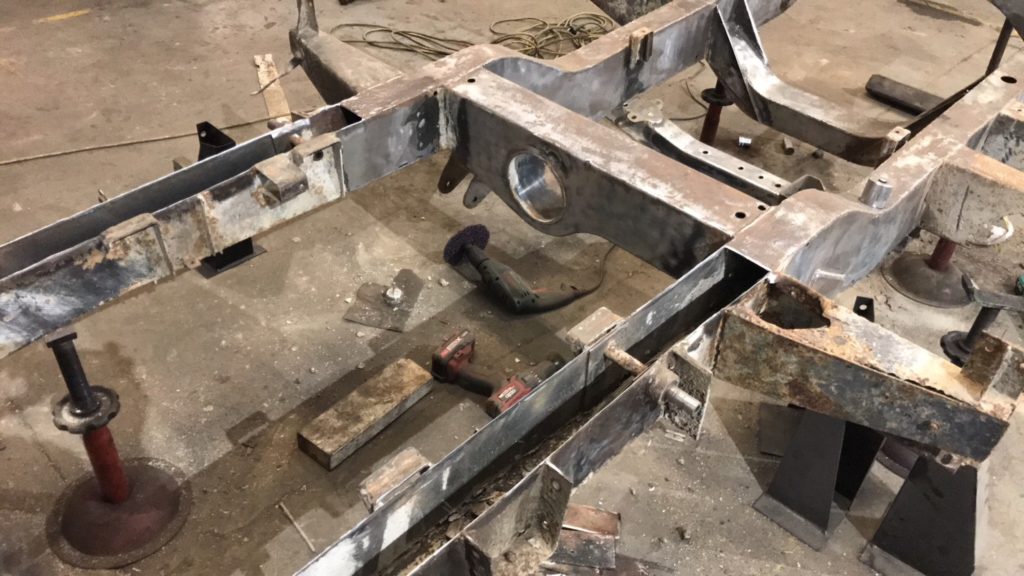
Some major back surgery, has had a few patches, all getting replaced., next weekend will have new metal in there, and hopefully all five replacement outriggers going on too.
Rear diff and suspension before i put a spanner too it, was a real mess.
FYI, a golf got torn down today too!!!
That wheel bearing will not go again!!!!
New rear main seal goes in, now I can get the sump back on, end adapter plate, flywheel, clutch etc……
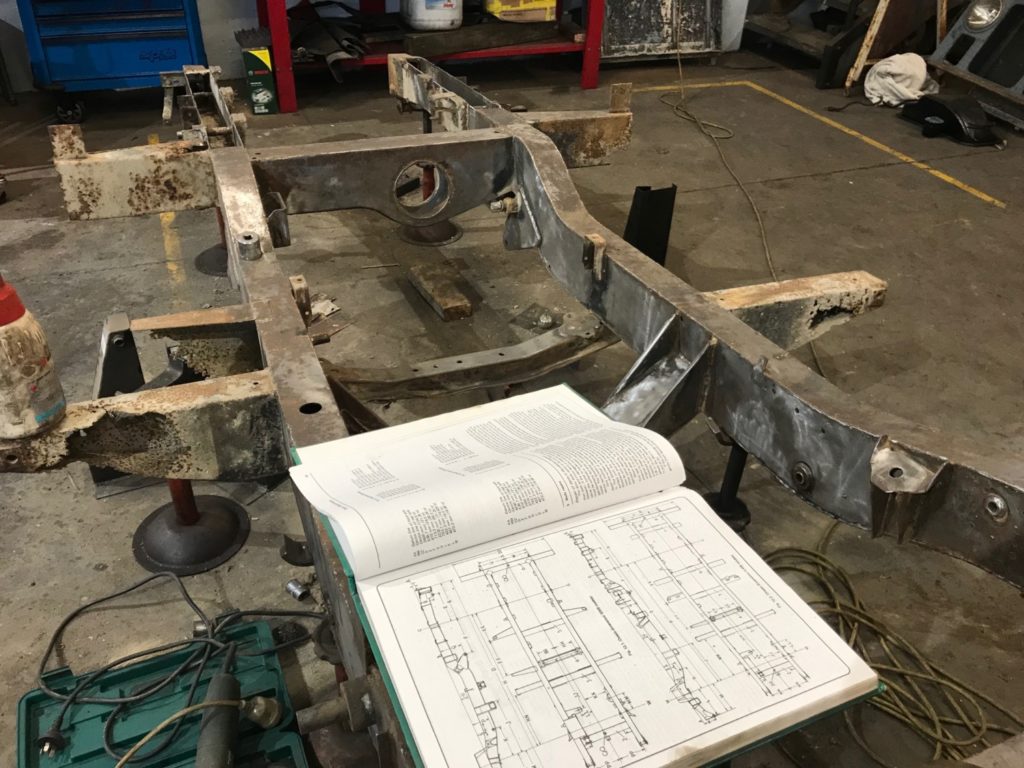
YES, reading the manual, critical to measure measure measure to get the chassis correct.
The other 2a 88 Station Wagon we grabbed last week….. Seized motor ((
New rear cross member arrived today, very exciting…
Recent Comments
What others have to say